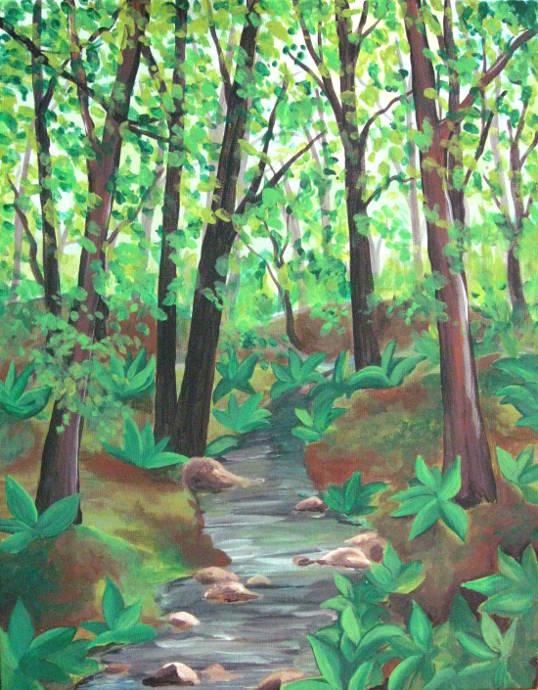
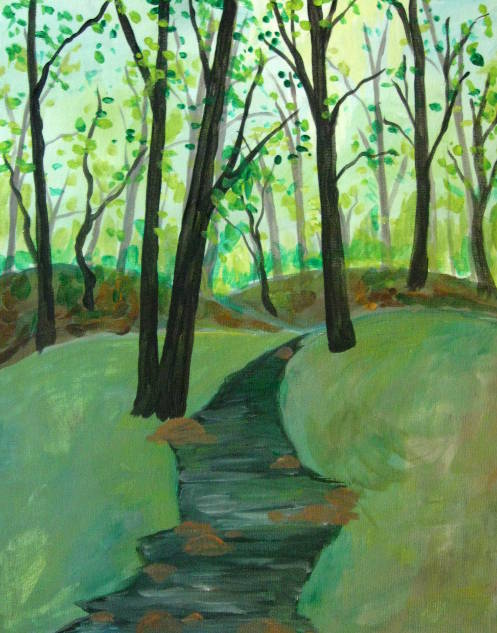
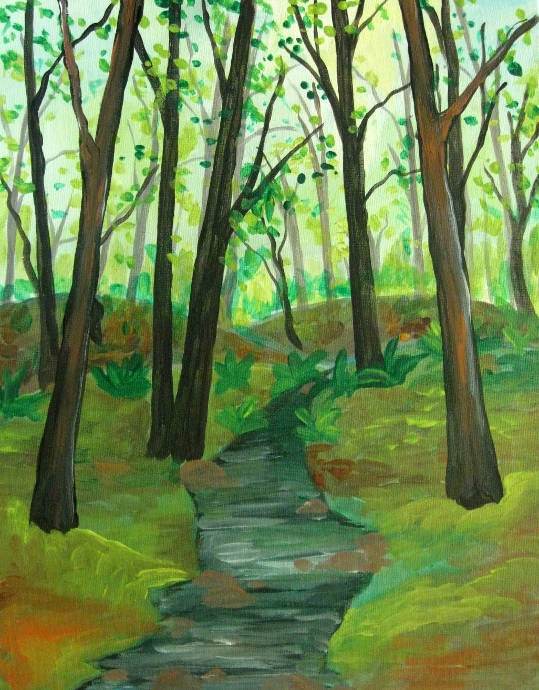
This instructions to how to paint a summer forest simple to do. The most important thing to remember is: THERE IS NO WRONG WAY TO DO IT! Don’t make it exactly as it is here, make it your art. Put your own trees, and leaves and grass, and hills. These are just general guidelines. Have fun with it and enjoy the process!
What you’ll need:
CANVAS:
What you will need is a stretched canvas or a canvas board. I used a 11×14 Canvas Board. They are cheaper than a stretched canvas, and are great for practicing painting and just having fun.
PAINT:
For this painting I used “My Studio” Acrylic Paint. This paint is inexpensive, but can run a bit thin. It is perfect for learning. If it is too thin, do one layer, let it dry and do another. In the case of this particular painting, everything happens in layers, so eventually the paint builds up nicely. The colors in my palette were White, Back, Brown, Mint Green, Grass Green, Blue, Dark Yellow, Beige. Truly, the colors are up to you. Just think about what color scheme you would see in the forest. A few shades of green from light to dark, browns, a blue and a grey, whites, yellows. You could also switch from greens to yellows, oranges, and reds and change this from forest in the summer time to a fall forest.
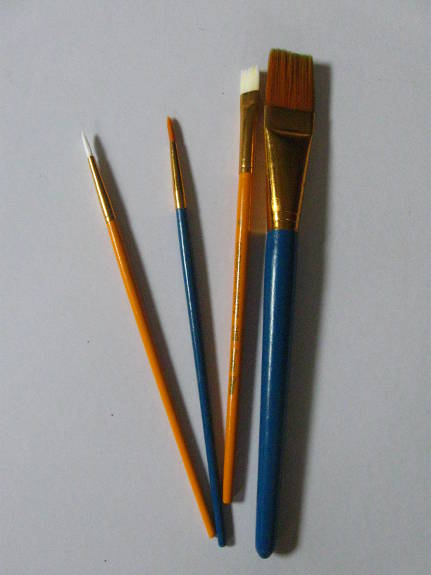
BRUSHES:
I bought a big cheap pack of brushes. Not the colorful plastic kind you would use for glue, but the next step up. I used three basic sizes: a large flat brush, which was about an inch in width; a medium flat brush, which was about 1/3 inch; and a small rounded brush with a point, for details.
How To Paint A Forest In The Summertime:
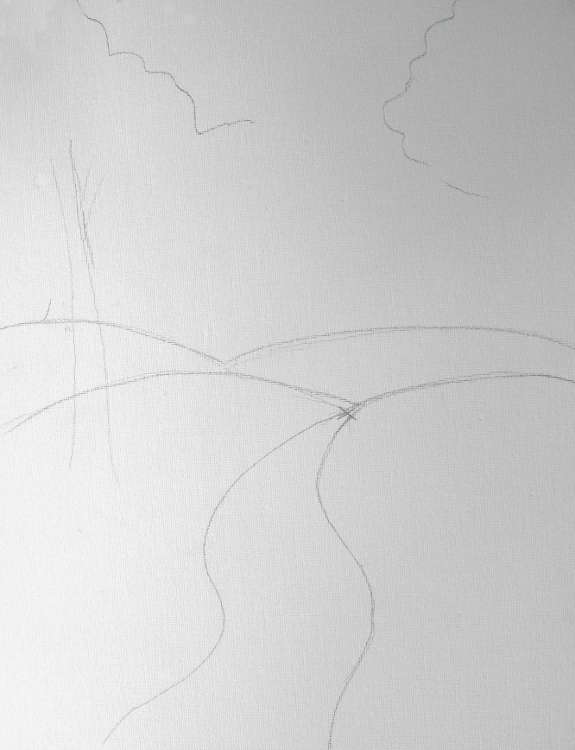
First make a rough sketch of where the hills and the river will be in your forest. Don’t worry about what it looks like right about now, you will most definately paint over it. I just put a few quick bumps with my pencil in the middle of the page for the hills and two squiggly lines that converge to a dot between the hills for the river. Really simple. Do not overthink it.
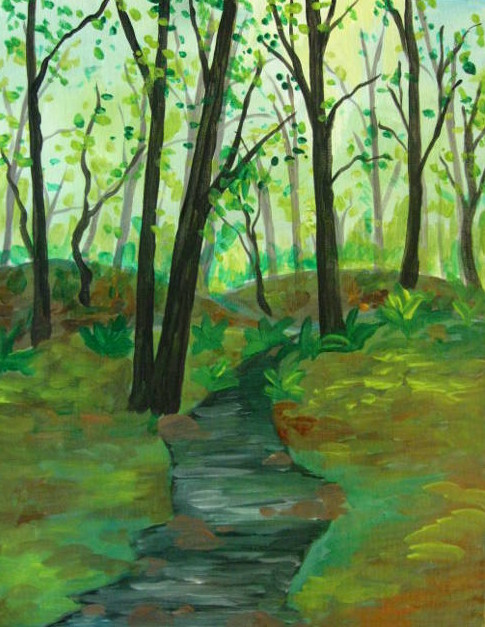
Time to paint in the background. Remember, it doesn’t have to be perfect. Use light colors for the sky: lots of white, a bit of blue, some lime green. The hills that are farther away are grey/blue, the ones that are closer are more green/yellow, and some black/grey for the river, with a few triangular inlets. Big brush, wide strokes, no details.

Now to add some trees on the far away hills. Using a thinner brush draw a few trees on the hills that are growing further away. They really are just sticks that are pointing slightly inward and taper off toward the top. You could also added a bit of shadow the trees are casting on the ground. Use light brown, or just mix brown and white and black. The further away the trees are the lighter, more muted, their colors become.
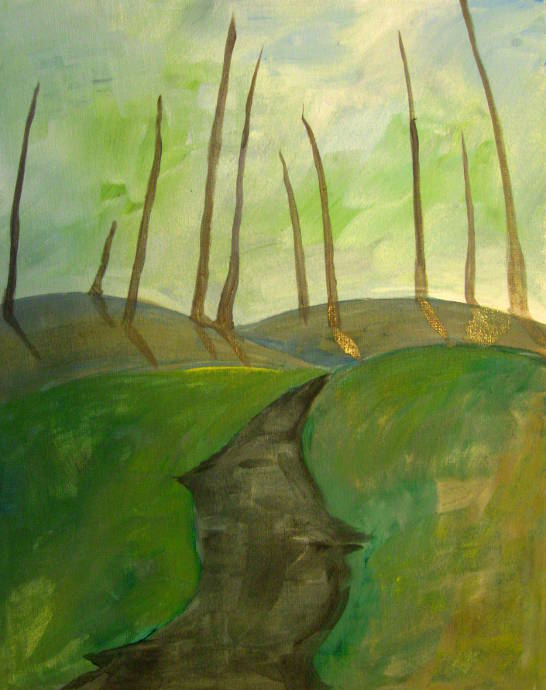
With a thin brush add some branches to the trees and maybe a few smaller trees that are even further away, behind the horizon. A few squiggly lines is all it takes. Same goes for the branches as for the trees, the further away they are the more muted the colors become.
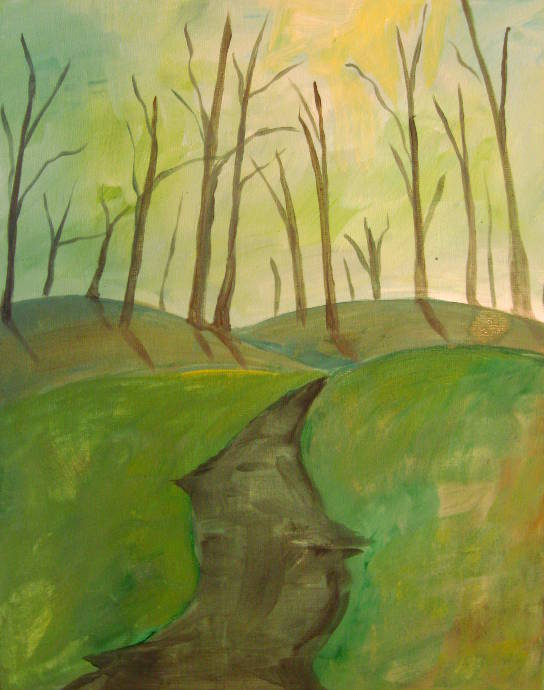
With a thin brush, using a few light greens add leaves in the back. A few spots here and there. Make sure not to do too much. I also chose to add some texture to the hills in the distance. Using some browns, light green and dark green and wide sloppy brush strokes.
Using black paint put a few trees in the foreground, on the hills that are closer. You’ll add more trees even closer later, so put these in the middle of the front hills. Don’t forget that the closer something is to you the bigger it seems. So the trees closest should be even bigger. For now these trees are just long dark sticks pointing up. They run off the page.
Now, using a thin brush and black paint add a few branches running off the bigger trees. Again, not too many, just a few off each tree. You could also add some squiggly small trees in the back.
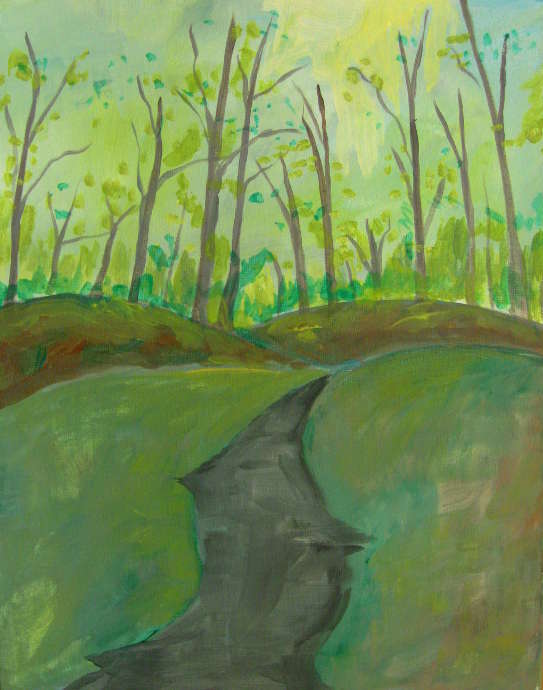
Same as before, use a small brush to add some green leaves to the trees in the front. This time though make the green paint a bit brighter, darker, more defined. Don’t fret over details: these leaves are just green dots around the main branches.
Use a medium sized brush to make the river a deeper green/black color. Don’t focus too much on the details, but at this point it would be a good idea to use horizontal brush strokes for the river.
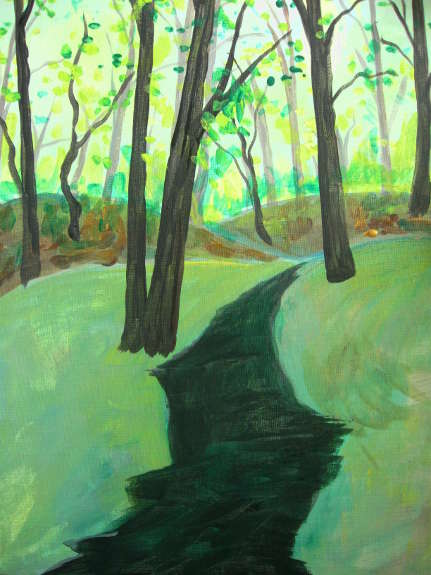
Using the flat wide brush, white paint and making horizontal strokes. Add highlights to the river. Work them around the edges to help blend them in the general green/black color underneath.
Continue working on the river highlights. You could use a medium brush if that makes you more comfortable. Add the colors to the river as you see fit. It would reflect the green of the forest, some sunlight that’s coming through, maybe some blue sky. You can’t go wrong here.
Now using the fine brush add a few more light green/white horizontal strokes to make your river. Take your time. Keep at it until you are satisfied. Sometimes it’s a good idea to work with the paint while it’s still moist, but sometimes you should step back, let it dry and then add more or paint over it. It is completely up to you, there is no wrong way to do it.

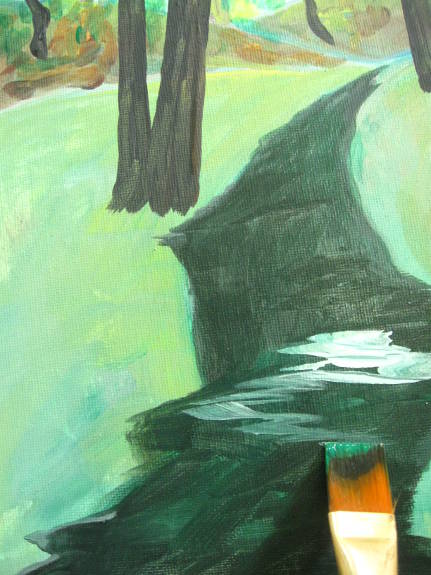
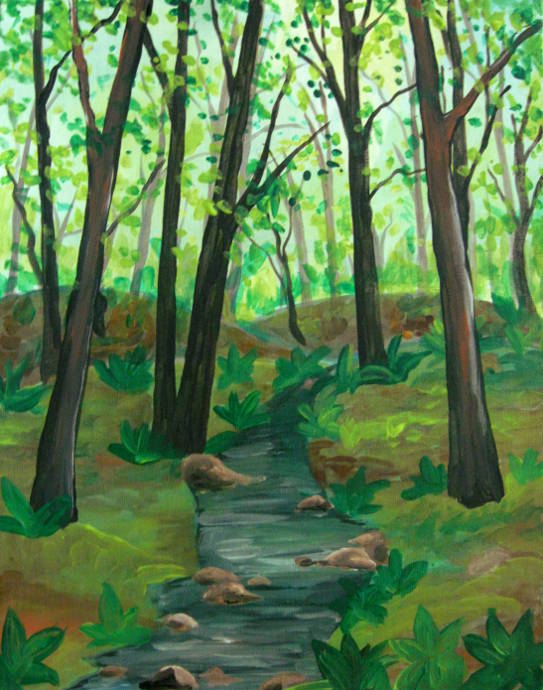
With small or medium brush add some brown rocks scattered on the river. Put some in an inlet and some just in the water. Don’t worry about the paint underneath showing, you’re just marking the spots for the rocks, and will add more to them later.
At first use the medium brush and greens/yellows/browns to add texture to the hills up front. Use big brushstrokes and not much blending of the paint. Use a smaller brush to add green plants in the back. They are simply strokes that go vertically and at an angle in dark green/light green.
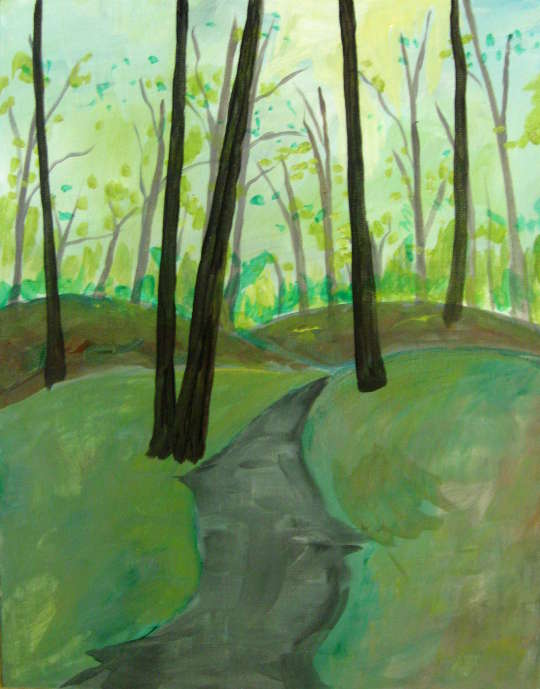
Now using a medium brush put two or three more trees up in the front. As the trees get closer they seem bigger, and more details are visible. You could use the finer brush with white/grey paint to add some bark details and highlights. Use the small brush to get a few branches on those trees.
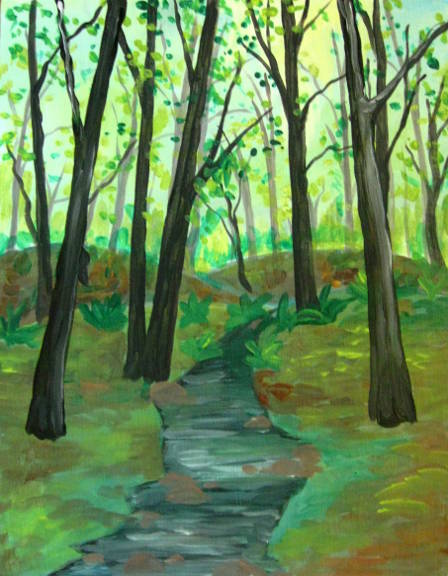
Pick a brush you are comfortable with and add some brown/white highlights to the trees closest to you.
Using the medium sized brush keep adding strokes and colors to the ground under and around the trees. I made vertical light green strokes to resemble the grass, horizontal brown ones to look like dried fallen leaves and general colors to really make it pop.
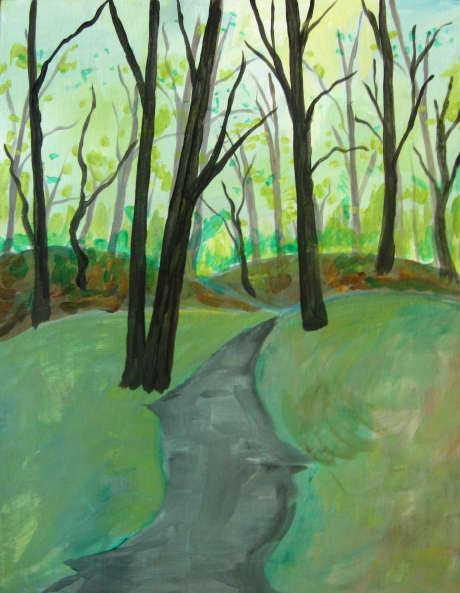
Now use the medium or small brush to add more green leafy plants. Make them a nice bright grass green. Also with the small brush it is time to add some details to your rocks. The bottoms of the rocks should be dark, black or even bluish. The tops are beige and white, with the brown/grey in the middle. The rocks also cast just a bit of dark shadow on the water, right under them.
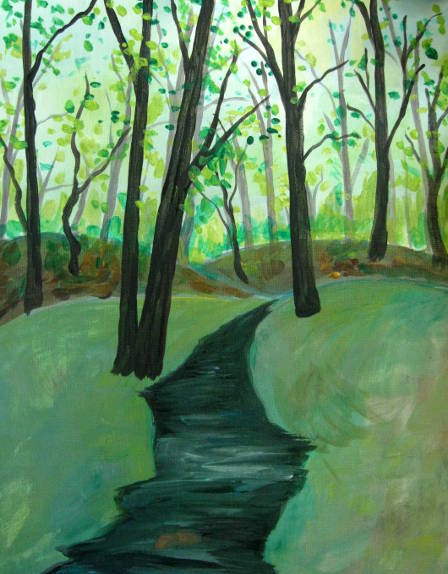
It’s all about the details. Feel free to add more leaves to the trees with the fine brush, until you are happy with the result. Using the fine brush add light green horizontal strokes to make grass. Add more highlights to the river, rocks, the big leafy green plants on the bottom.
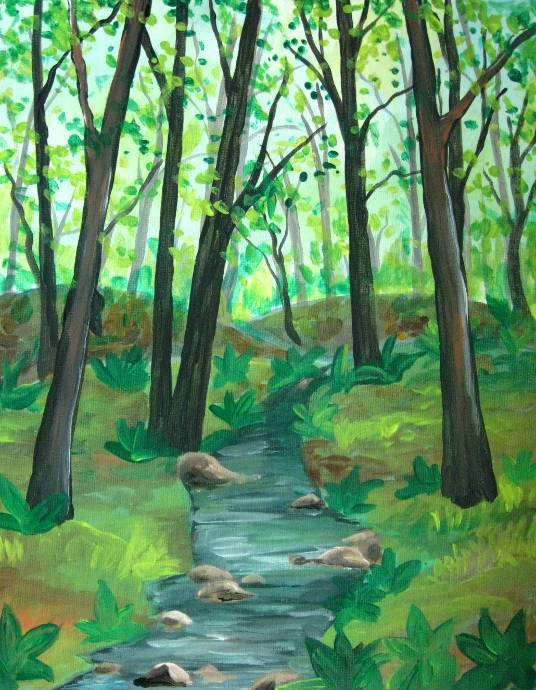
With the thin brush add a few more branches that are hanging off the trees just outside of the painting area. Keep adding more details, highlights. Add more plants on the bottom and leaves up on top until you are perfectly satisfied with the result.
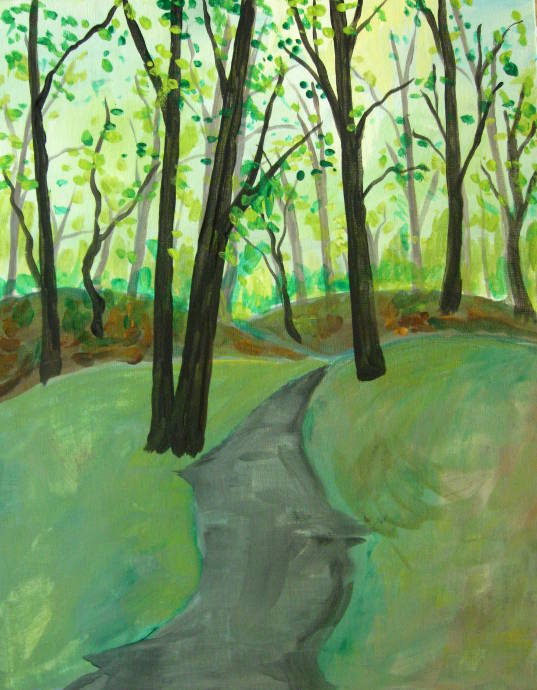
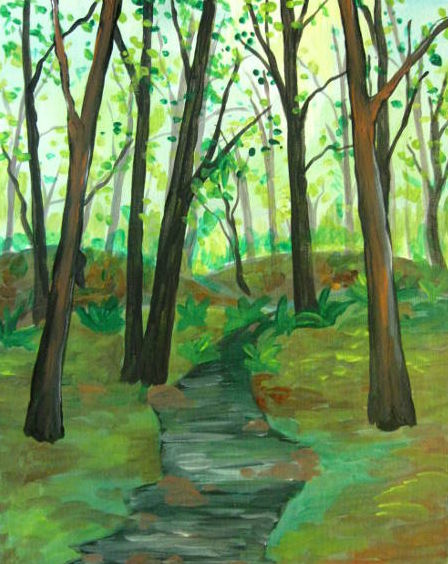
For the final step add the finishing touches: a few more plants, some shadows that these big plants cast. For example I wanted the ground to be a bit darker, and have more reddish brown instead of light green. I also added some sharper dramatic shadows on the rocks. There you have it! All done!
