Let it Snow
Inspired by the first snow of the season, I have been drawing and painting snowmen. Lots of them. They are easy to draw and it is fun to get them to do funny things.
Here is a quick and easy way to draw a snowman. I wanted a “Let It Snow” painting with it. It is fun to do and looks very pretty.
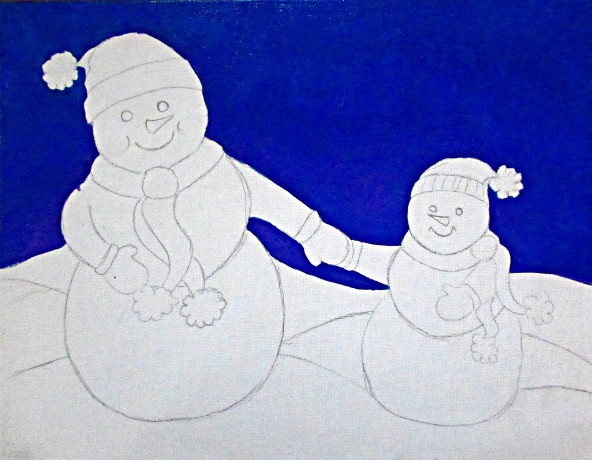
I used Folk Art Acrylic Paint, a flat medium paintbrush and a small pointy one. I also had a 9×12 inch stretched canvas that had an old sketch on it. I washed the sketch off using water and a kitchen towel, let it dry and then used for these two adorable snowmen. Here they go.
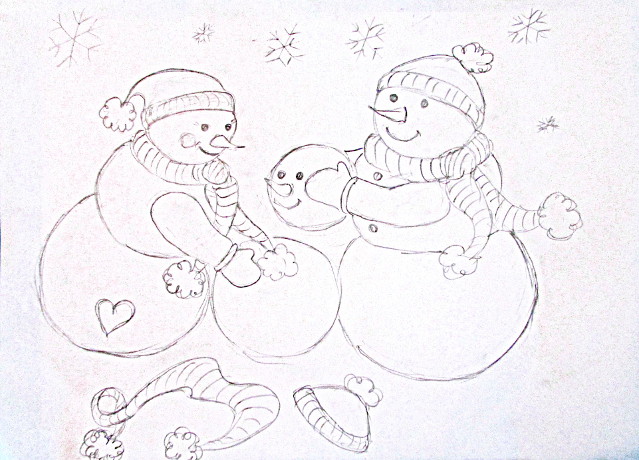
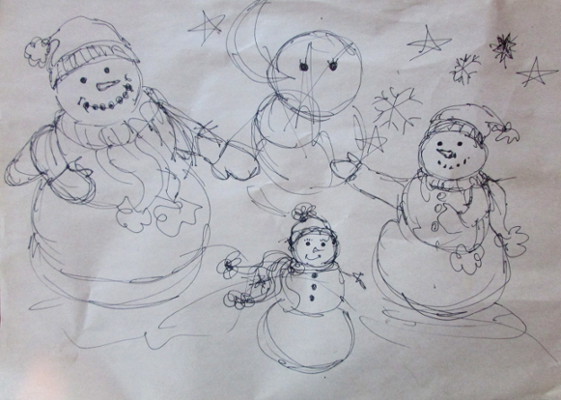 I started by doodling with a black marker on some scrap paper. Here are my doodles. The reason why I like to doodle first is because it allows me to relax, stress free, and just come up with some ideas. I use a black marker so that I can’t erase any accidental ideas that I might want to go back to later. The beauty of it is that if I don’t like it, I crumble my paper and throw it in the fire. As I was doodling on this page I came up with another great snowman idea that I will post a bit later in more detail. This doodle, however, gave me a stronger idea of the snowmen and what I wanted them to do. I wanted a parent and child holding hands, so there you go.
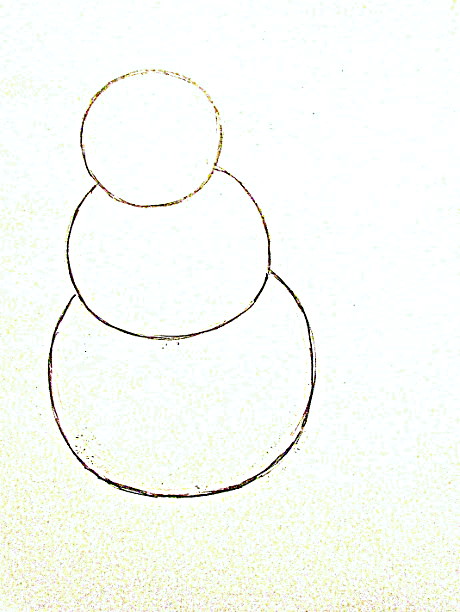
Start by drawing the head circle, followed by the midsection circle, and then the bottom circle.
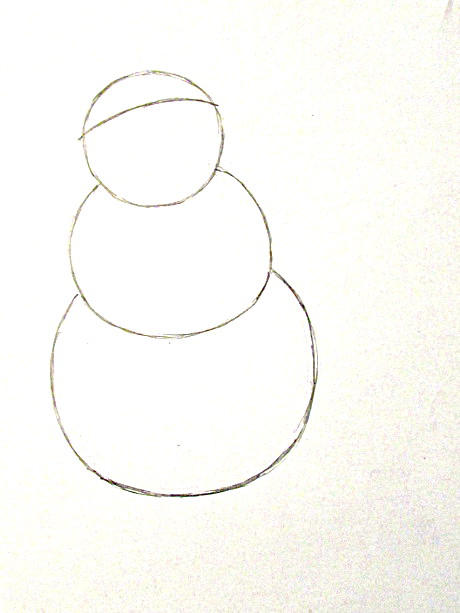
Next do the line of where the hat will begin on the face.
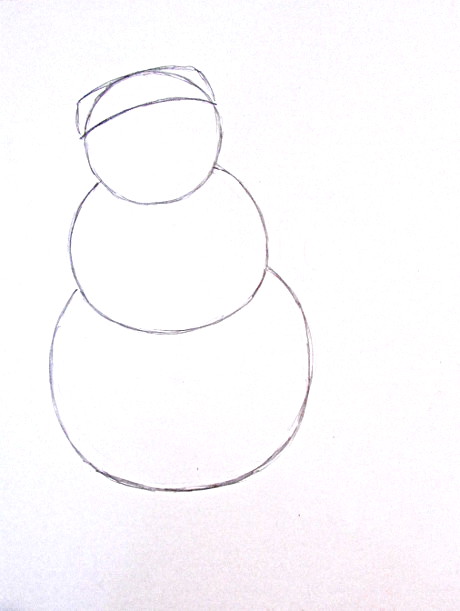
Make a trapezoid shape for the hat band. It is slightly curved because it should go around the head.
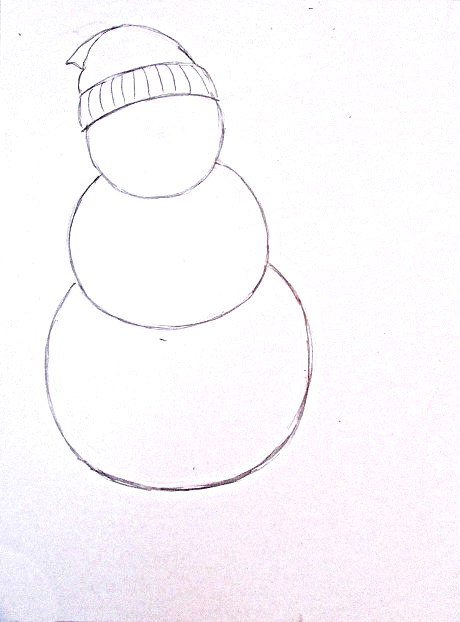
Complete the hat with a semicircle, and a triangle, also add a pompom like in the next photo.
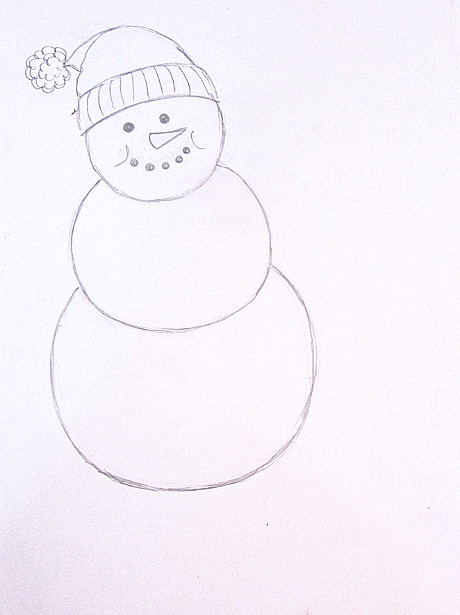
I have to admit, I played around with the face quite a bit. This isn’t the final face. Play around with it till you’re satisfied with how it looks. Snowman faces are easy: two cute eyes, a carrot nose, and a smile.
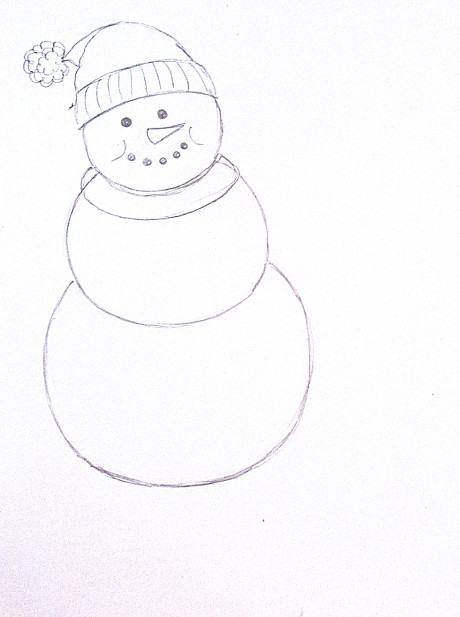
Add a noodle shape for the scarf around the neck. It’s just a sketch, not the final drawing, so being messy here isn’t a big deal.
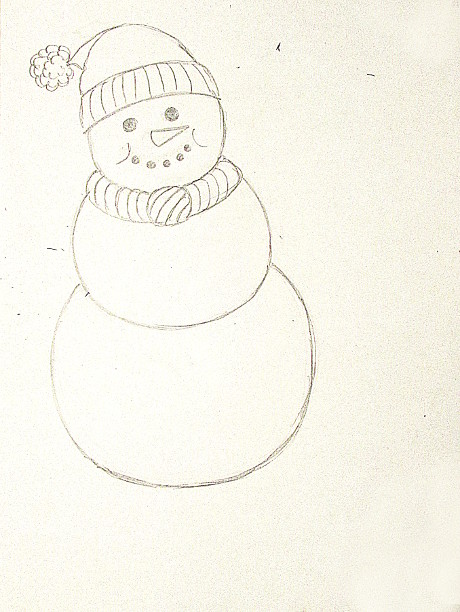
Make a circle on the scarf for the knot. Draw some stripes if you feel like it.
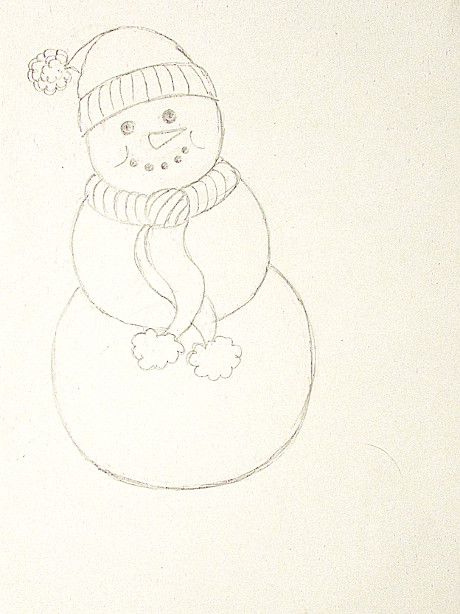
Add the scarf ends with pompoms.
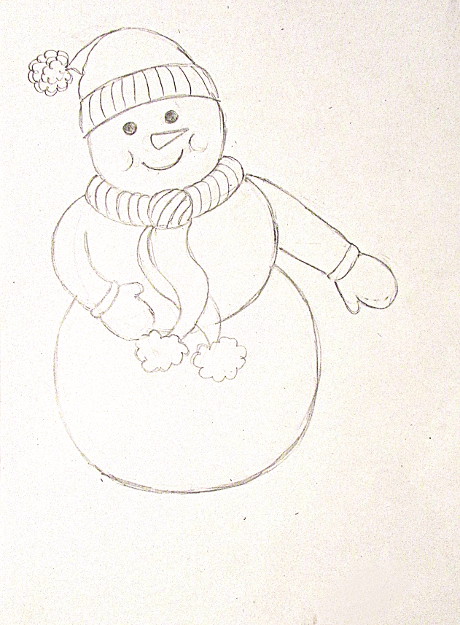
Here I changed the face to how I liked it better, mostly it was the smile. Add arms with gloves, and it’s all done.
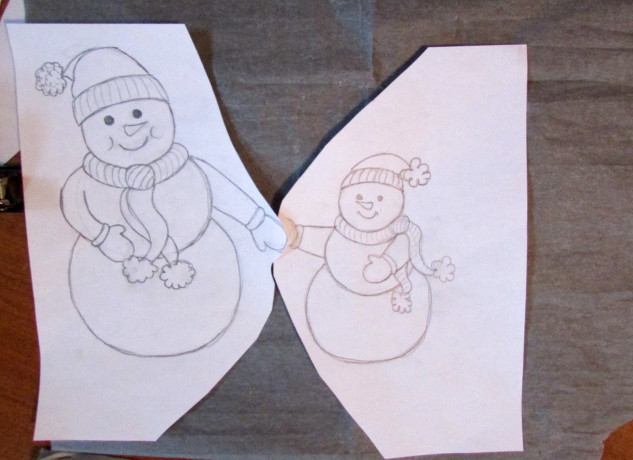
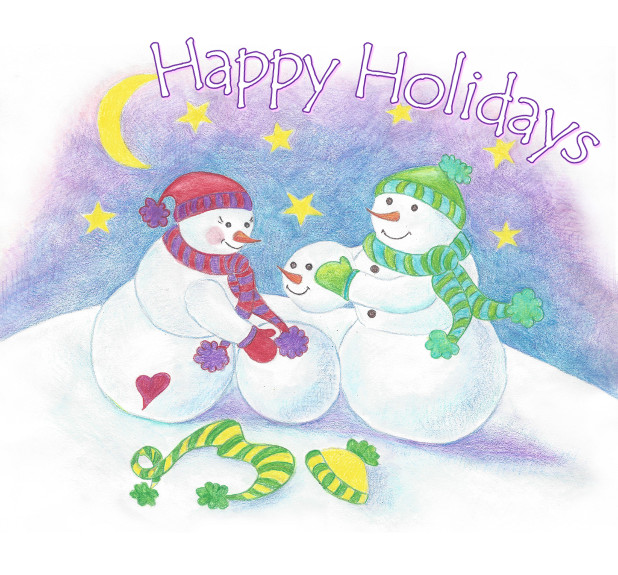
It is pretty much the same process for the little guy. Once I had them both done (they were on separate pieces of paper) I cut them out so that they could hold hands, and using carbon paper I transferred them both onto a 9×12 canvas without the hat and scarf details.
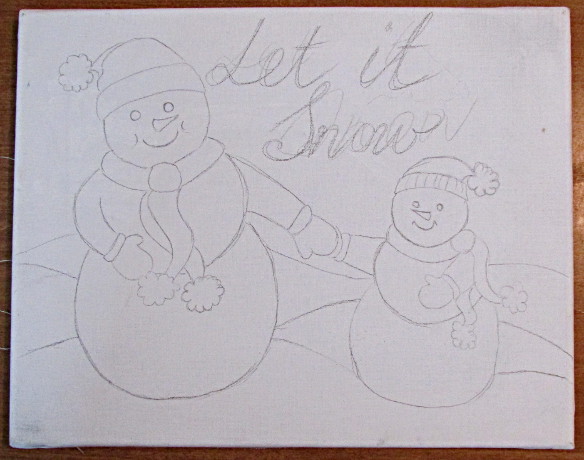
Then I played around as to where it would say “Let It Snow”, but it isn’t final, it is just an estimate.
Using dark blue and purple I painted the sky first. I actually used purple closer to the center and blue on the edges. You can’t really tell by the photo, but it is lighter by where they are holding hands. The paint was rather thin, so I made two layers.
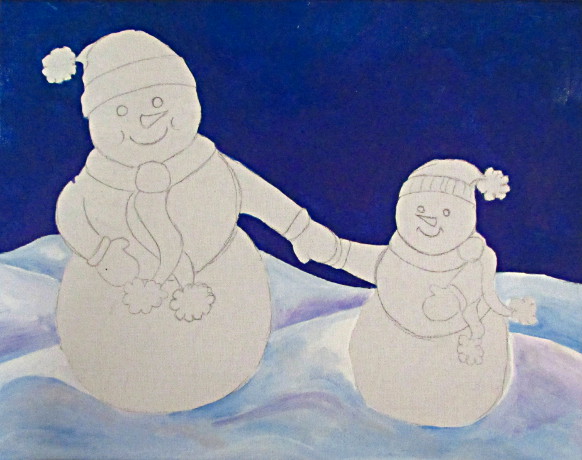
Using white with bits of the same blue and purple as I used on the sky I painted in the snow hills. Mostly I was using the medium flat brush, but went in with the little pointy one in a few spots, especially around the pompoms.
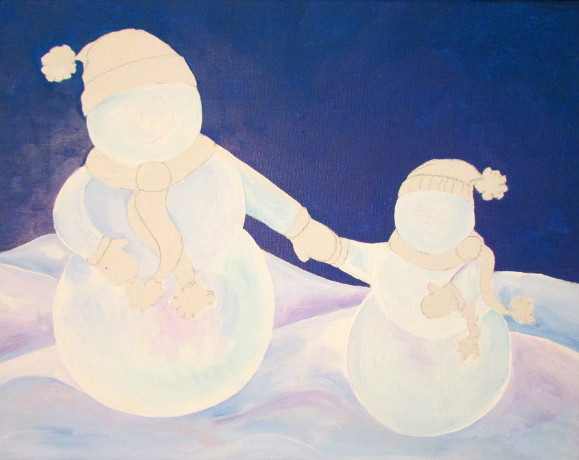
Again using white, and even less of the blue and purple then for the rest of the snow, I painted in the snowmen’s bodies. They are lighter than the rest of the snow!
Using a drop of red and white, I made the little pink circles for the cheeks.
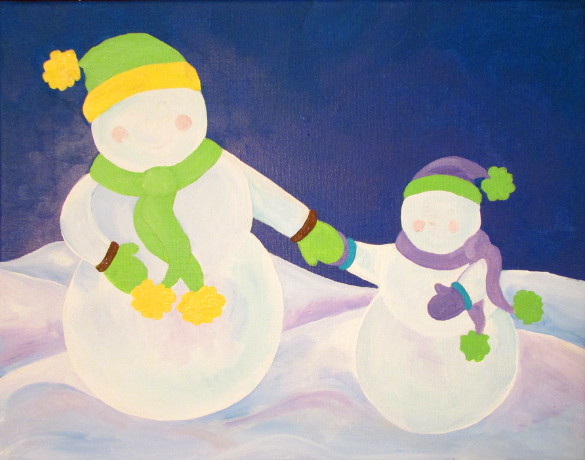
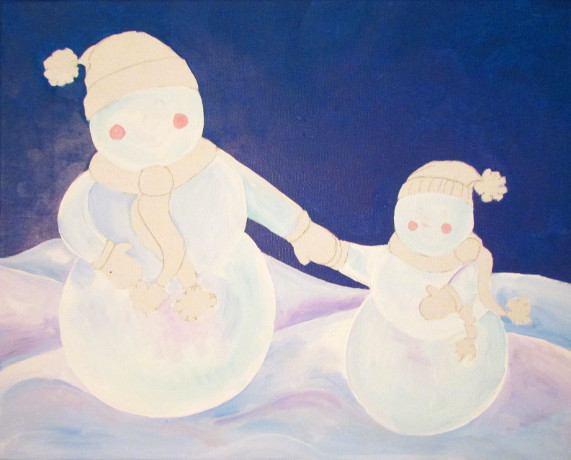
Using just flat light green, yellow and brown for the parent, and purple, light green, sky blue for the kid, I painted in the scarfs, hats and gloves.
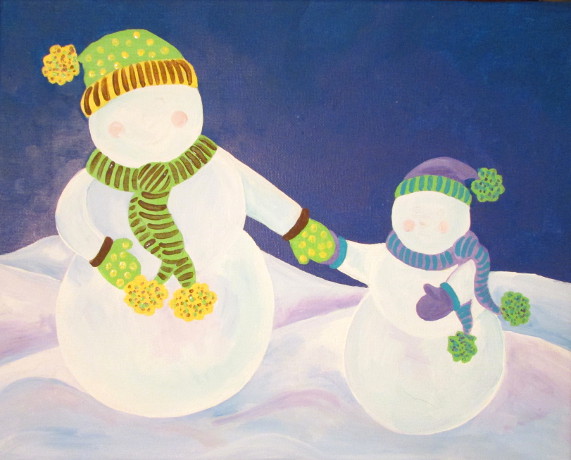
Now using a small brush and sticking to the same color combinations I added patterns for the clothing: stripes for the scarves, and polka dots for the hats and gloves, tiny spots for the pompoms.
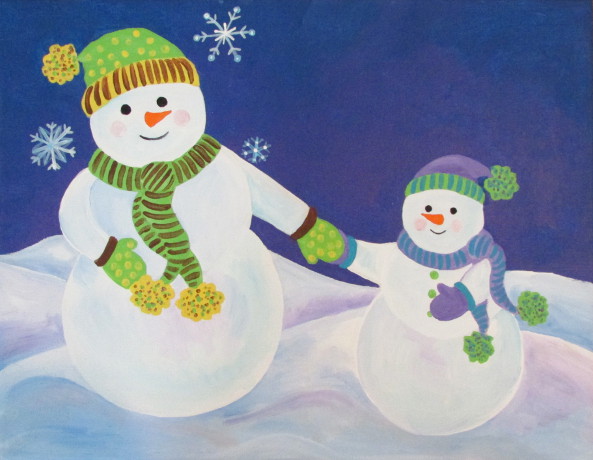
Faces!! Orange for the carrot nose, and two black coal eyes, and a small smile. I accidentally overdid it with the smile and had to wait for the black paint to dry to go over it with white.
I also started to add a few snowflakes. Snowflakes are just six intersecting lines with a matching pattern on each line.
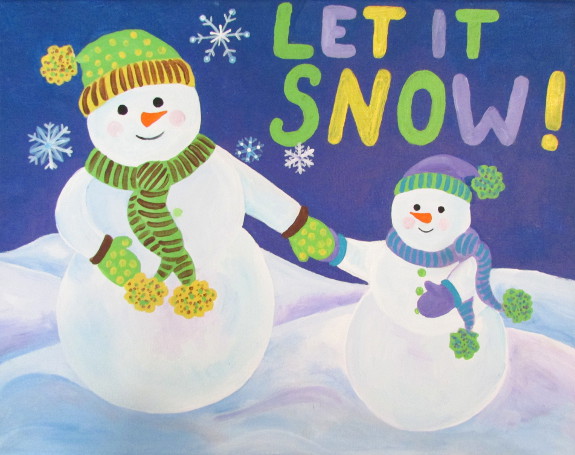
Now it’s letter time. I decided to make it simple. I wrote the letters in pencil and then just traced them around to make them thicker.
I painted them using the same color combination as for the clothes, alternating the colors from letter to letter.

Using the same colors as before, and a small brush I painted patterns on the letters. Each letter got it’s own color and pattern.
I added a lot more snowflakes using white, light blue and purple.
It is all done and ready to hang!!
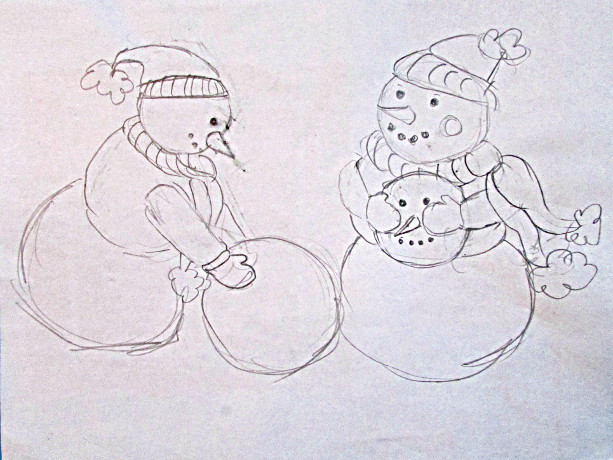
Here is another cute sketch that came to mind while I was doing the first one. I finished this one in watercolor pencils.