I have been searching for the perfect air dry clay to use with a group of kids. The kids are always excited for a clay project. However, with no kiln available, and the oven being inconvenient, it has to be air dry clay, and it has to be fairly inexpensive, yet good quality, and very importantly: non toxic! I have tried two different kinds of air dry clay at this point, and both have interesting results.
***This page contains affiliate links.***
Air Dry Clay Art Projects Or Adventures With Clay:
Picking the right clay:
 The first clay that I tried was Crayola Air Dry Clay. It came in 5 lb buckets, and I needed at least 4 buckets to make sure I have enough for our small group. This clay had a great sticky clay feel to it. Like regular clay that needs to be fired. However, it shrinks considerably when it dries, so anything 3-D that we tried to make with it cracked horribly when drying. I came up with a great 2 D project for it, during which we talked about texture, and used glue and water mixture while working with it to prevent it from cracking so much. You can look below to see how to make it.
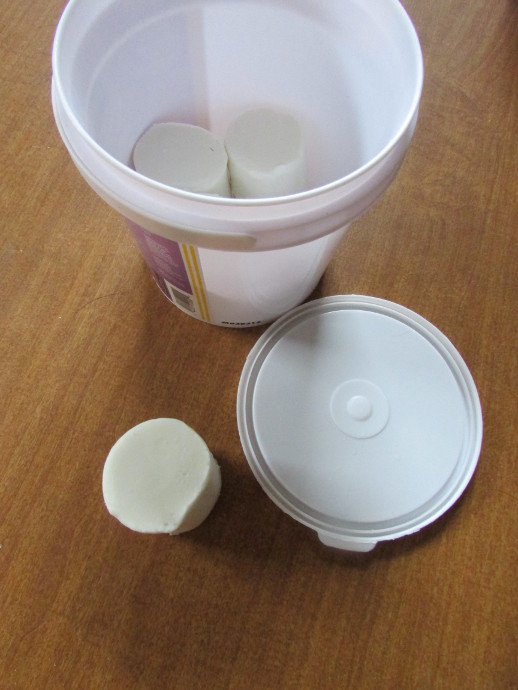
 The second clay I tried was the Sargent Art Sculpt It. I got the clay in five 2 lb bucket, but looking back I might just get it in a 10 lb bucket next time. This clay worked fantastically. We made adorable candy eating monsters with the class that you can see below. The clay was smooth, and easy to work with. It held pretty well, and only fell apart where it wasn’t wet enough when connecting pieces. There were minimal cracks. I would definitely get it again.
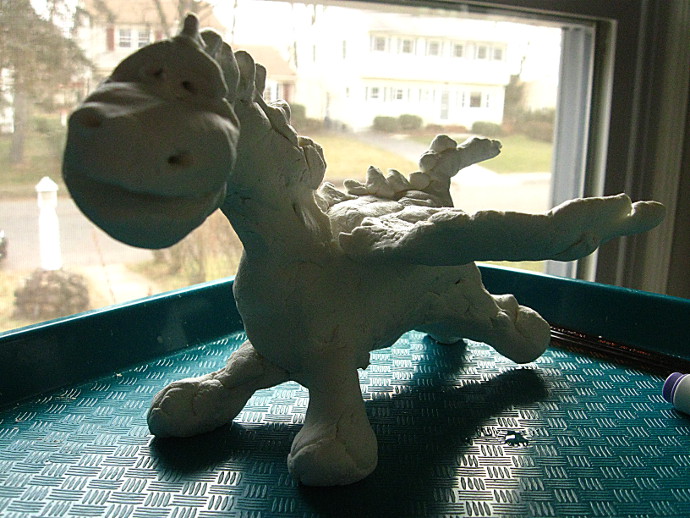 One more air dry clay that I have tried in the past with my kids at home was the DAS Air Hardening Clay. It worked fine for playing with it with the kids. Though as some of the reviews mentioned it was a bit too fibrous and flaky. I don’t think I would buy it again. My son made this dragon (with a wire support structure inside), and it dried well, with some cracking. The dragon is still alive and well.
I also bought a few sets of these clay tools, which came in very handy.
First Let’s talk about the Crayola Air Dry Clay.
Before every class, I try and do the project I have in mind. Play around with whatever supplies I plan on using and make sure that I have fun with it. The Crayola Air Dry Clay wasn’t good for much of the 3-D ideas I had in mind. It would shrink tremendously when drying, resulting in giant cracks all over the surface. At some point we even used a wire under-structure, and the clay shrank so much that the wire started coming out of the clay.
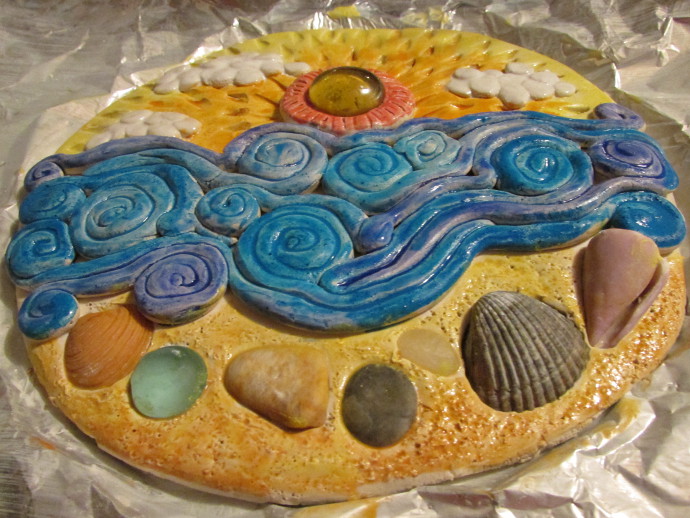
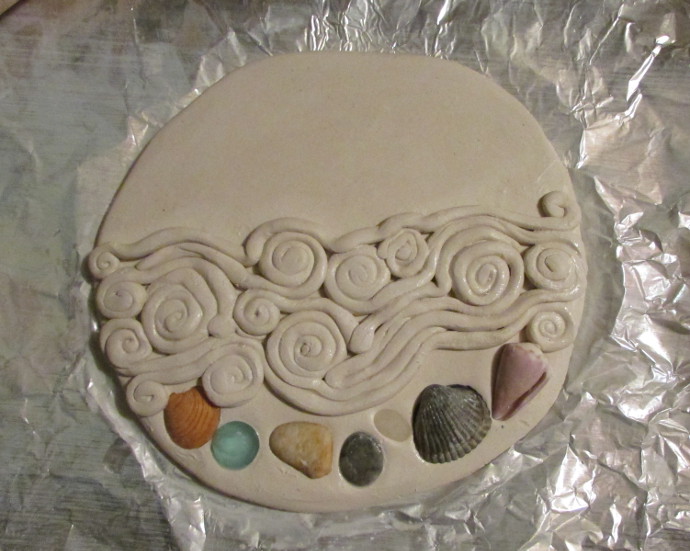
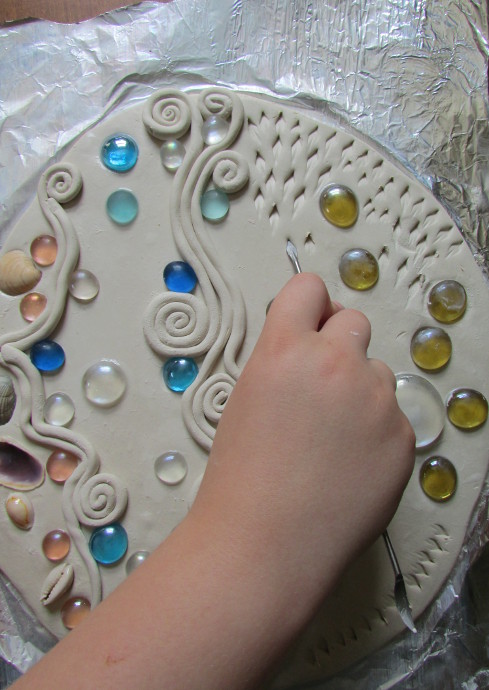
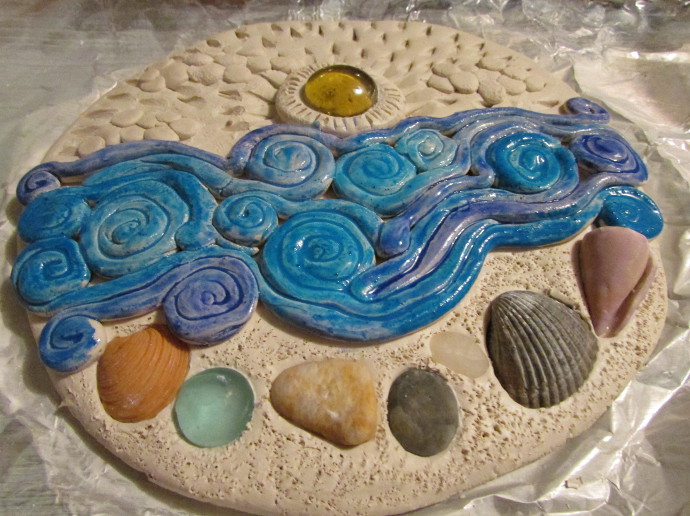
I realized that what ever project I do, it will be better if it is thinner, so I decided on a simple clay relief project that would have lots of exploration with texture. We made a beach scene with the clay.
Here is one of them:
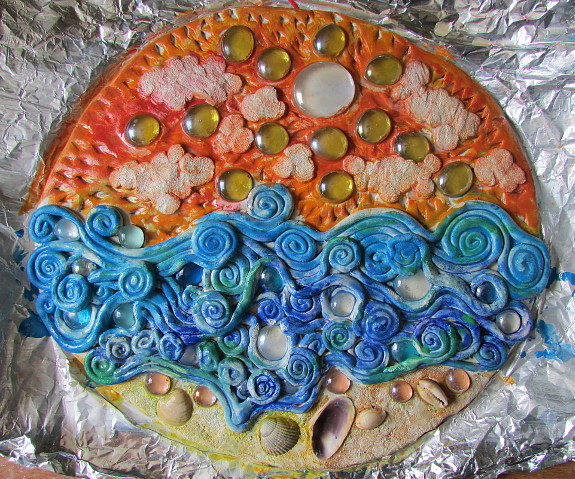
How To Make An Awesome Beach Scene Using Crayola Air Dry Clay
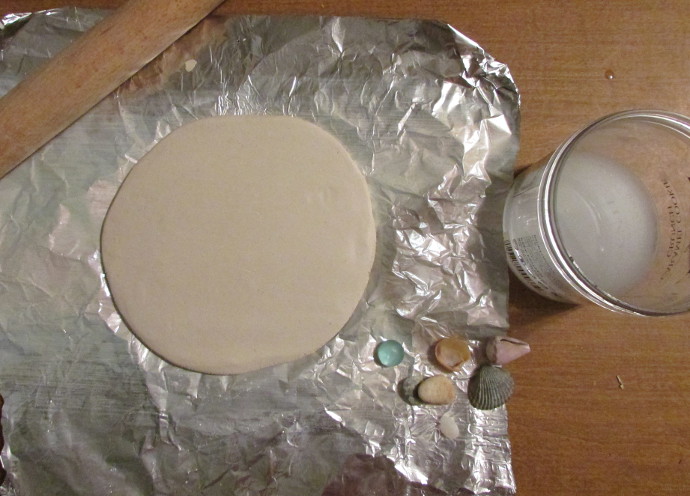
First, we rolled out a good chunk of clay on aluminum foil using a dough roller. The foil made it easy to transport and clean up.
The seascape would consist of three parts: sand, ocean and sky.
To prevent cracks and to make sure it sticks better together, we used water with a bit of white glue mixed in.
Up next is the waves: roll thin tubes of clay of different lengths….
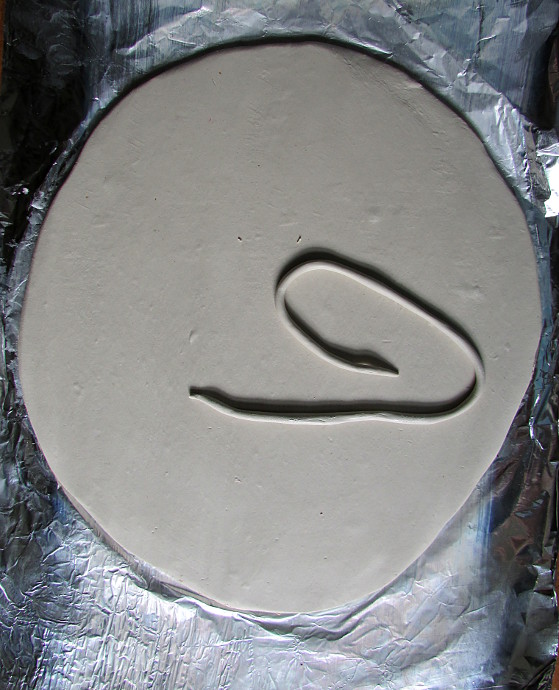
….now roll them up into swirls and attach them to your base with the water and glue mixture.
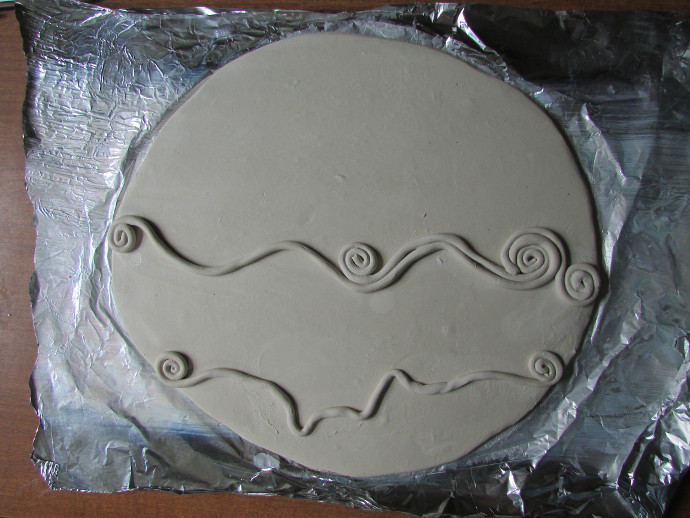
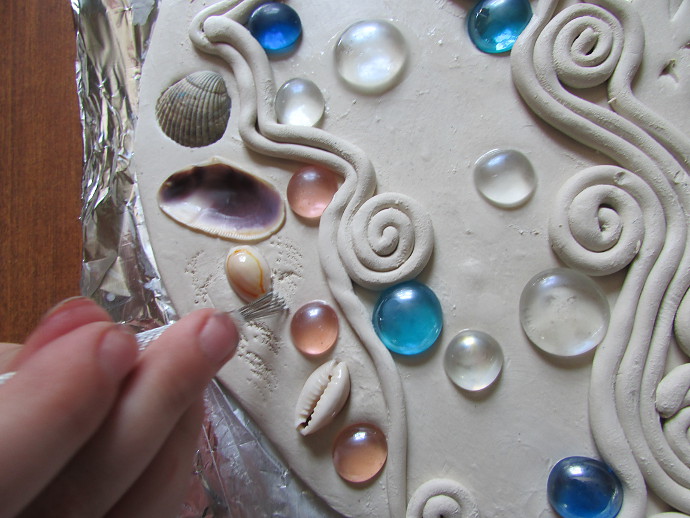
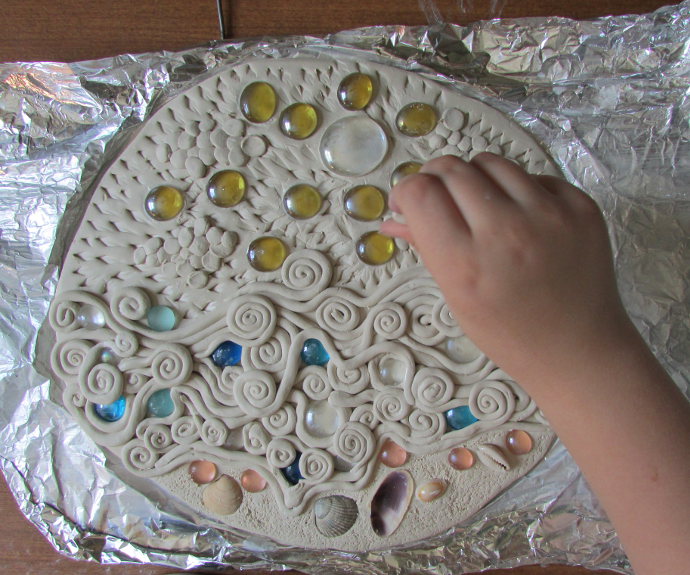
Keep at it. Also, we have added gems and shells to our seascapes.
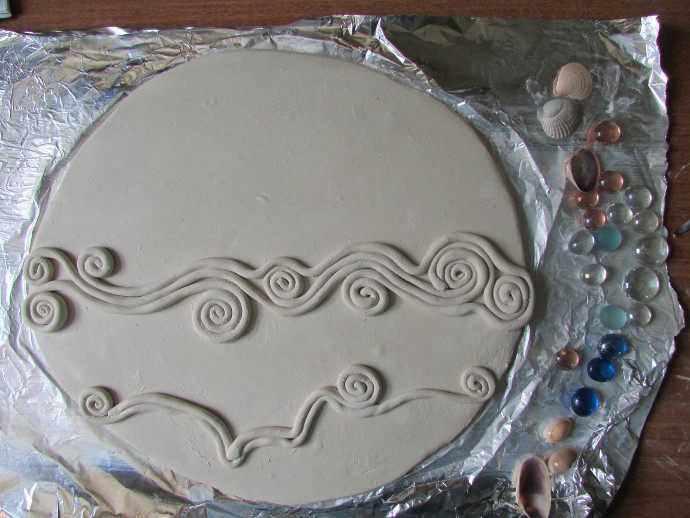
It might be a good idea to plan out exactly where to put the gems and the seashells.
Here is another seascape in progress, with the ocean all done, and the shells and gems planted in the sand.
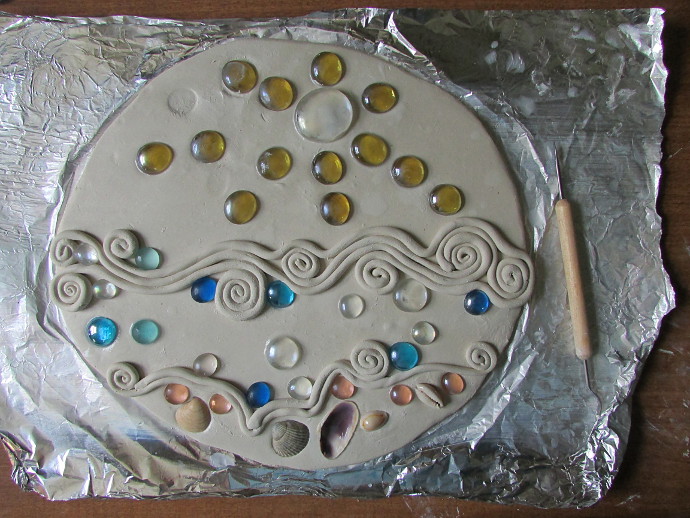
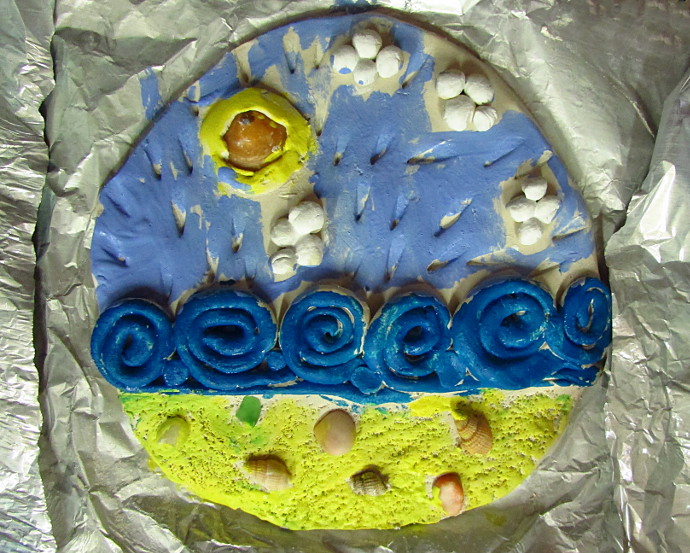
Ideally, I would do this step after the ocean is done completely, but my 8 year old couldn’t wait. Using the tools, texture your sky. We went with texture that looked similar to the sun rays.
Do the same thing with the sand.
More sand texturing.
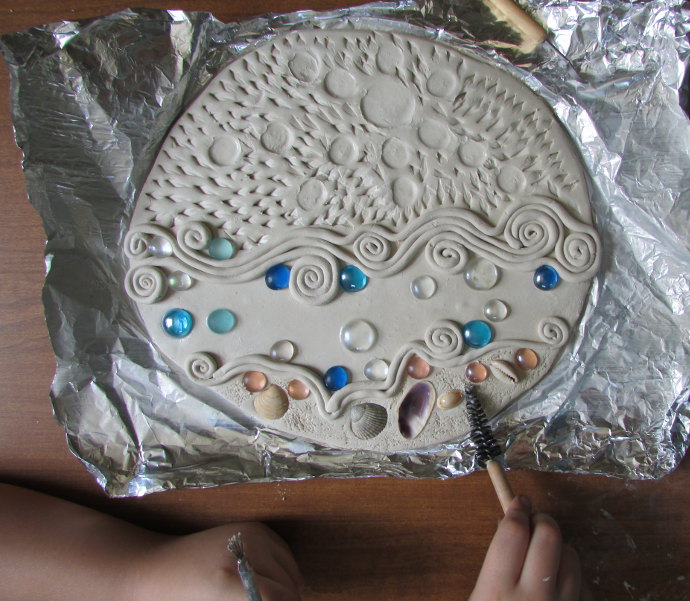
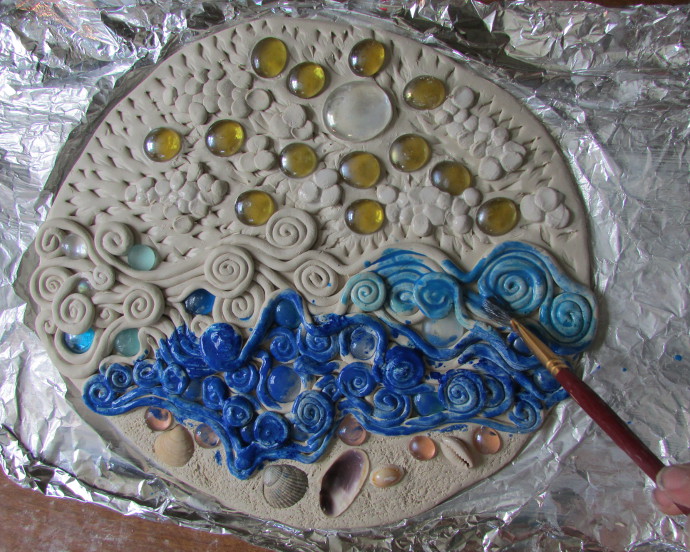
At this point, we went back and finished the ocean.
Then we rolled little balls of clay and layered them on top of the sky to create clouds.
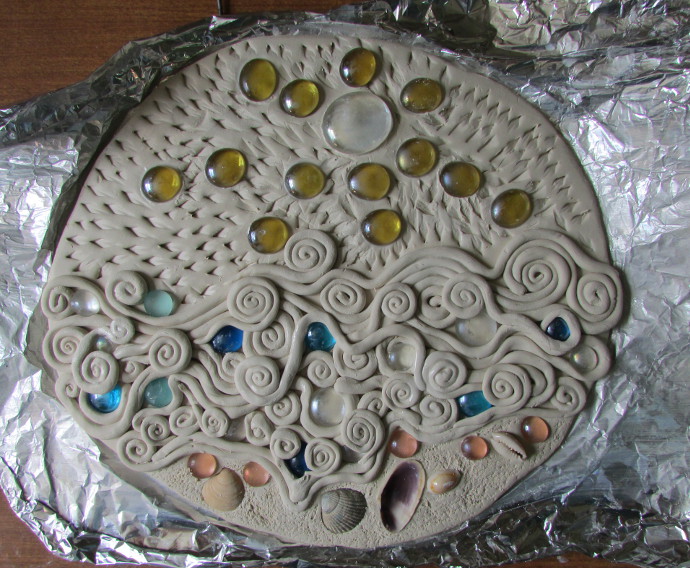
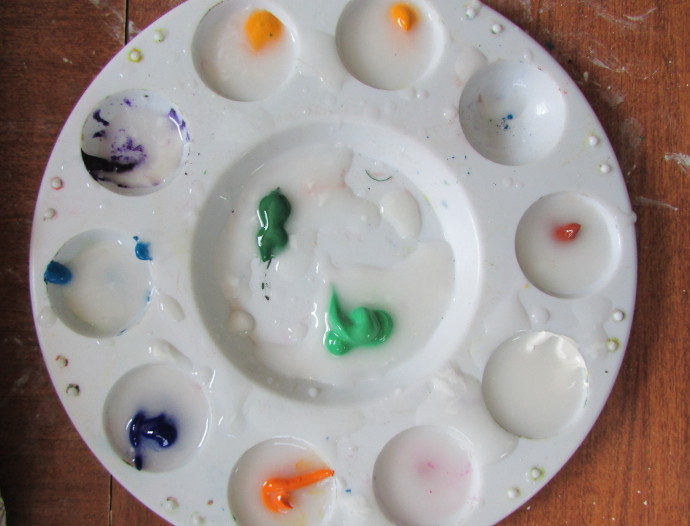
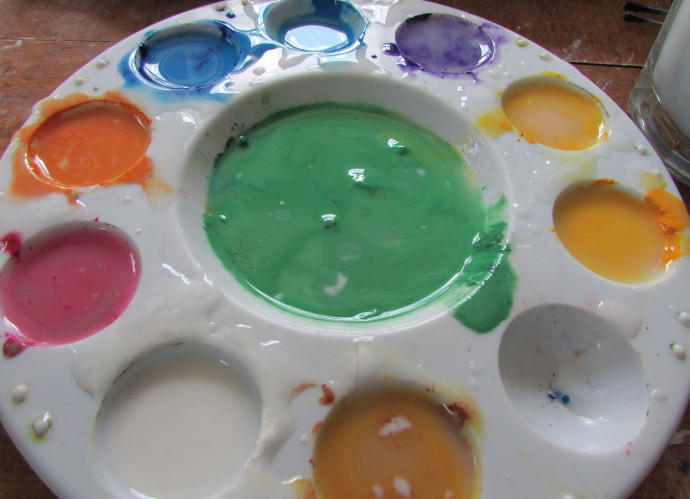
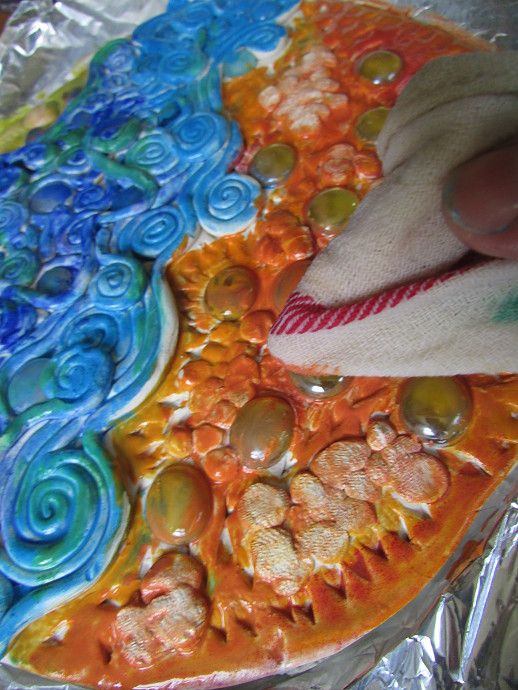
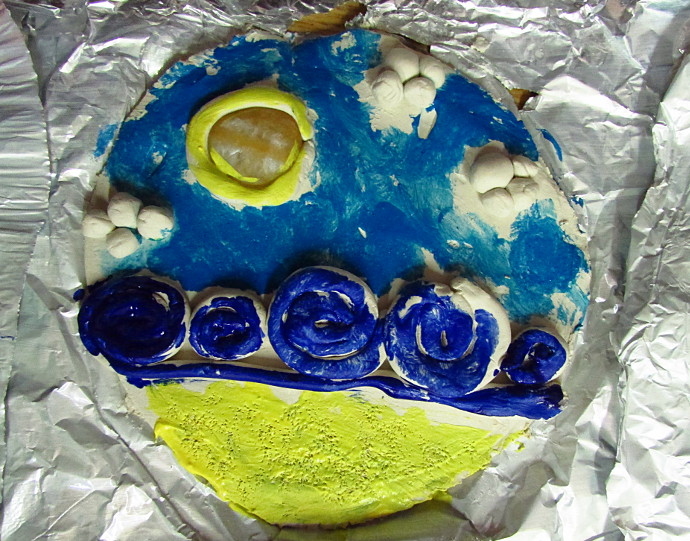
While the clay is wet, we set out to paint right over it. Using watercolor paint, like this one, though I have to be honest, I have found a better deal at my local art store. We mixed the water color paint with a drop of white glue and just a bit of water to mix it all together.
Start painting with a regular watercolor brush.
If you accidentally put too much paint, just dab it with a kitchen towel.
All done!
Sargent Art Sculpt It Clay
I liked using Sargent Art Sculpt It Clay better then Crayola Air Dry Clay. It was smoother, but a bit on the tough side. We needed quite a bit of water to soften it up and to work with it. Once softened, it was easy to work with, and the pieces were sticking to each other quite well.
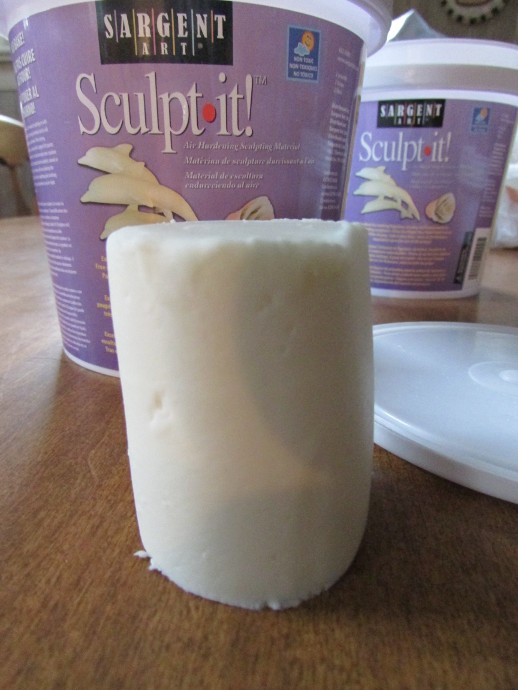
It came in 2 lb bins, each bin containing 9 rolls of clay. This is what they looked like:
They clay dries quickly, so you’ll need to work accordingly. When it dried, there was minimal shrinkage, very few cracks, and only the pieces that weren’t properly attached fell off. They were easy to glue back on. At the end we also painted the clay in acrylics, and it worked out fine.
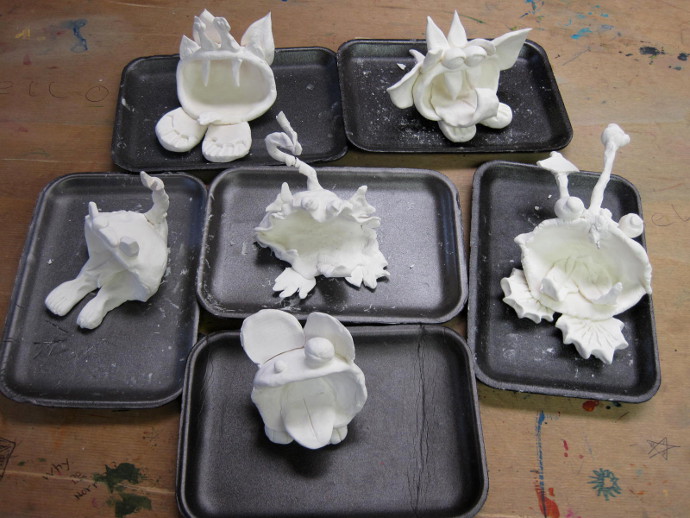
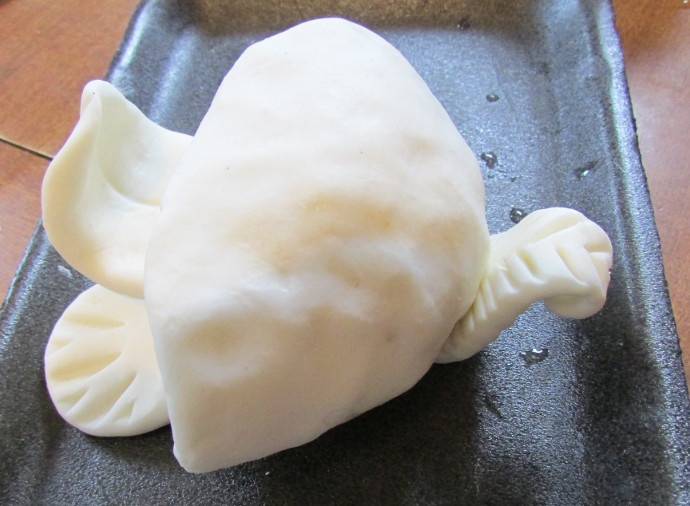
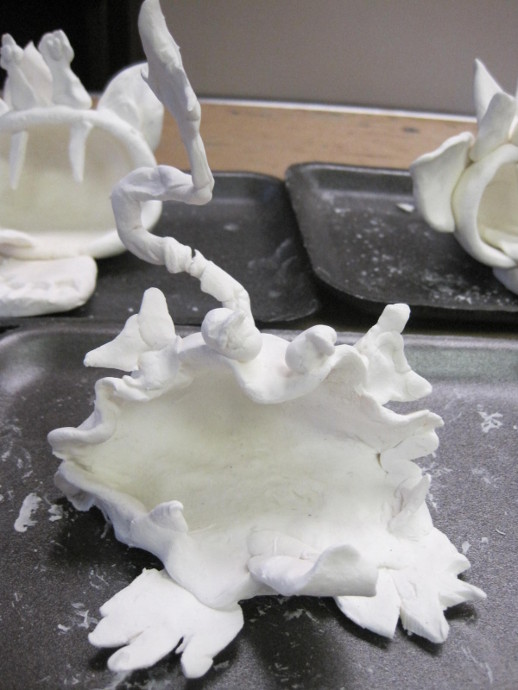
We made these pinch pot monsters:
I got the pinch pot clay monster idea from this website: johnpost.us, and I am very grateful for it.
See below how we made them:
We started with a round lump of clay, using up one of the little rolls. Like I mentioned above, we definitely needed plenty of water to work with this clay, and it does get quite a bit slippery when wet.
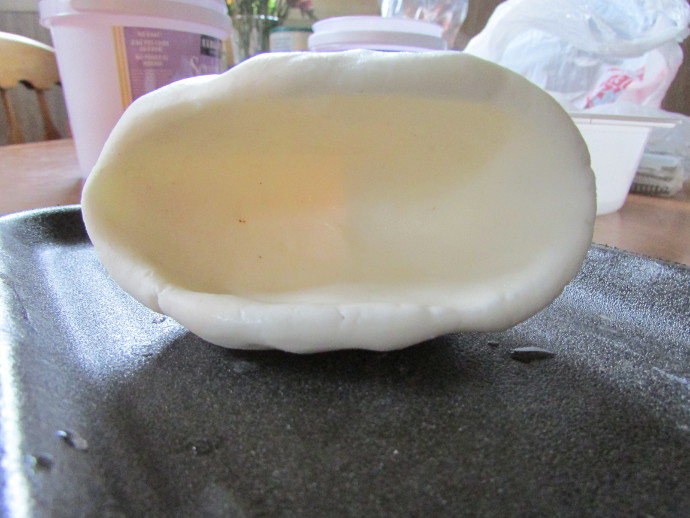
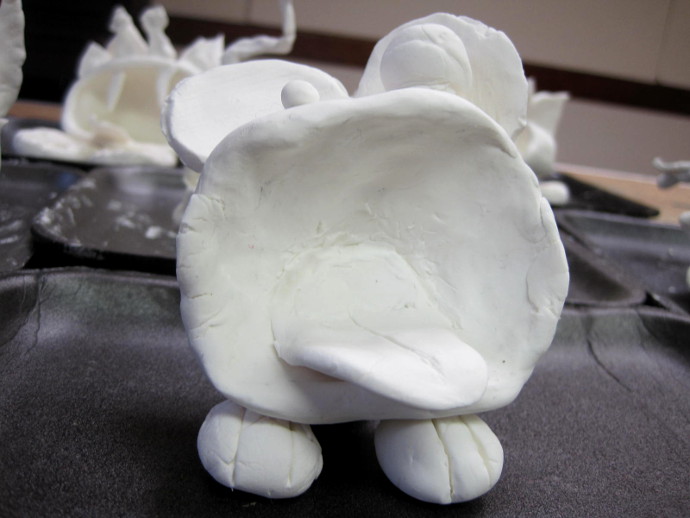
Using their thumbs, the kids pushed and shaped a bowl like thing.
We kept working on it until it looked like a monster mouth.
Make feet in any shape you want.
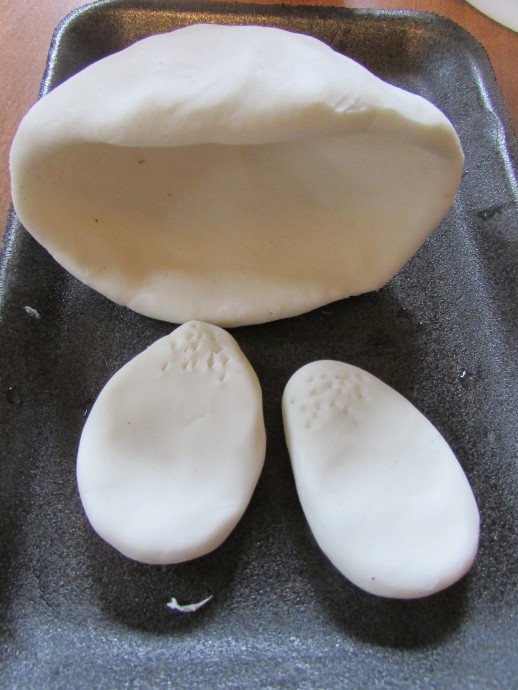
Attach the feet to the bottom of the monster, just make sure to use plenty of water.
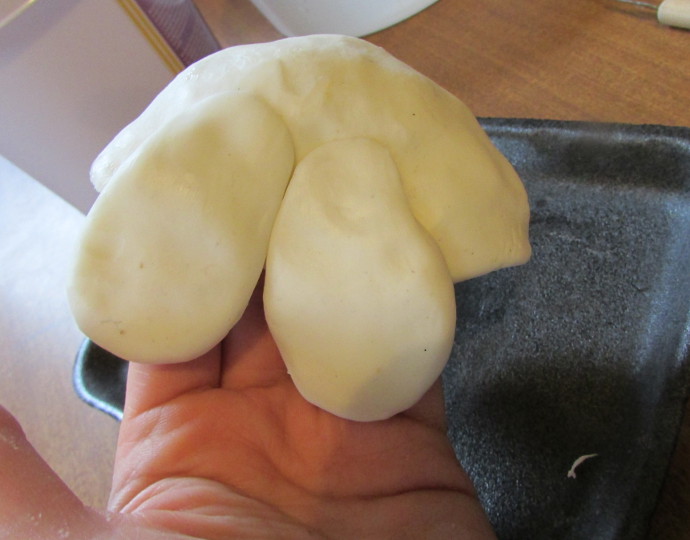
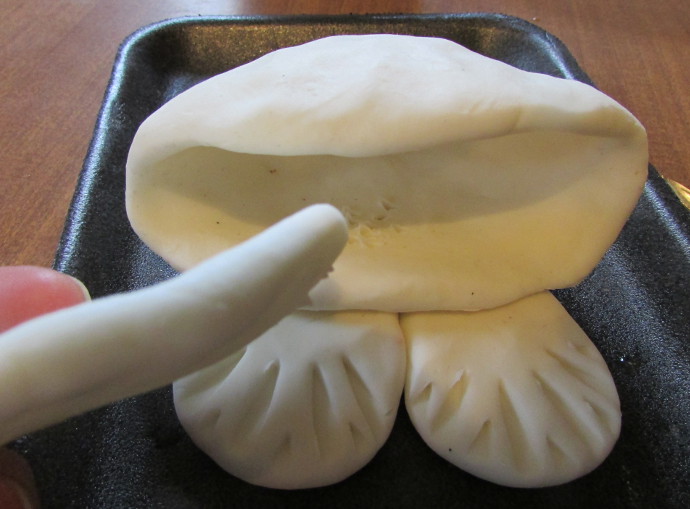
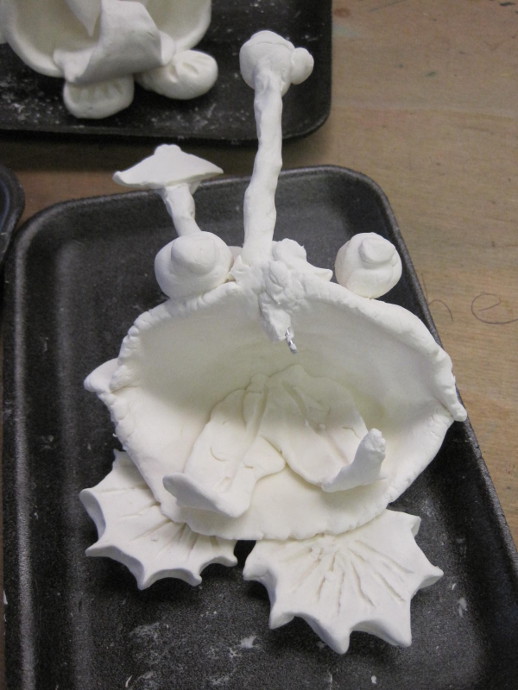
Same way, we attached the tongues. If you can tell from the photo, it helps to make little grooves with a tool on both surfaces that you will be attaching together.
Same thing for the tail.
Then we made eyes, ears and teeth, and attached them all.
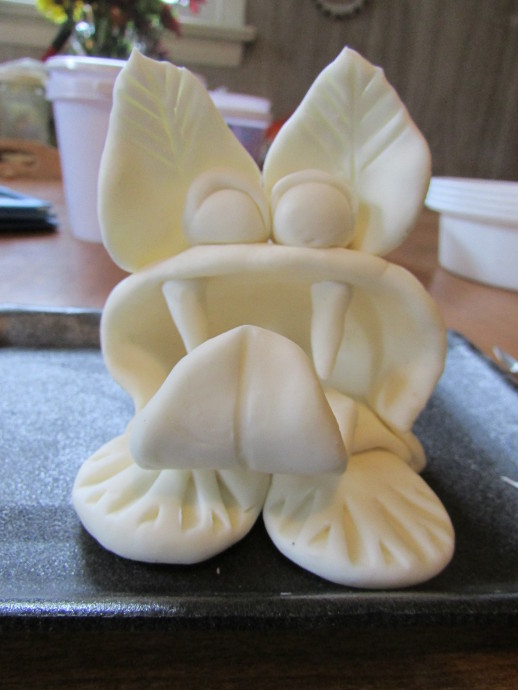
When the monsters were completely dry, some parts, those that were not properly attached just came off. It was easy to glue them back on with a bit of white glue.
Here are a few of the monsters the kids made up close. Some of the kids opted out to make entire families, and it was adorable.
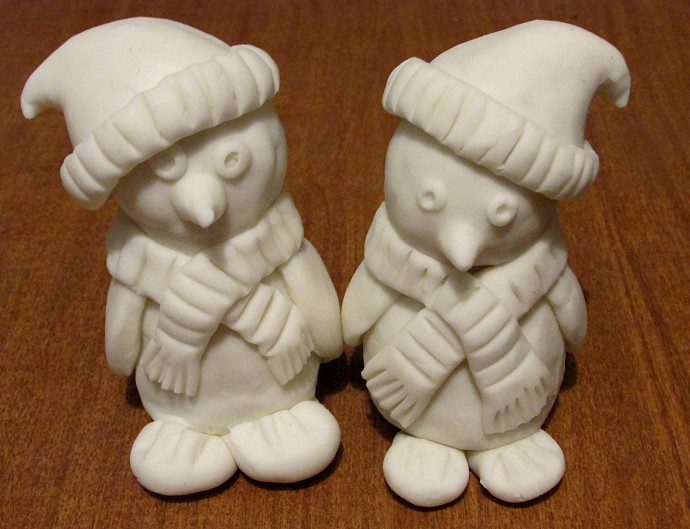
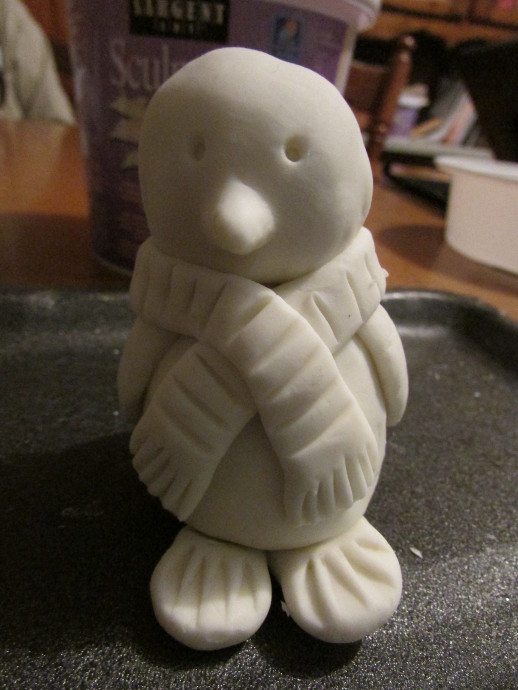
Penguins
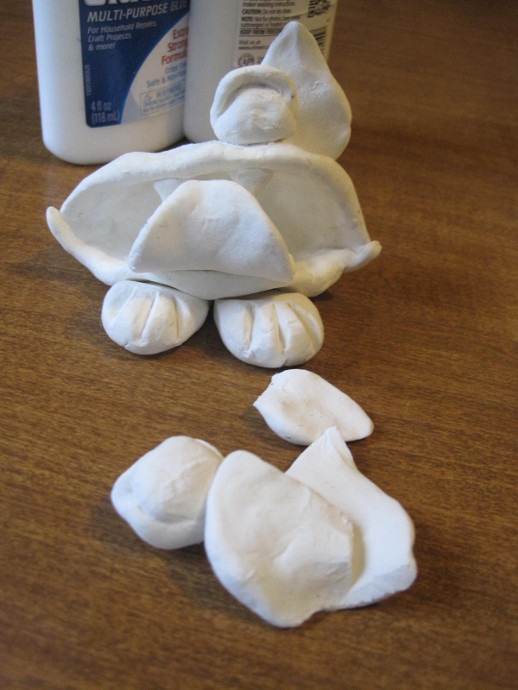
Out of the leftover Sargent Art Sculpt It Clay I made two little penguins, just for fun. Here is how to make them:
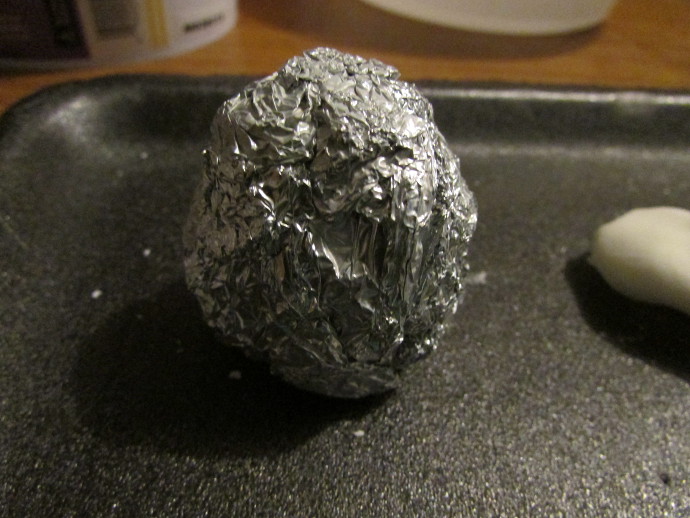
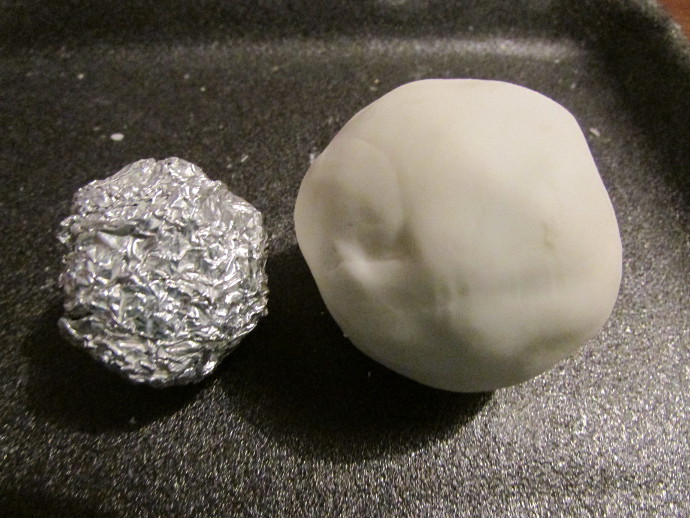
I started with an oval shaped lump of crumbled up aluminum foil.
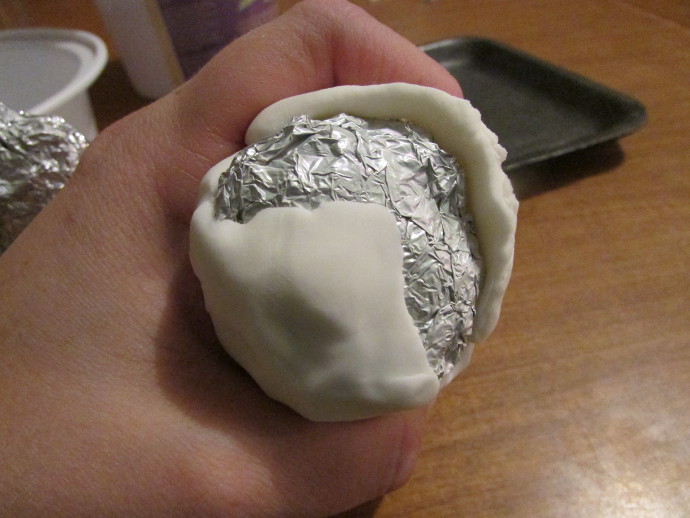
Then I covered it with a thin layer of clay.
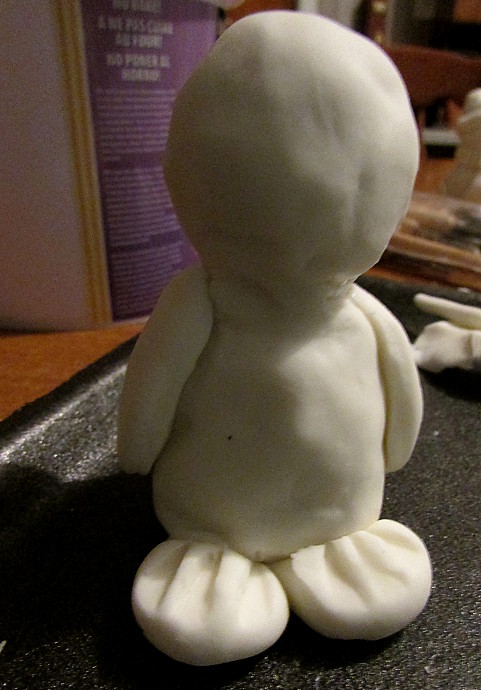
Attach two little feet to the bottom of the body.
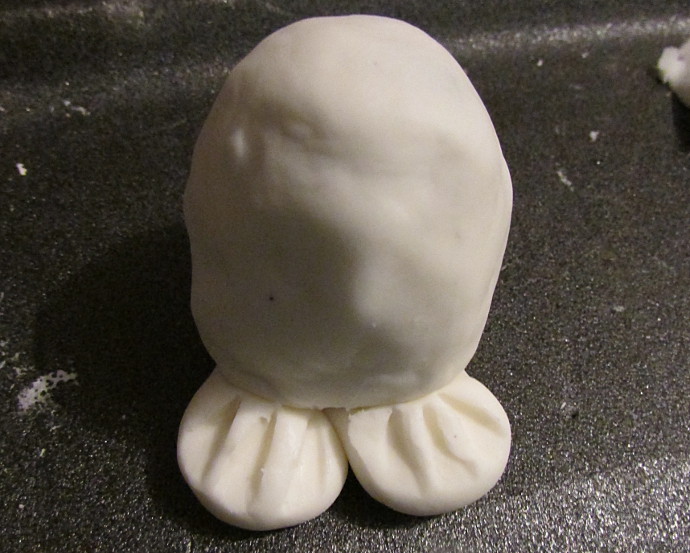
Same with the tail.
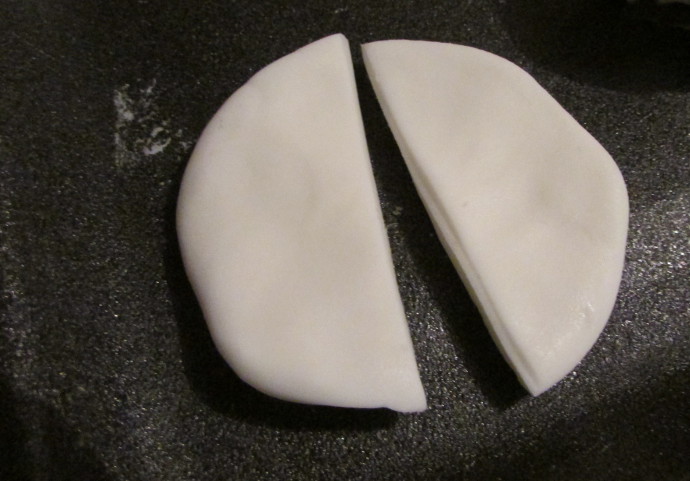
Cut a flattened circle in half and use the halves as wings.
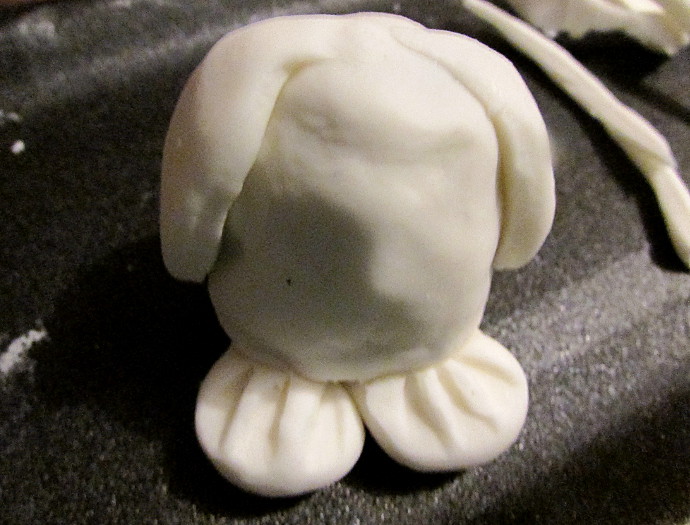
Attach the wings to the body.
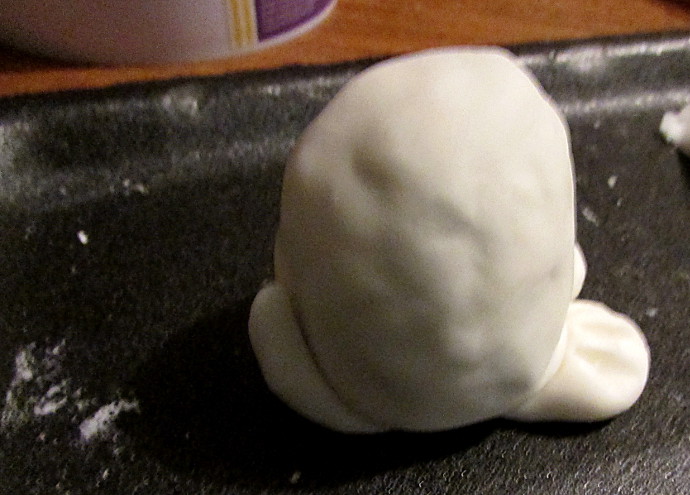
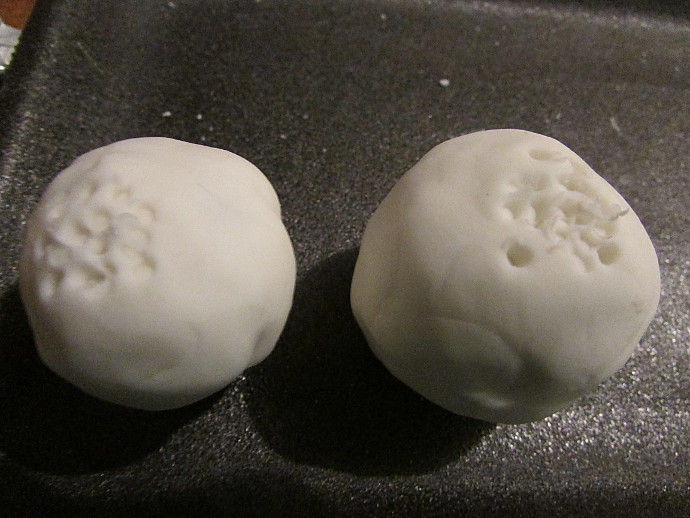
Make a smaller, more round, lump of aluminum foil for the head, and cover it with clay.
I have two heads because I am making two penguins. Make some little holes in the bottom of the head and the body to attach them better. I know that wire would probably work better for this step, but I was way too tired to go look for it.
Attach the head with liberal amounts of water.
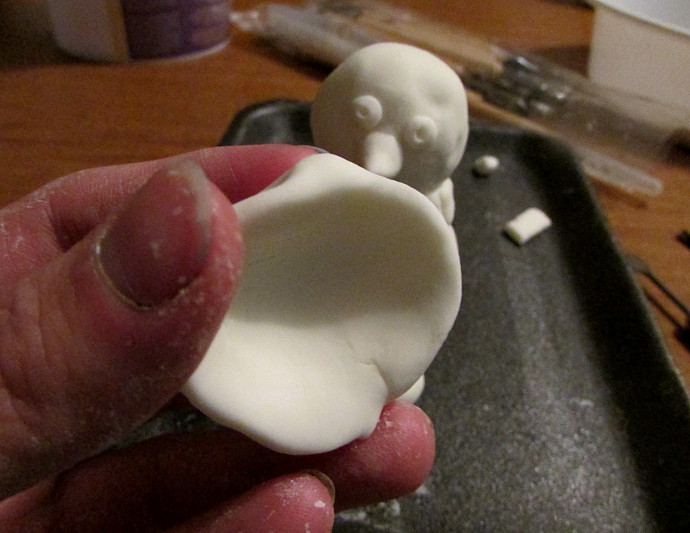
To make a scarf: roll the clay into a long tube, flatten it, and cut off the edges.
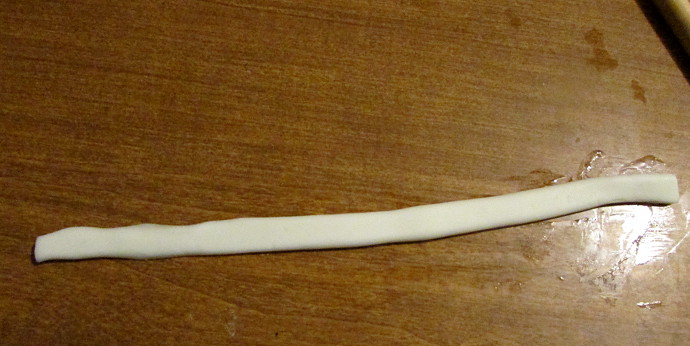
Put it around the penguins neck, making sure that the inside of the scarf is moist.
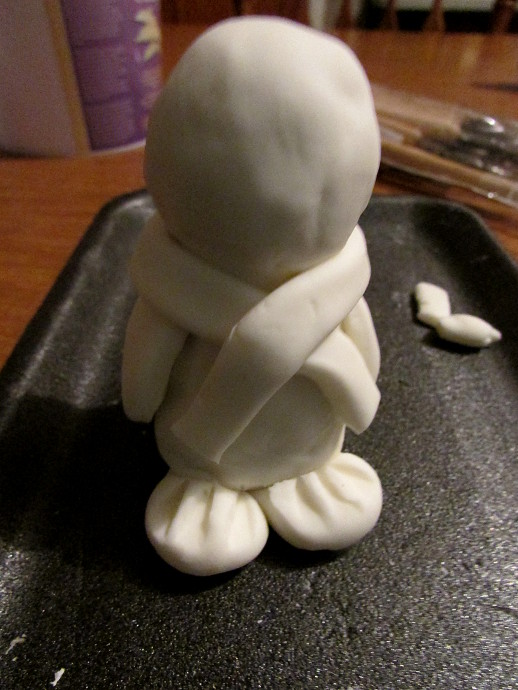
Using a clay tool, or a simple toothpick, make ridges on the scarf.
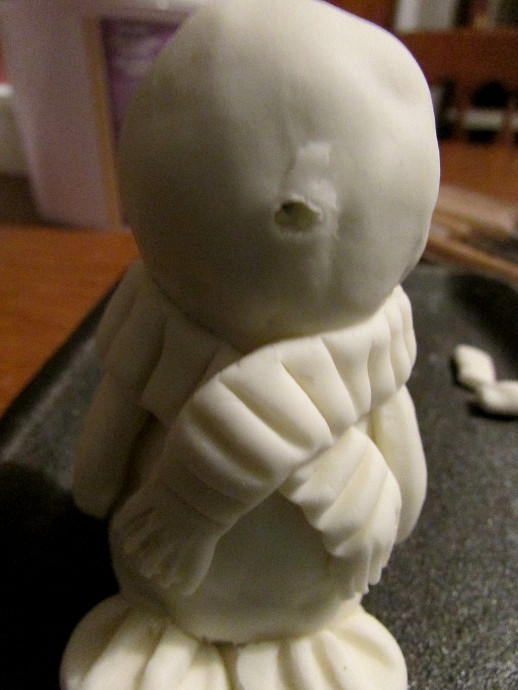
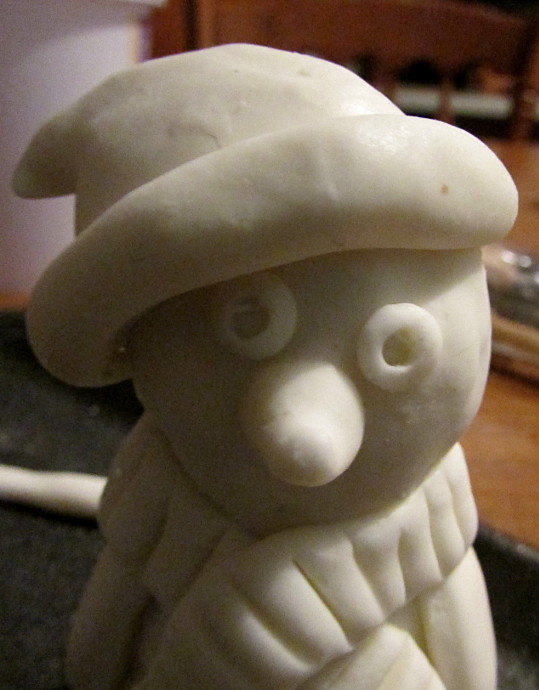
On the face, make a hole for the beak, attach the beak and shape it.
Make holes for eyes.
I put two small balls into the eyes, and used a toothpick to make a pupil hole.

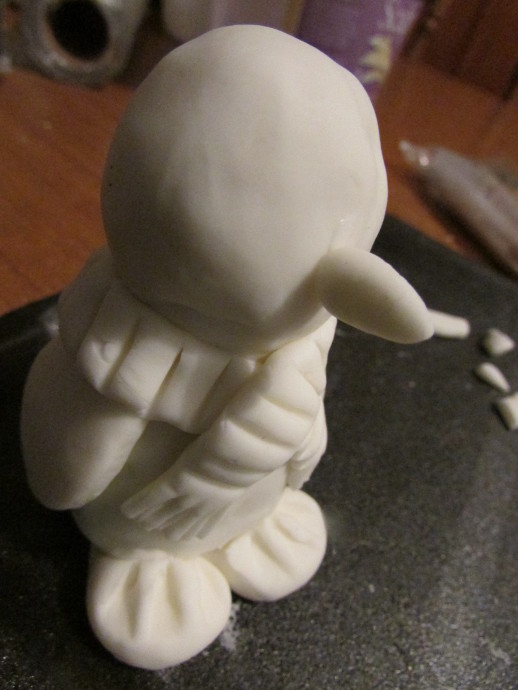
Shape and pinch a hat.
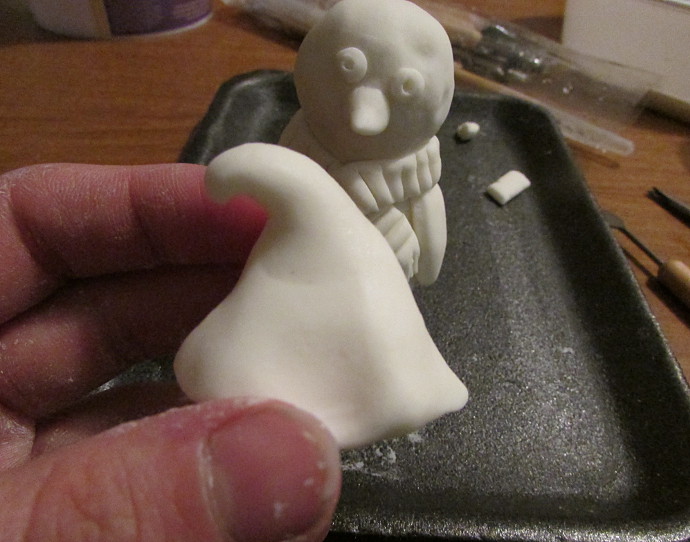
Put the hat on the penguin’s head, and attach it well.
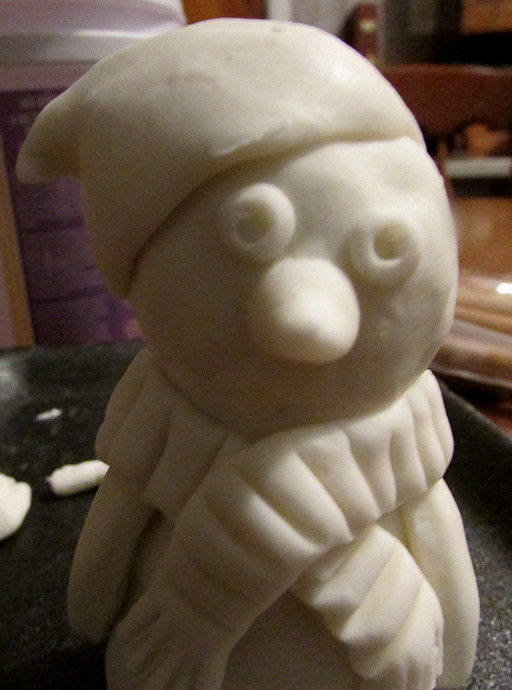
Same as with the scarf, put a small band around the hat.
Use a toothpick to create ridges. Taa-daaa! All done.