It is that time of the year again. The time when the classes are over, and I get to take stock of my art supplies I have left after another fun year of art classes. Usually, this is the time when I experiment, and come up with some fun new things to do next year. Last year I did a negative space lesson using scratch paper. ***This page contains affiliate links.***
I bought two different kinds of scratch paper and some tools for the kids to use. I bought this kind: SCRATCH ART BLACK COATED SCRATCHBOADS, which were great, and I will buy them again. I also bought this kind: RAINBOW COLORS SCRATCHBOARD, which were a lot drier and harder to scratch on. The rainbow ones made a great play time, but we didn’t really use them for art. I also have purchased these ENGRAVING TOOLS to do the scratching with. We had a great time using the scratchboards.
After the year was over, I noticed that I had a lot of little pieces of oil pastels left over. Lots and lots of little pieces. What else is there to do with oil pastel leftover pieces other then make your own scratch board.
Here is how to go about it, and how it turned out!
How To Make Scratch Paper Art On Homemade Scratchboard:
What you’ll need:
* Oil Pastels. I used THESE for this project, they worked great.
* Paper. I used Strathmore Mixed Media Pad, and it held up really well.
* Black Paint. I used CraftSmart Paint. I have tried a few other brands, but they didn’t work as well. They were either too thin or too thick. CraftSmart worked best, it was smooth and ‘scratchable’ without peeling.
* You’ll also need a paintbrush and some scratching tools: a toothpick, a wooden skewer or a set of engraving tools.
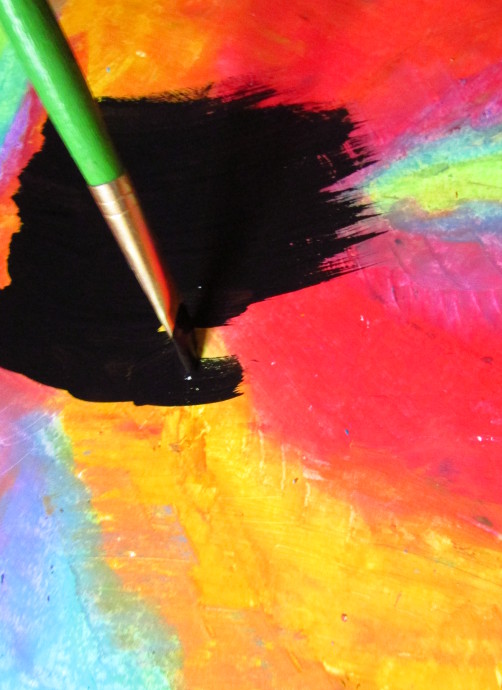
Start by using the leftover pastel pieces to color a heavy duty paper. Press hard. Make the pastel layer nice and thick. You can even draw a picture! Just make sure to cover every little bit of the paper with the pastels. There should be no white paper showing through.

After every little piece of white is covered, use the black paint to paint over the entire thing! I diluted my paint with a few drops of water, but just a touch. You don’t want the paint to be too thin or too thick.
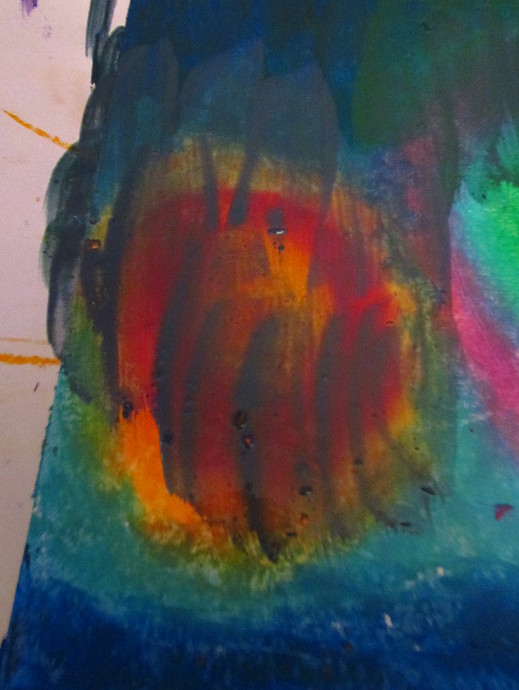
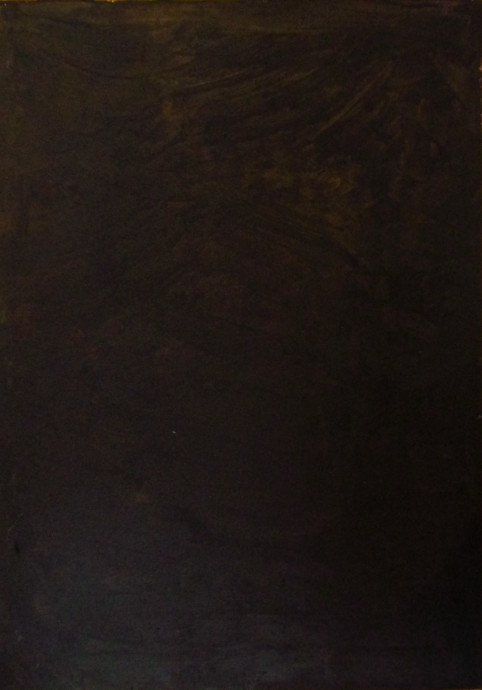
When the paint is too thick, it will come off in a layer when you try to scratch it. When the paint is too thin it looks like this:
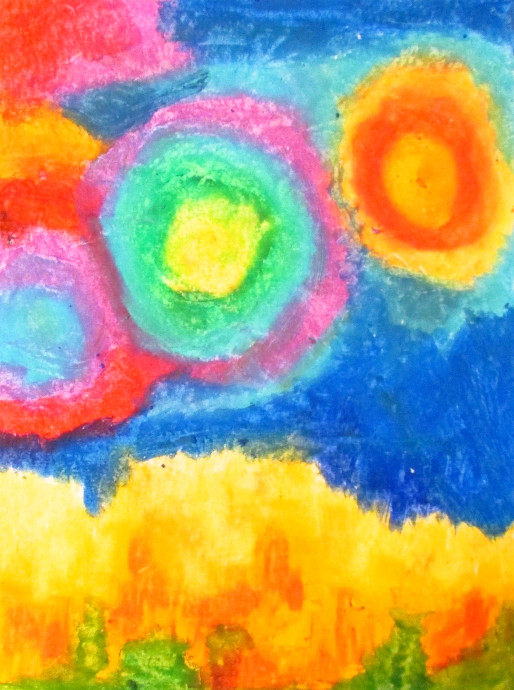
You want the paint to go on in a nice even layer, like this:
Until your entire paper looks like this:
Allow the paint to dry completely, and begin scratching your design on it:
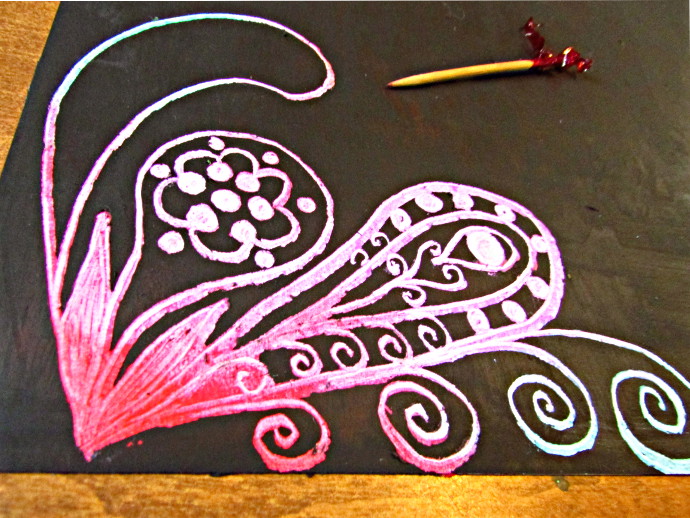
I actually found that the wooden tools were better for this scratchboard then the metal ones.
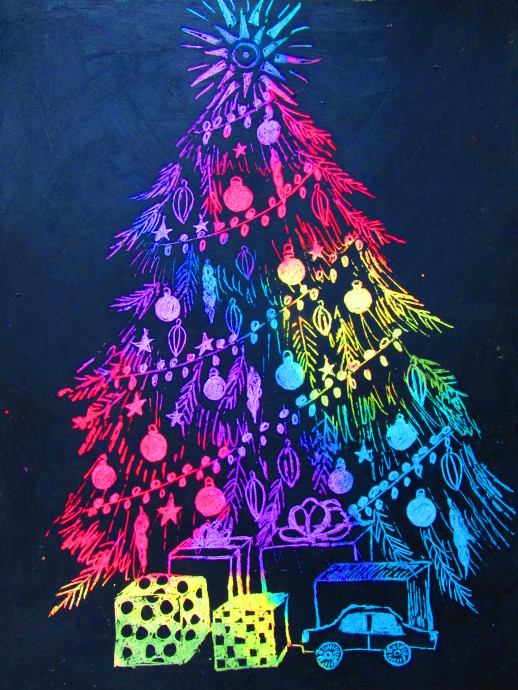
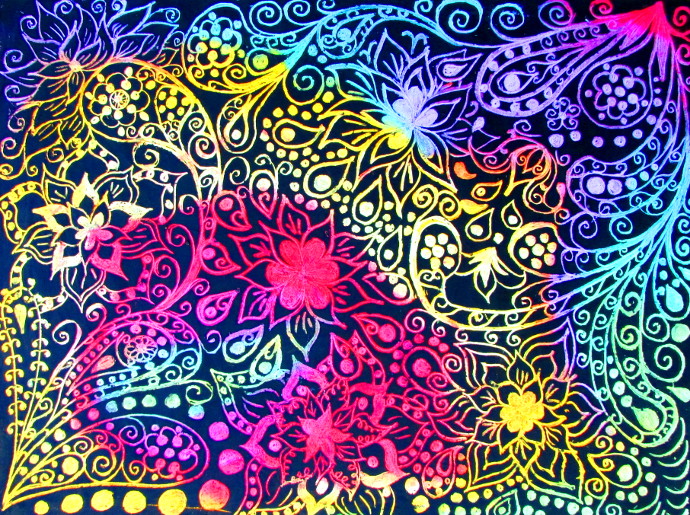
Here is the final result. It was a lot of fun!
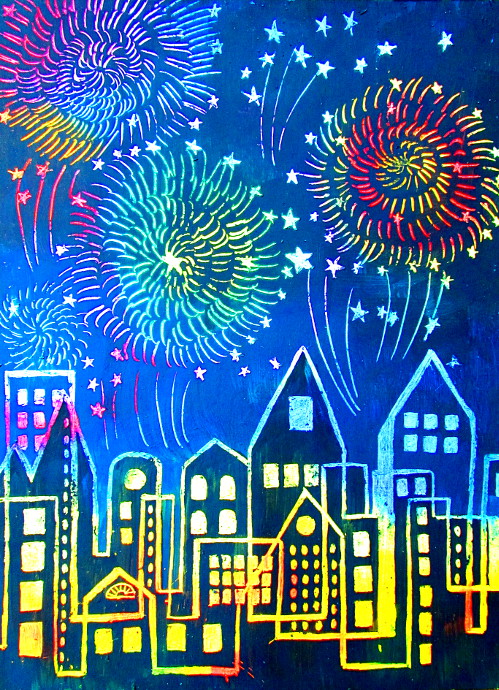
I love that this project covers so much! You can incorporate use of space, color theory, line, negative space, composition and more! Not to mention how much fun it is to make your own scratch paper!!! I’m definitely going to use this project in the next year.
Update for this year. This year this project fell around holiday time in December. What do you love about this time of year?