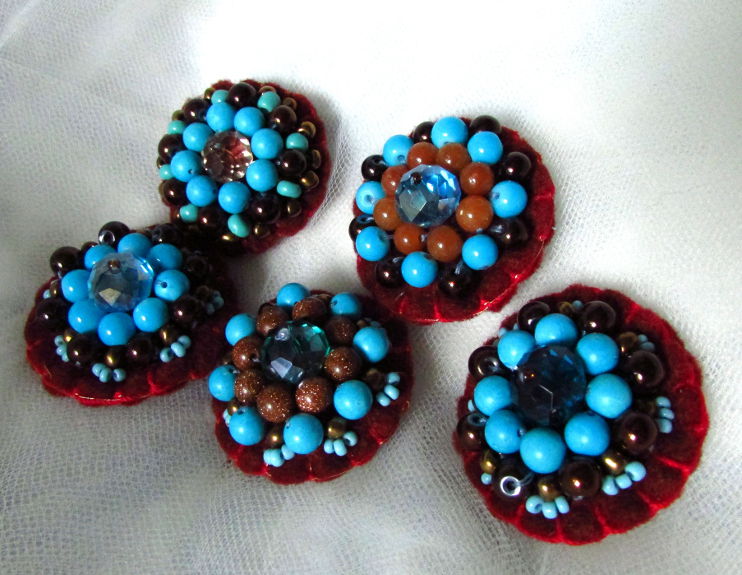
These beaded felt pins are a small craft project that are fun and really simple to make. I made some to give as presents, and to sell during a craft fair.
What you will need is a piece of felt in the color of your choice. Some beads: a big one for the center, medium ones to go around the center bead and small ones for the edges. Two different needles, one is small for the beads, and a large one for the yarn. You’ll also need some yarn, string to sew the beads on with, scissors, a glue gun, and a pin that you could sew the felt on.
Go ahead, give it a try!
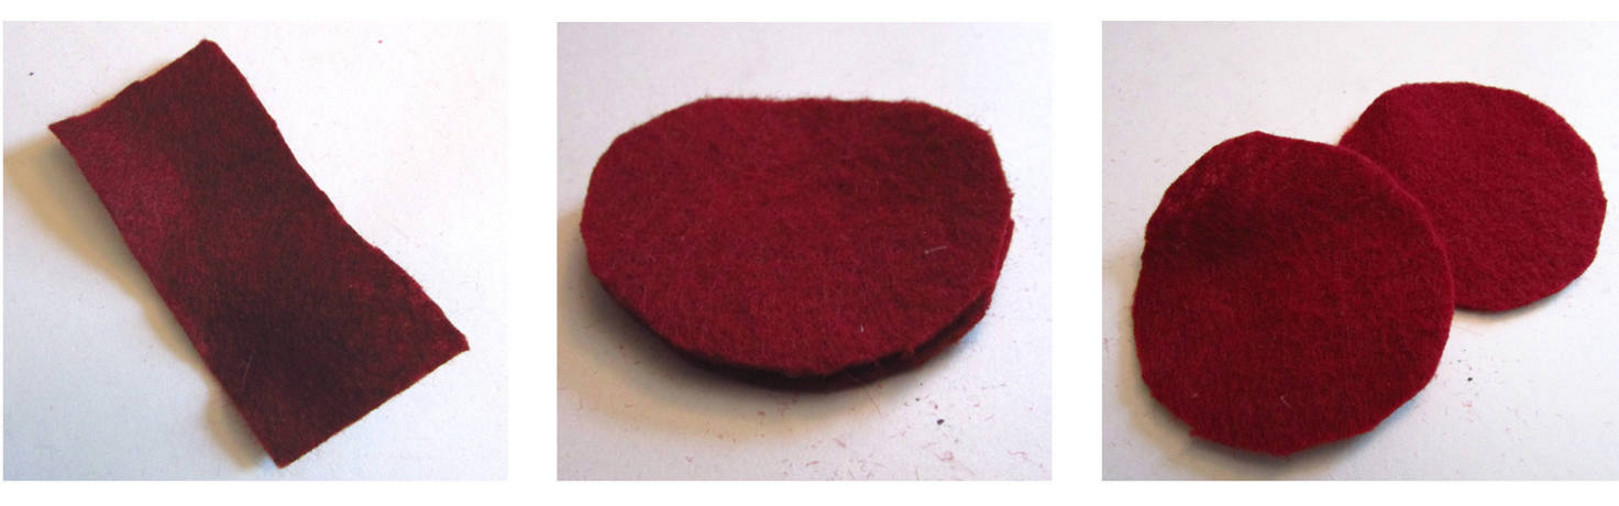
The first thing to do is to cut out a rectangle out of the felt you have. It should be double the size of the size of the pin you would like to make. In my case it was about 1 1/2 inches by 3 1/2 inches. Fold it in two and cut out a circle, just gauge the circle, it doesn’t have to be perfect. Now you should have two circles that are exactly the same size.
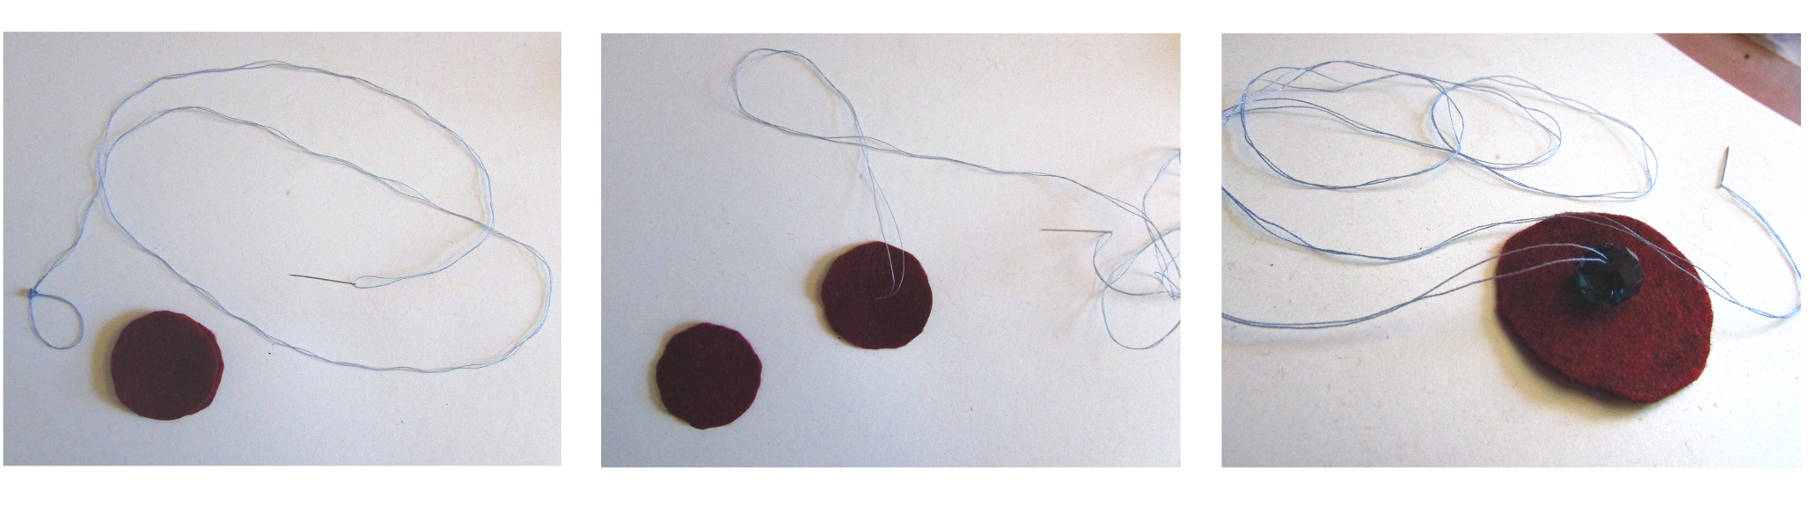
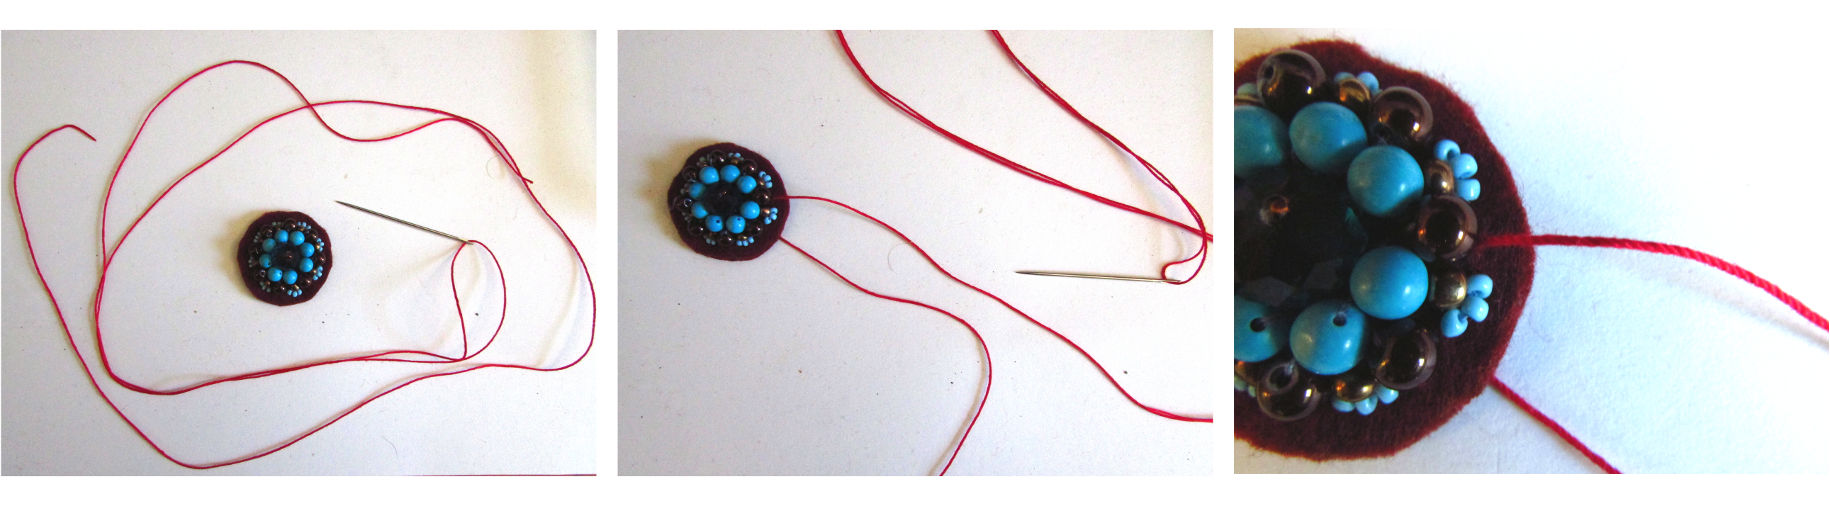
Before you go on, attach the center bead nice and tight. To do that put a little seed bead on the needle, then push the needle back into the center bead and the felt. Now bring the needle back up through the felt, center bead, put it through the same seed bead and back down. Do this a few more times, until you are confident with how well the center bead will hold.
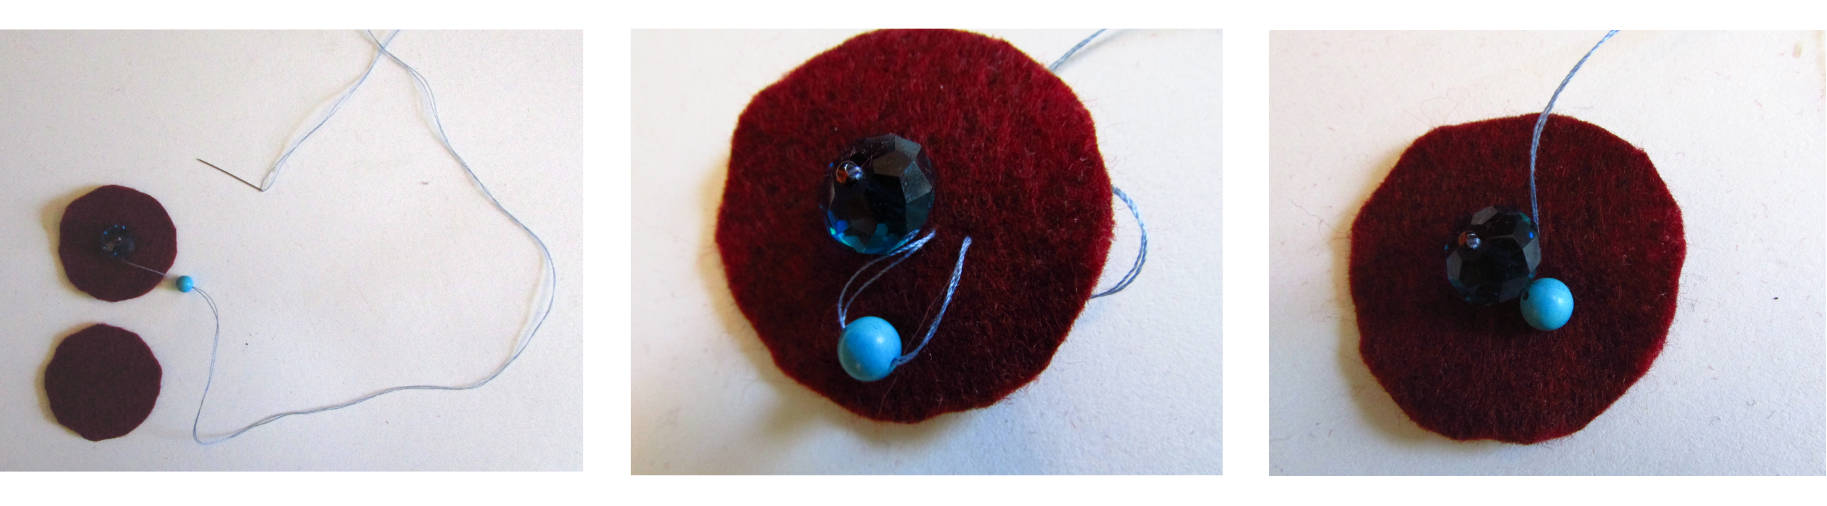
It is time to put the medium sized beads around the center bead. You start by bringing the needle up through the felt in the spot where your medium sized bead will go. Put the bead on, and push the needle back down through the felt. Bring the needle back up through the felt where your next medium bead will go. Keep going around in the circle around the center bead until it looks like a flower. Look on the picture below:
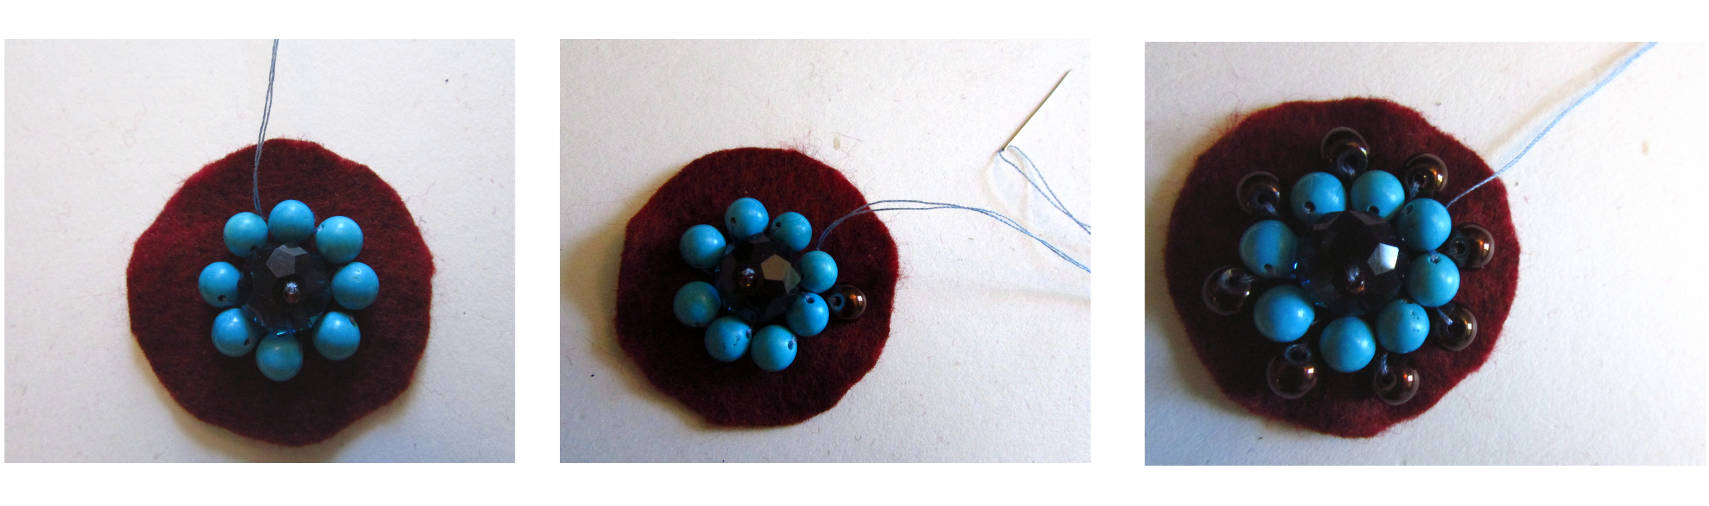
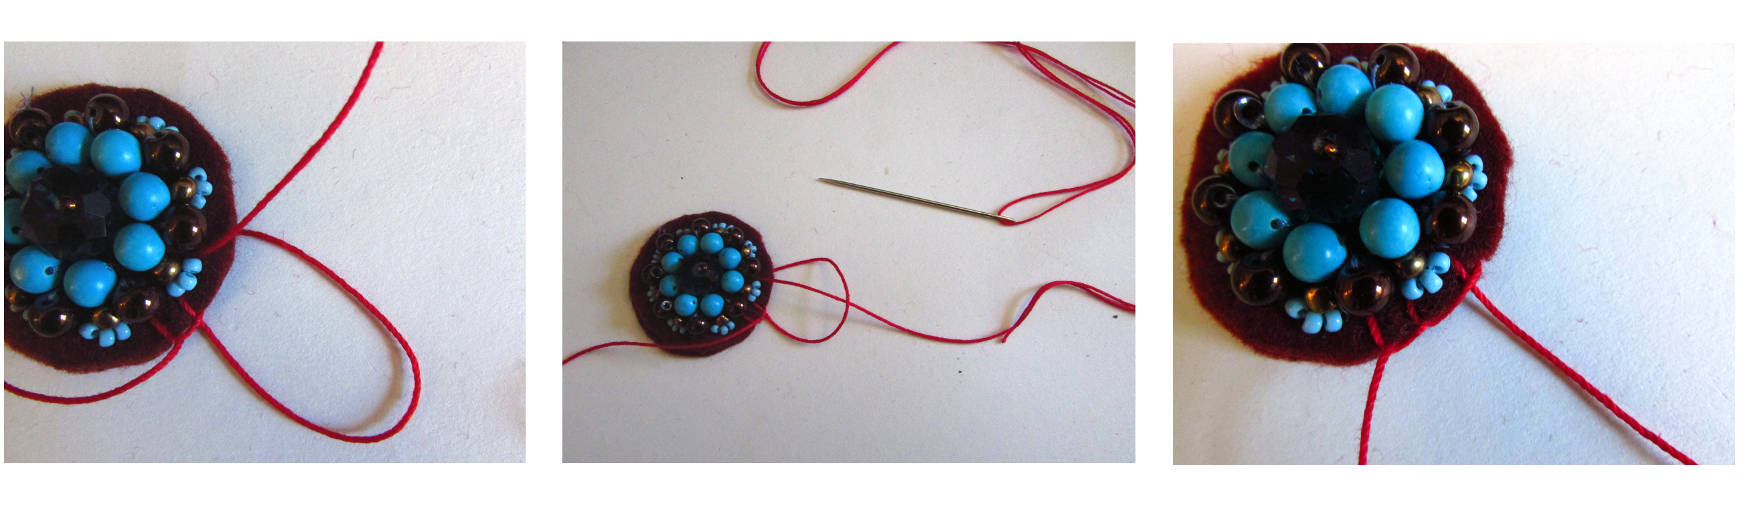
Do another layer of medium sized beads. I chose ones that were a little smaller then the first ones, and a different color, for contrast. Also, put the next layer of beads positioned in between the beads of the first layer, like in the pictures above!
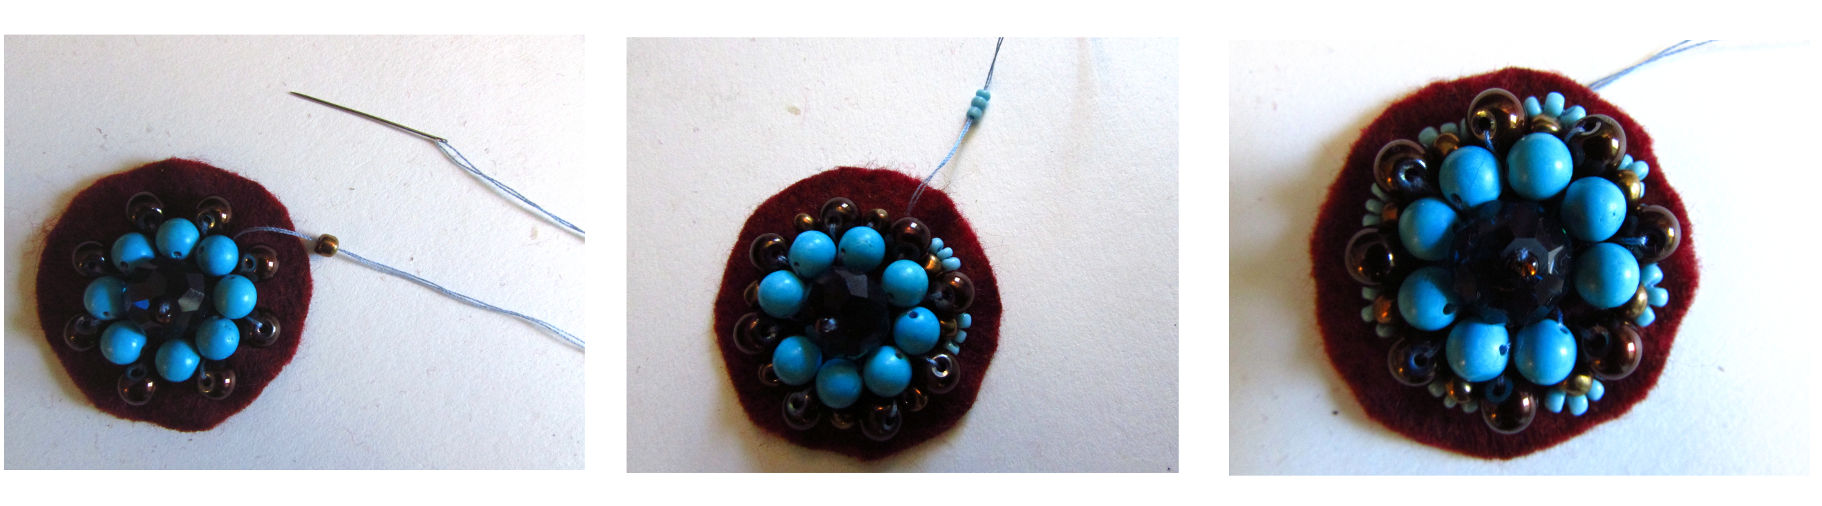
Next layer I chose a much smaller bead, and for the last one I put three seed beads at a time. Keep working until you have filled up most of the felt circle. Just make sure to leave some space to sew the other circle to this one with the yarn.
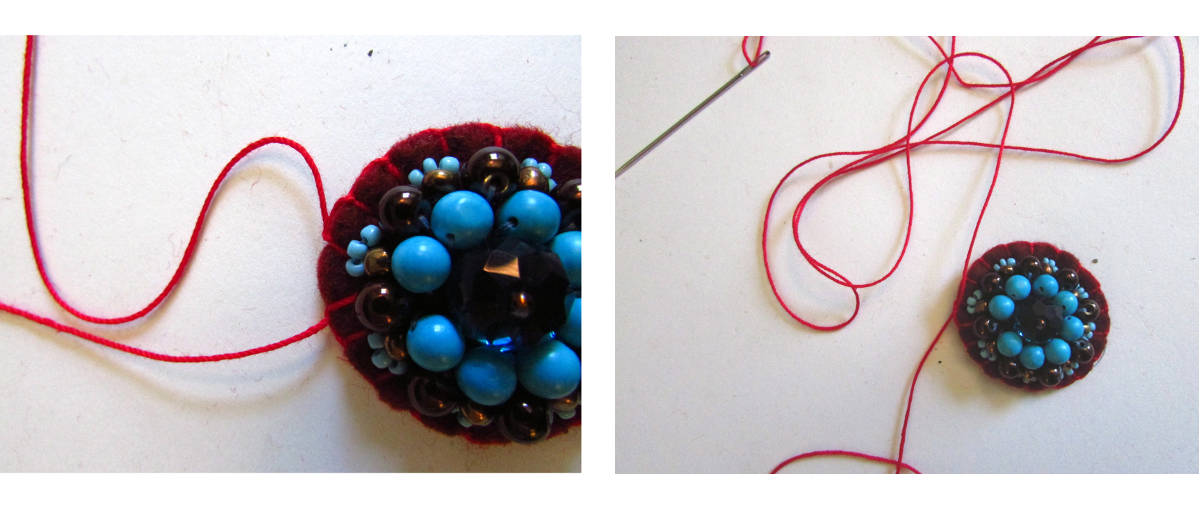
Now you’re all done sewing on the beads, it is time to tie off the needle. Just in case if you don’t know how, the photos above show step by step instructions on how to do that. First, bring the needle to the back of the felt for the last time. Secondly, put it through any stitch that’s already there, forming a loop with the string, like in the second photograph. Then, put the needle through the loop once, and twice (photos 3 & 4). Finally, pull the on the string, the loop will tighten, and make a tie. Then you can cut the string. Just don’t cut it at the base, leave a bit of it hanging out (photo 5).
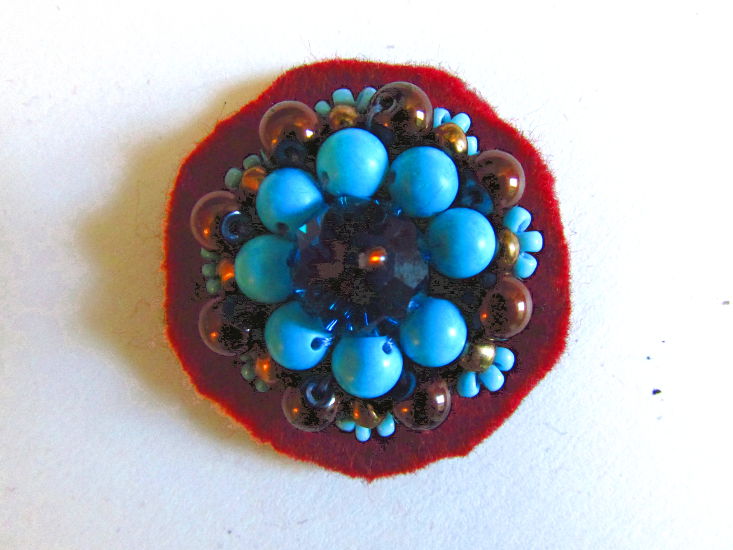
This is what your beaded felt pin should look like at this point of the process.
Now put the other circle on the back of the one you’ve been working on. It is time to stitch them together. Put a piece of yarn through the large needle. From below up, push the needle through both felt circles.
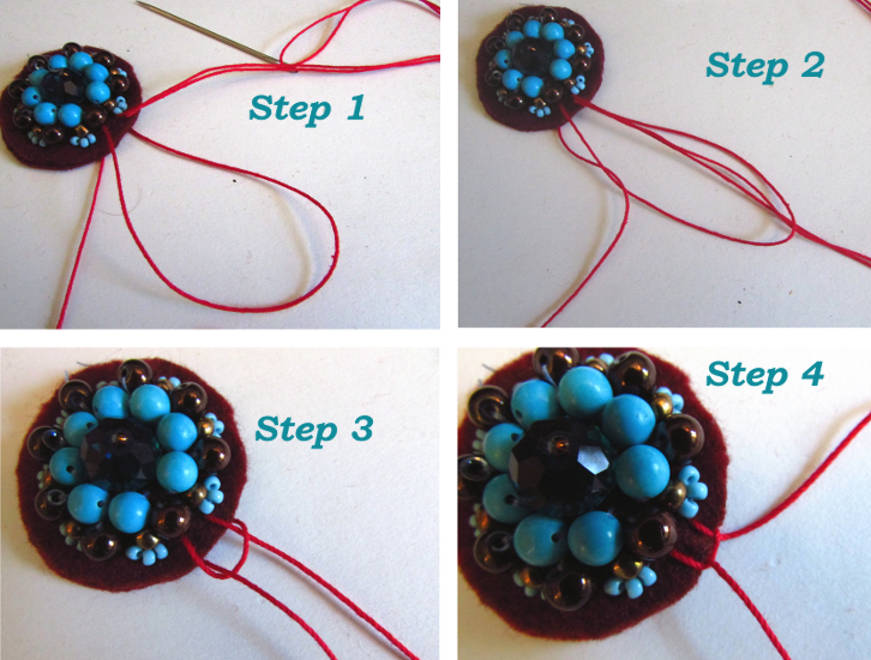
Above are instructions on making the first stitch.
STEP 1: After you put the needle from bottom up through both felt circles, leave about 5 inches of yarn loose, bring the needle down again and do the same thing, push it through from bottom up. It will form a loop.
STEP 2: Put the needle through the loop, and the loose end of the string through the loop as well.
STEP 3: Gently pull both ends of the string. Don’t make it too tight!
Step 4: Adjust until your stitch looks like in the photo # 4 above.
To make the next stitch, it’s the same thing, except without the loose end. Bring the needle down again and push it through both felt circles to the top, form a loop, put the needle through the loop, and gently pull forming the stitch. Don’t make it too tight!
When you do the entire circle you will come to the end, like in the picture above. Tie the string with the needle with the loose end together.
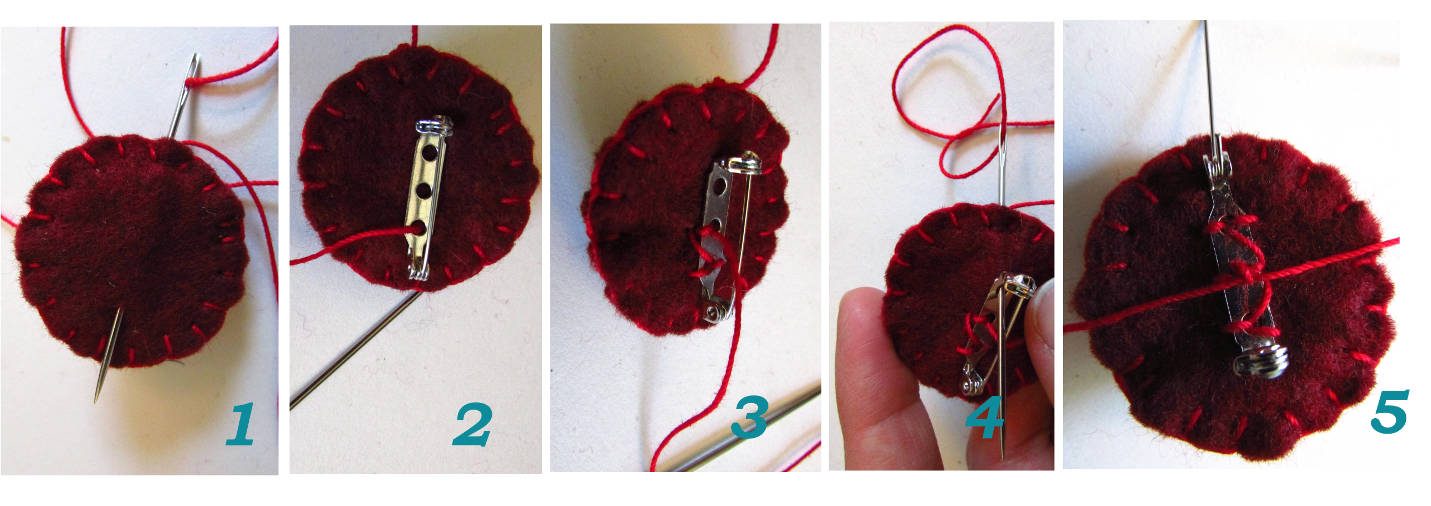
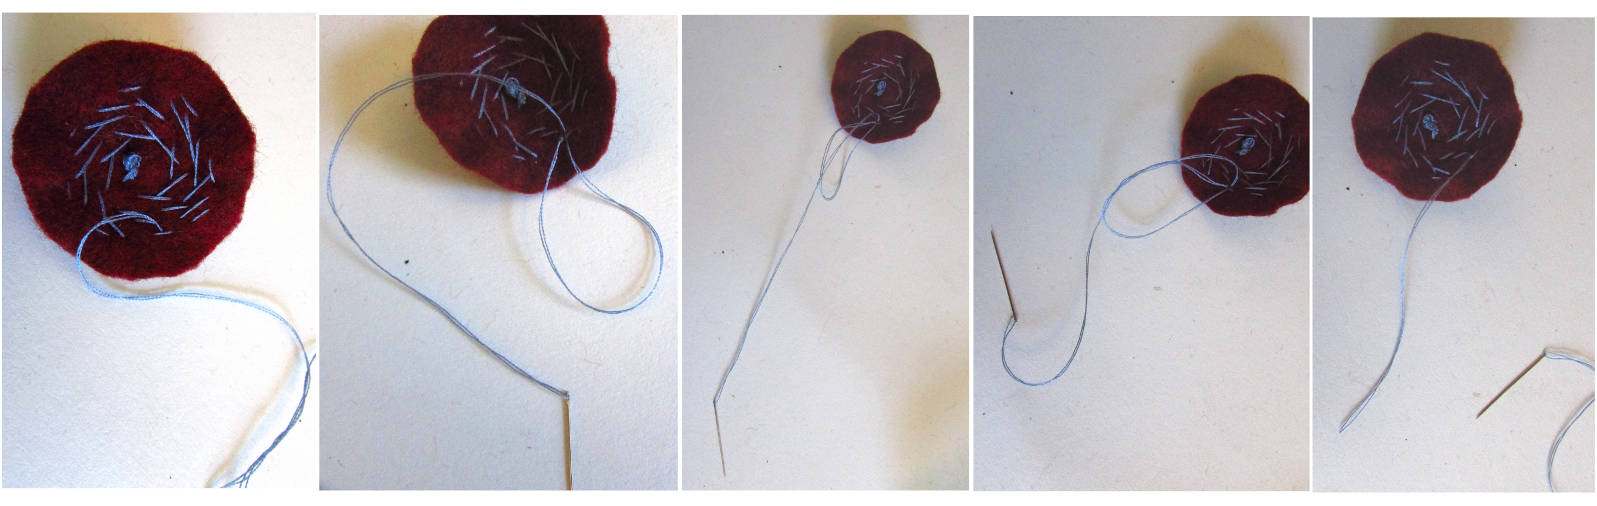
Now it’s time to attach the pin to the back. First, gently push the needle in between the two felt circles, and take it out about 3/4 of the way into the circle (picture 1). Put the pin on the needle through one of the holes (picture 2). Stitch the pin on half way (picture 3). Take the loose end, put it through the needle, push it between the two felt circles and push it through the opposite hole on the pin (picture 4). Stitch the second half of the pin on, and when they two ends of yarn meet, tie them with a double knot and cut them off (picture 5). Again, don’t cut the yarn at the base, but leave a little bit.
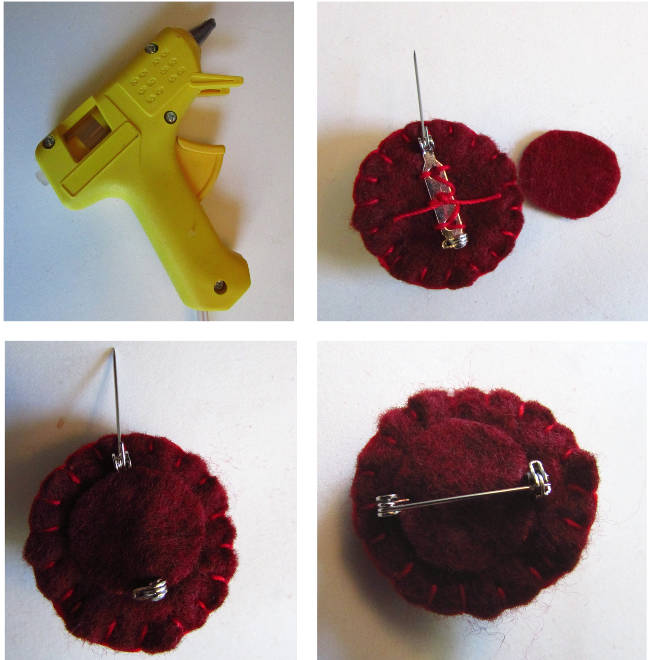
Now to finish it off. Heat up the glue gun. Cut a smaller circle out of the same felt. Make sure it’s big enough to cover the backing of the pin, but not too big to prevent the pin mechanism to open.
Use the glue gun to glue it in place like in the photos above.