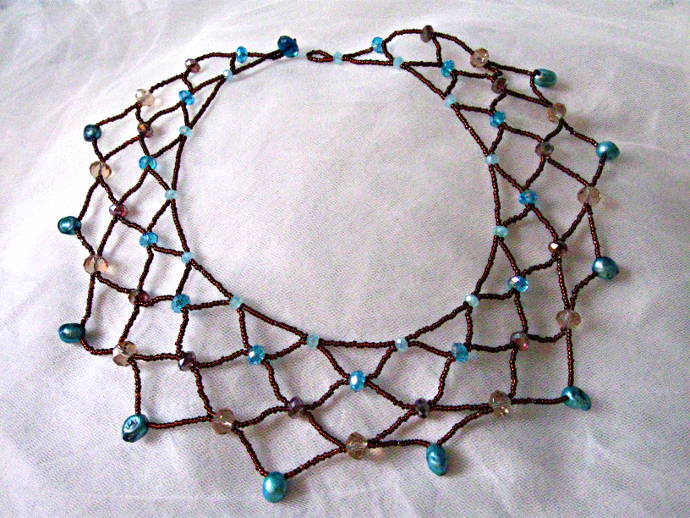
Every time I go to a craft store I love all the colorful beads they have hanging on the walls, all the shiny colorful displays there inspire me to make something right away. Here are step by step instructions on how to make this beautiful beaded necklace. Using glass seed beads, crystal beads of various sizes, pearl beads, needle and string. The pattern for this beaded lace necklace is simple and drapes nicely over the neck. It makes a beautiful gift, and is easy and fun to make. I did my best to take photos as I was making it to make it clear as to what to do in each step!
Here is what you will need:
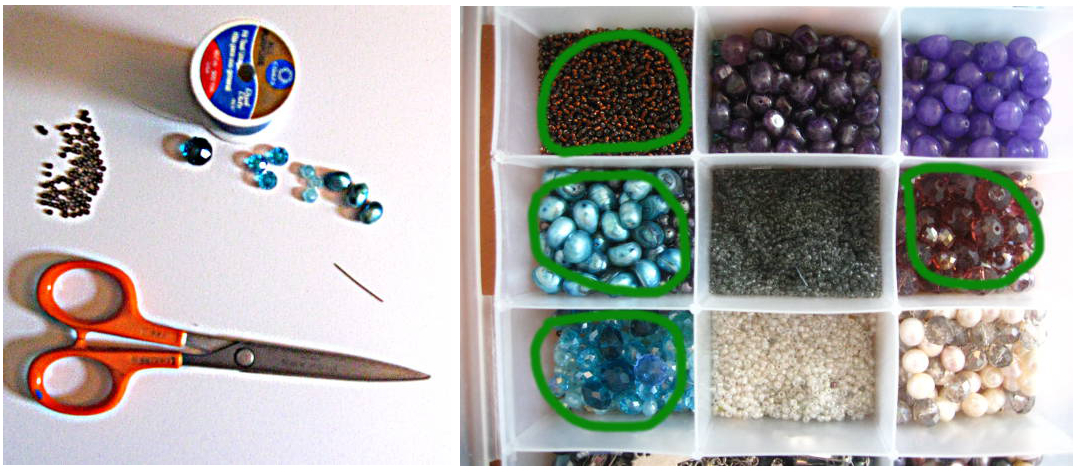
You’ll need a spool of strong thread, I used “Coats” string for this, and it held just fine. You will need a lot of glass seed beads in the color of your choice. You will also need a tiny needle for the beads. Many beads are ok with a bigger needle, but some seed beads tend to be smaller, and pearls definitely need a tiny needle. You will also need some glass/crystal beads. I used three different sizes, and five different colors. I also used tear drop pearls to finish it off. For the seed beads, I would recommend choosing ones with a larger opening so that you could fit the needle through very comfortably, and later on, when you have to tie off the threads, the larger openings in the seed beads will be very handy!
It is a good idea to make sure that you have extra seed and the other beads. It is better to have some leftover then not to have enough. Also, I always find it good to have some other beads on hand in case I feel the project needs something extra. For example, originally I was going to use only the kind of beads on the picture on top, but as I was working, I felt it needs another color, so I added the tea colored ones from my bead box.
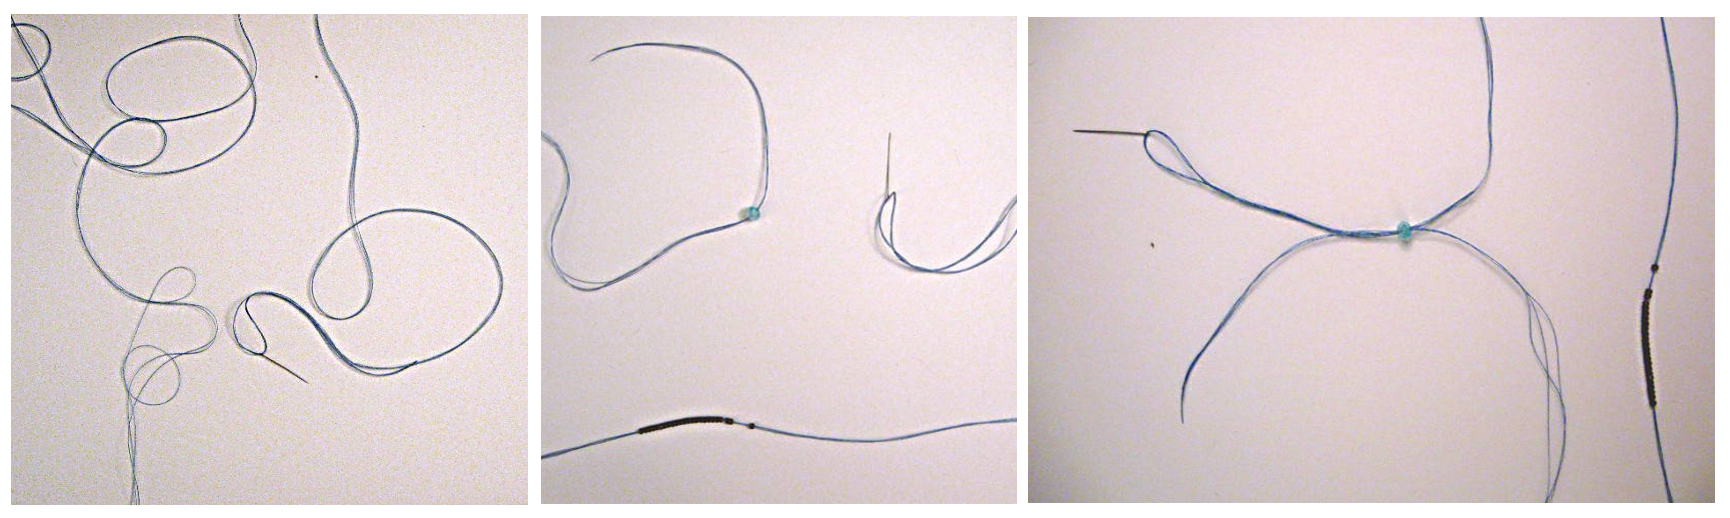
You begin by taking three pieces of thread about 6 feet long each. Just like with beads, it is better to have extra thread left over, then not have enough of it to finish the project. Put them all together through the needle eye. If you do it by hand it makes it a lot easier if you cut all the strings the same length, make sure none of the edges are frayed, and moisten the tip of all the strings put together. Then slowly give it a try.
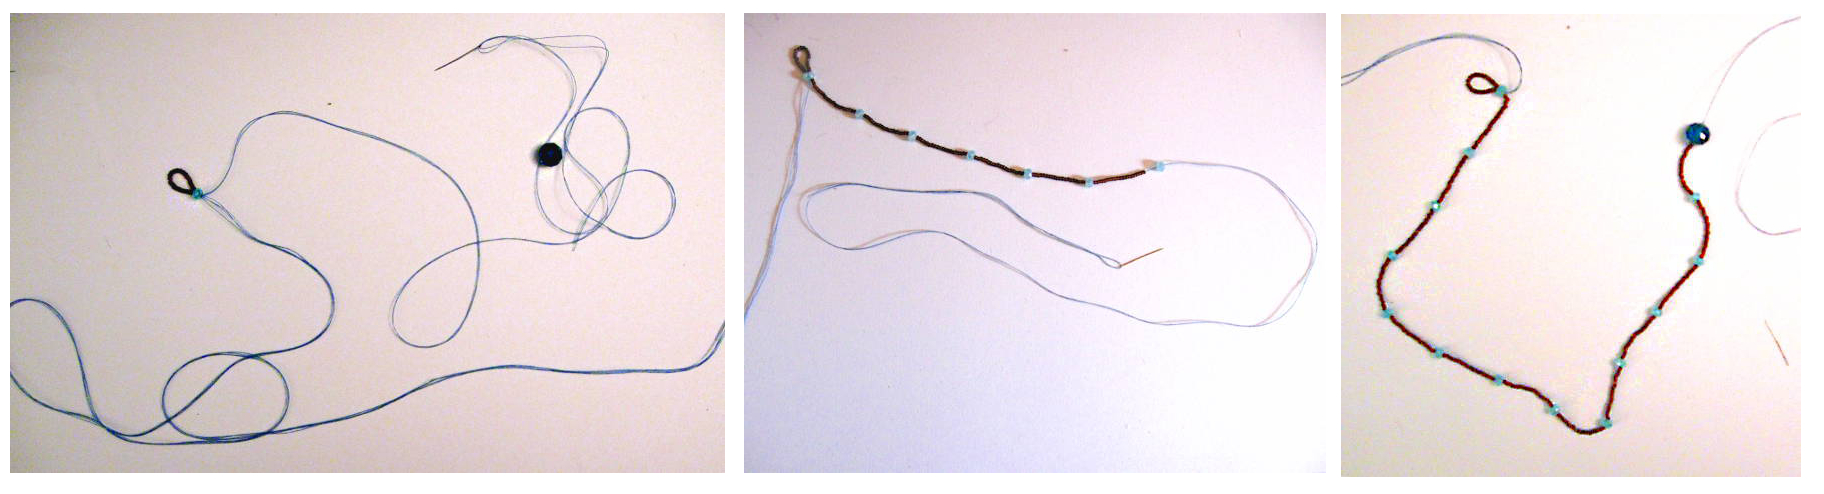
The first thing to do is to make a clasp. This particular clasp involves making a loop out of seed beads, and having a large bead on the other end of the necklace. This way when you are done, you can fit the large bead through the loop and use it as a toggle clasp.
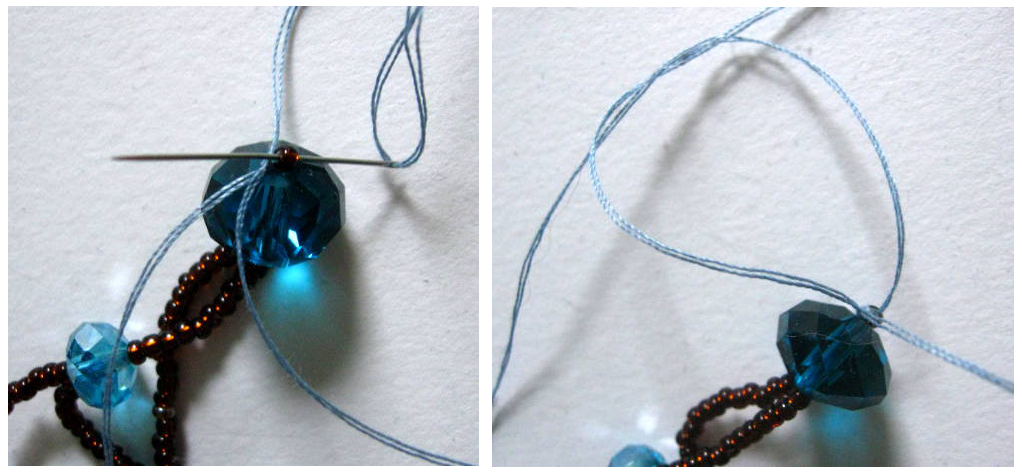
Begin by selecting a sufficiently large bead, then on your needle put enough seed beads to make a comfortable loop for the large bead, I had to use 24 seed beads to make the loop. If you take a look at the photo above with the bright orange scissors, you’ll see a single dark blue bead. That’s the clasp bead that I chose. On the opposite end of the string slip on a bead next size up from seed beads, like the blue one in the pictures.
Put the needle through the blue bead to form a loop. It makes a neat loop.
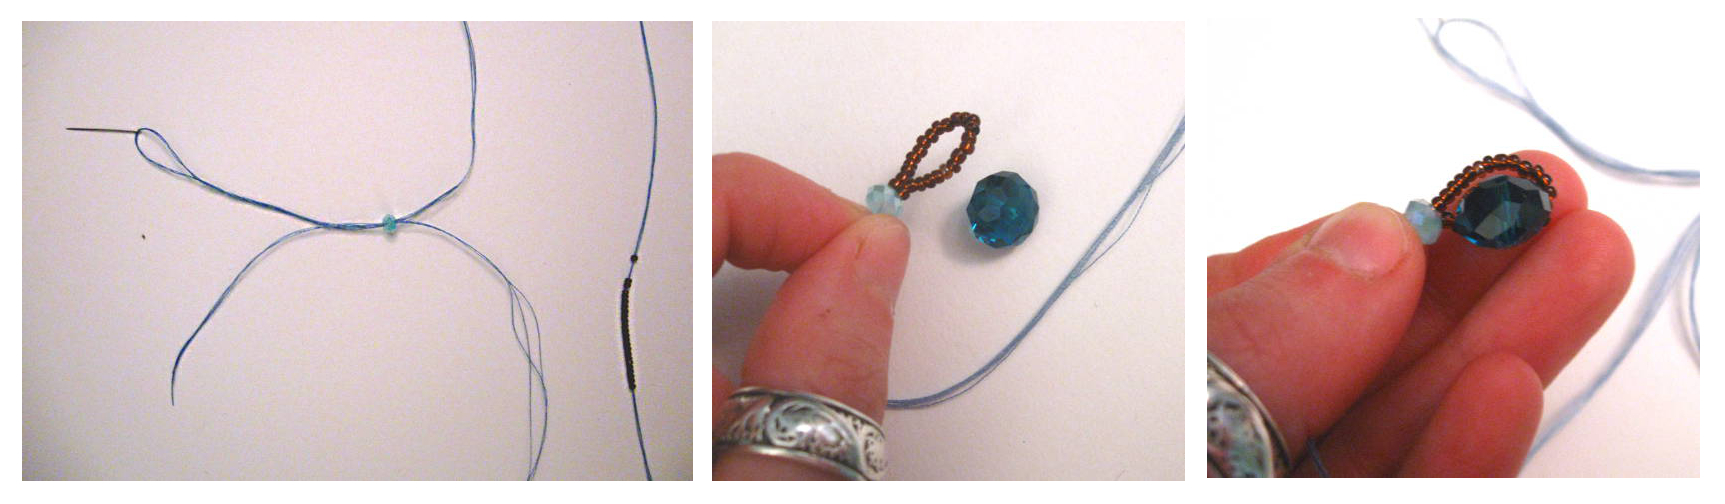
At this point you should now have six lengths of the thread, about three feet each coming out of your loop. Take the needle off the three threads, and you are ready to begin making your necklace.
The images above show the bead I selected to be on the other end of the clasp, and how it should fit through the hoop. It shouldn’t be too loose, or the necklace might fall off, and it shouldn’t be too tight or you take the risk of breaking the thread holding it all together. You might have to re-do your clasp if it’s too lose or too tight, but it’s worth it in the long run to get this just right!
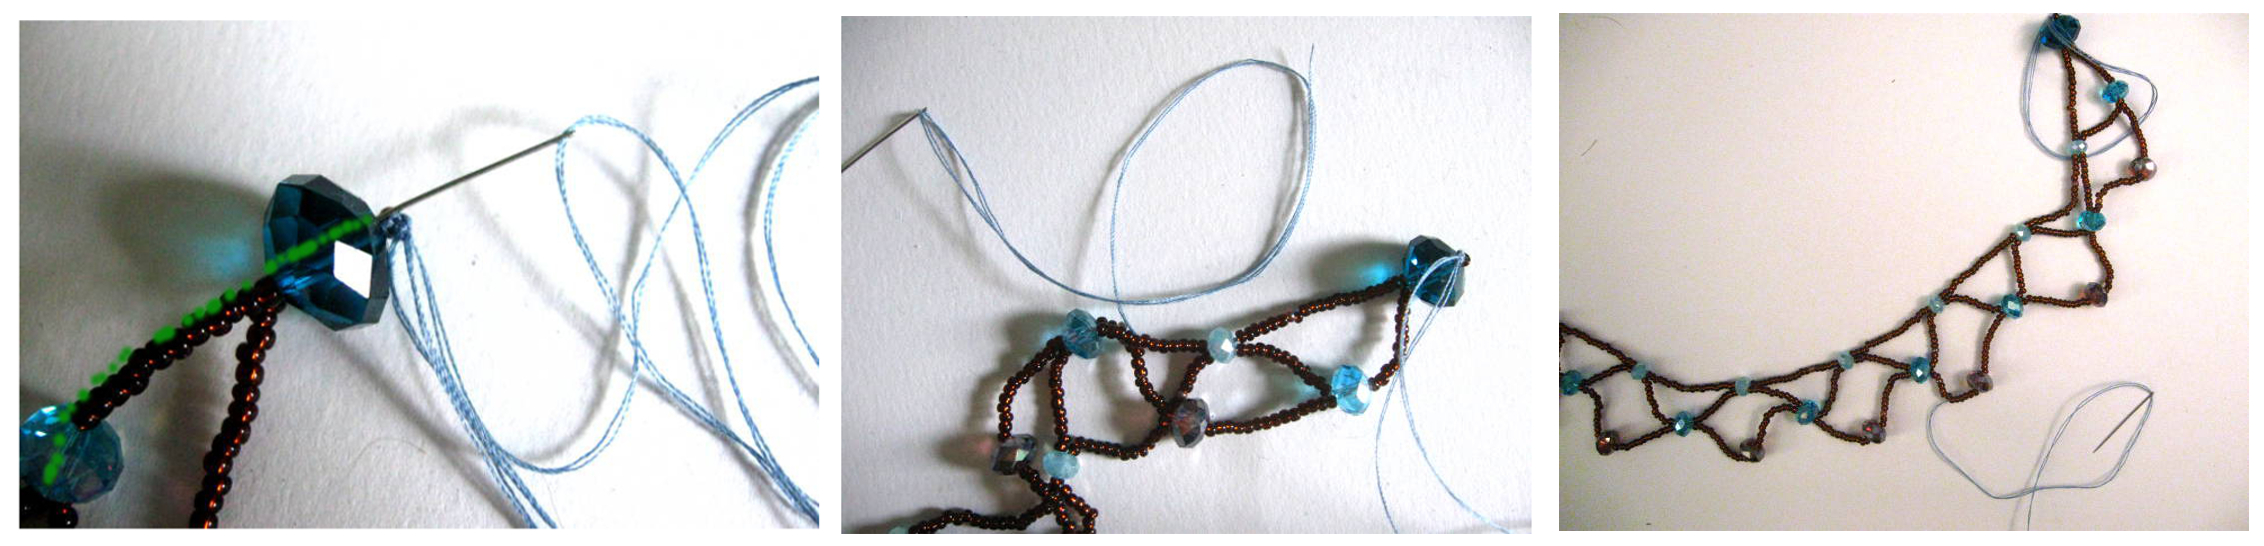
Start by selecting two of the threads coming out from your loop. Put the ends into the needle’s eye and pull them through. Just like in the photo above. Then start putting beads on. This will be your first layer, and it’s a good idea to begin with the smallest of the crystal beads. In my case, it’s the little light blue ones. Gauge the space between beads depending on how wide you want the pattern to be. I tried several different lengths, and finally settled on 20 seed beads, one blue bead, 20 seed beads, one blue bead, etc. Once you get a good length for a neck, in my case, it was 13 sections, put the large clasp bead on, pull the tread through, and remove the needle. It might be a good idea to tie a little bead at the end of the thread, so that if you drop the necklace it won’t spill.
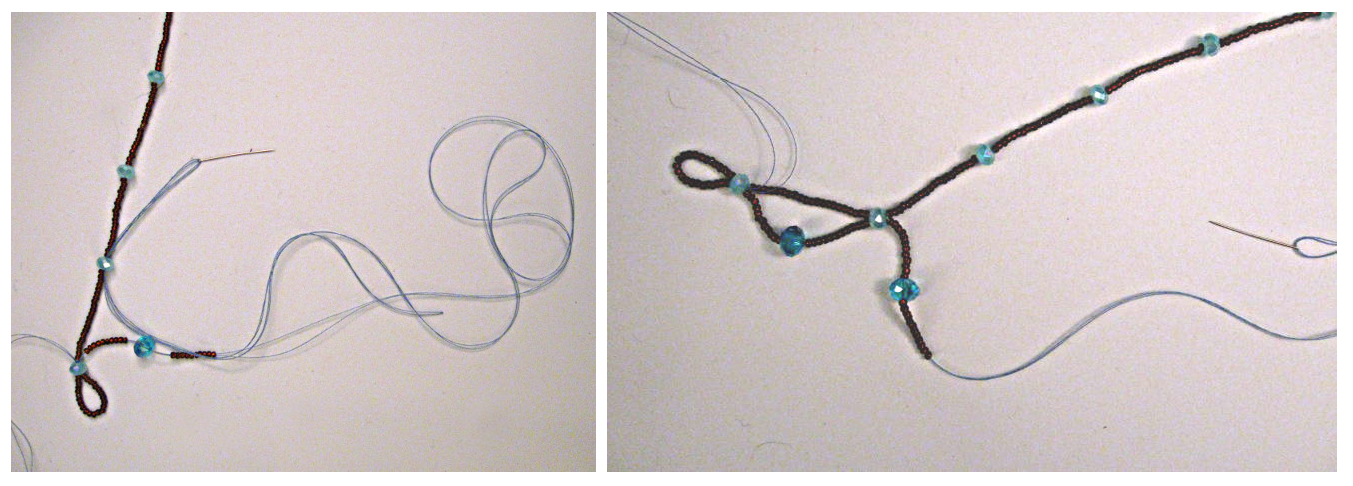
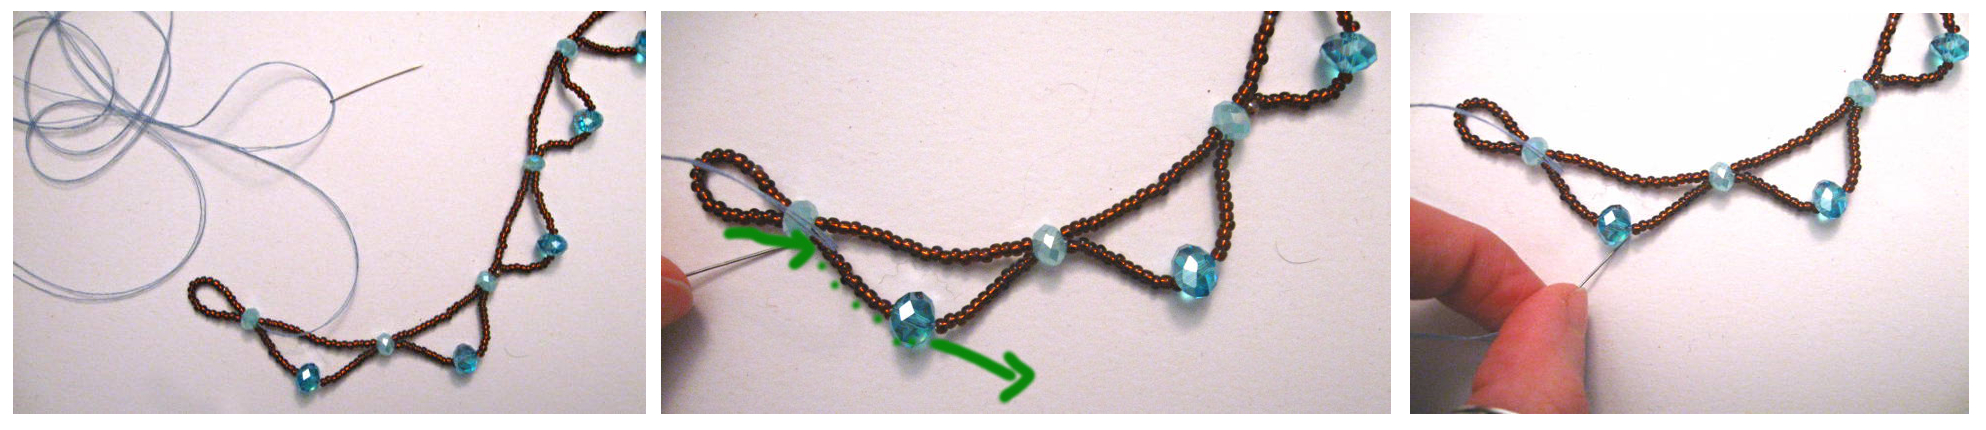
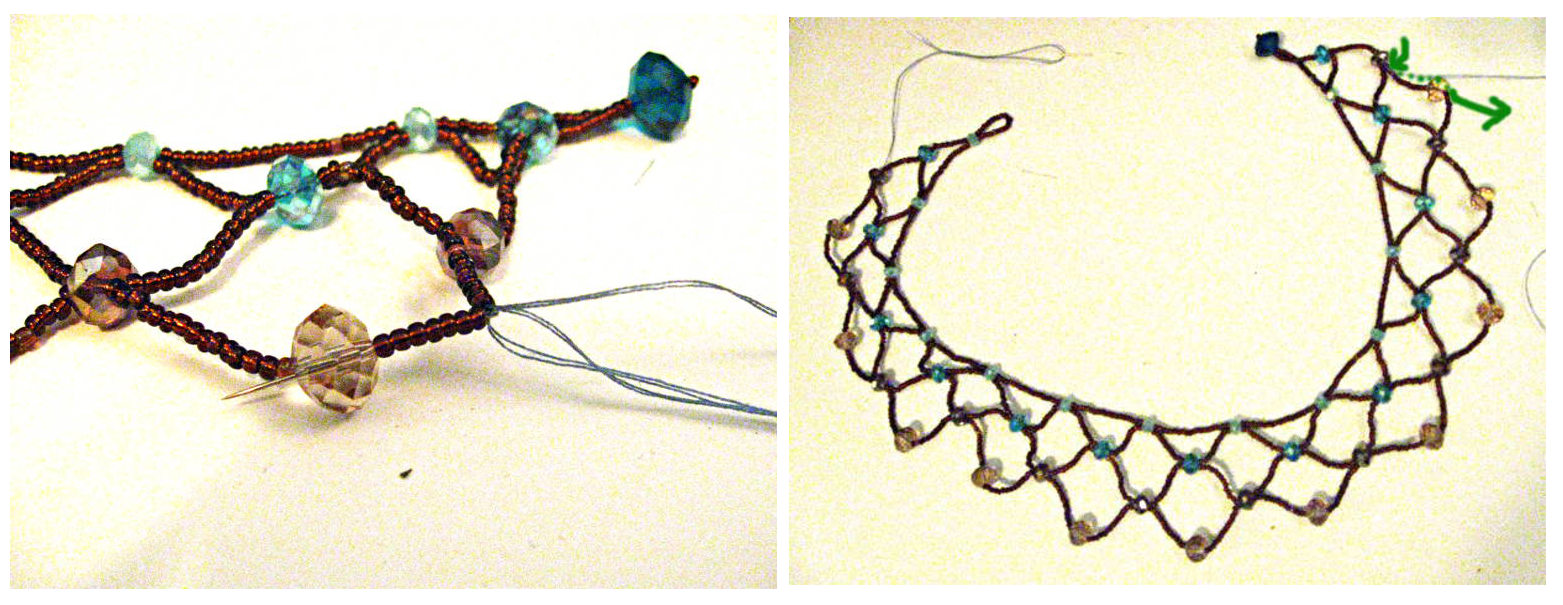
Separate the next two strings, put them through the needle just like before. Then start putting beads. You want to start with a total amount of beads for each section of the second layer being slightly more then the beads in the top section. So since my first layer had 20 seed beads in between each blue bead, in this layer I am putting on 12 seed beads, followed by a medium sized blue bead, followed by another 12 seed beads, making the total 24 seed beads and one crystal medium bead for each section.
After you bead the 12-1-12 section, put the needle through the little blue bead in the layer above, connecting the two layers, and forming a neat triangle. Just look at the photos to see what I mean. Then rinse and repeat. Keep doing it again and again until you have gone the entire lenght of the necklace. When you get to the end just push the needle through the clasp bead and take it off the string. Again, might be a good idea to tie a little bead to prevent the necklace from spilling while you are still working.
Your necklace should look like the picture on the bottom right.
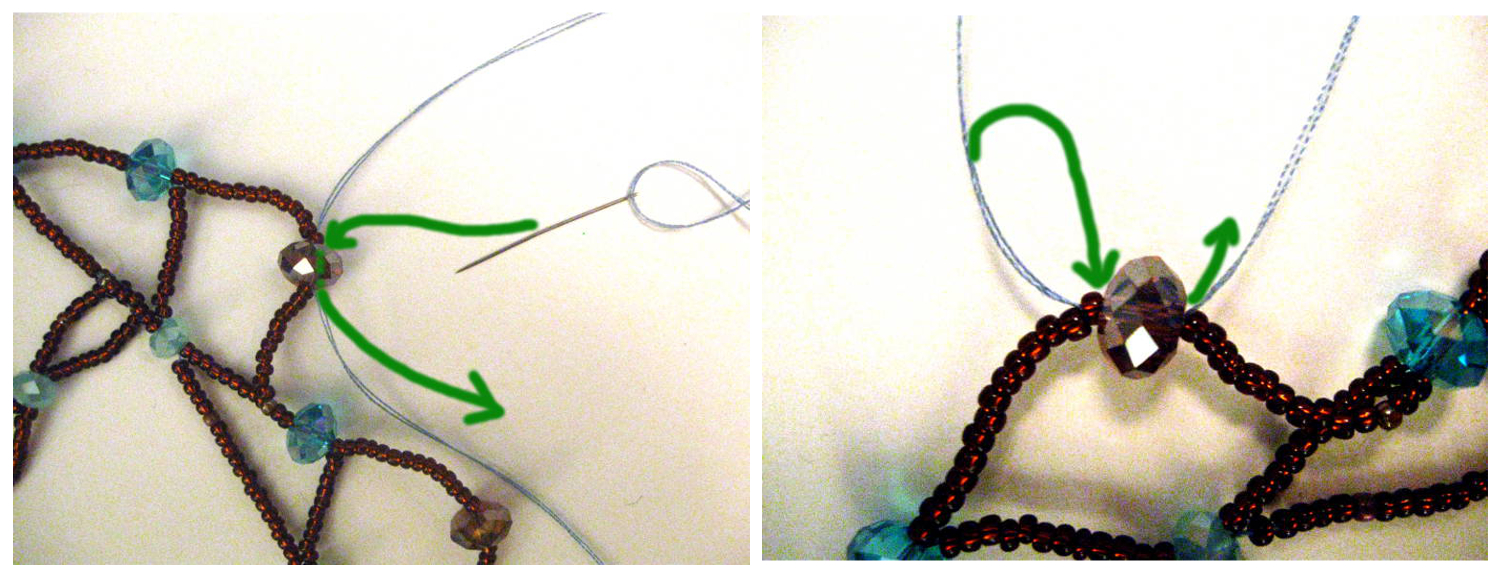
Thread the last two string ends into the needle.
Now, put the needle through the first seed bead on the second layer, push through the first 12 seed beads, then through the medium blue one and out on the other side of the medium blue bead.
Take a look below for detailed photographs:
Now your on to the next layers of the necklace.
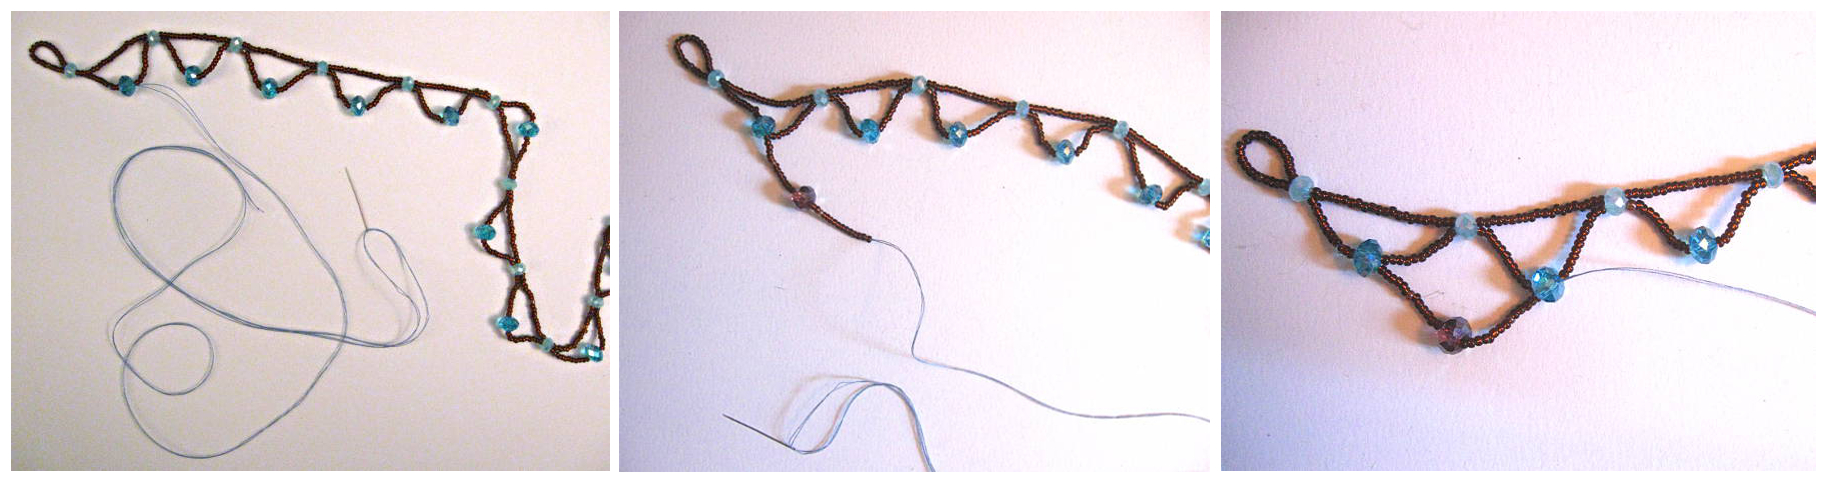
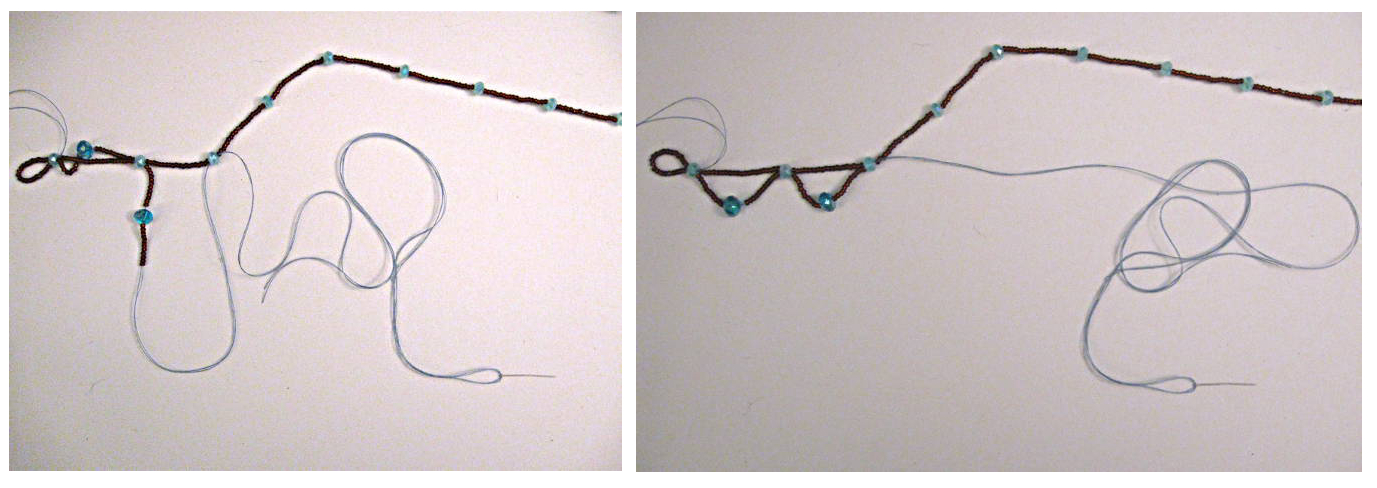
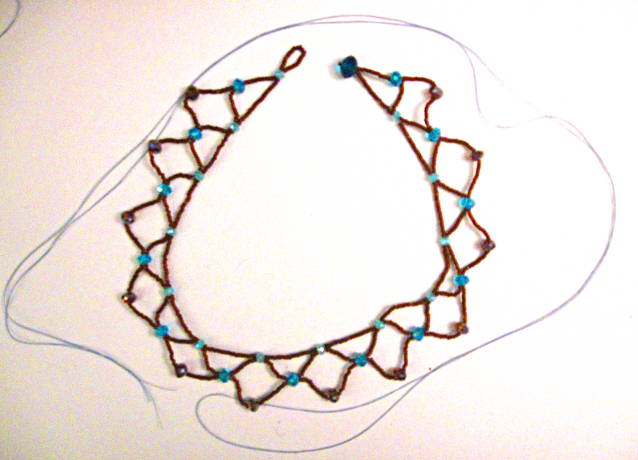
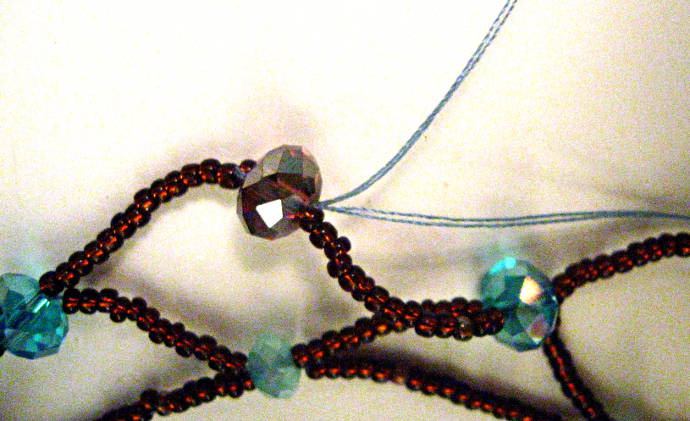
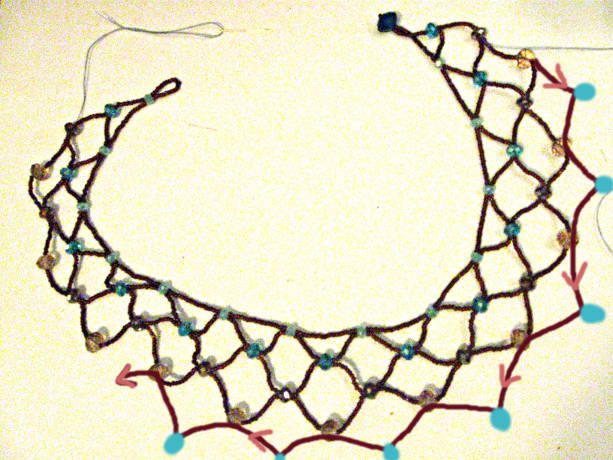
Now you can begin the third layer of the necklace. Just like with the first one, start with approximate how many seed beads you will need in each section. You don’t want it to be too few or too many. Generally, it needs to be just a few more then the previous layer (on this necklace was 24 beads all together per section in the previous layer). Since for the second layer I used 12-1-12 beads per section, for this one it’s going to be 14 seed beads, one medium sized coffee colored bead and another 14 seed beads (for a total of 29). After you get a section done put your needle through a medium blue bead in the section above, like in the photos above.
Keep repeating this until you go the entire length of the necklace, and get to the last medium sized blue bead. In my case I had to repeat this step 12 times.
When you get to the last medium blue bead, put your needle through it, then put it through the remaining 12 seed beads and through the clasp bead, pulling the string all the way out with the others. Just see the picture above!
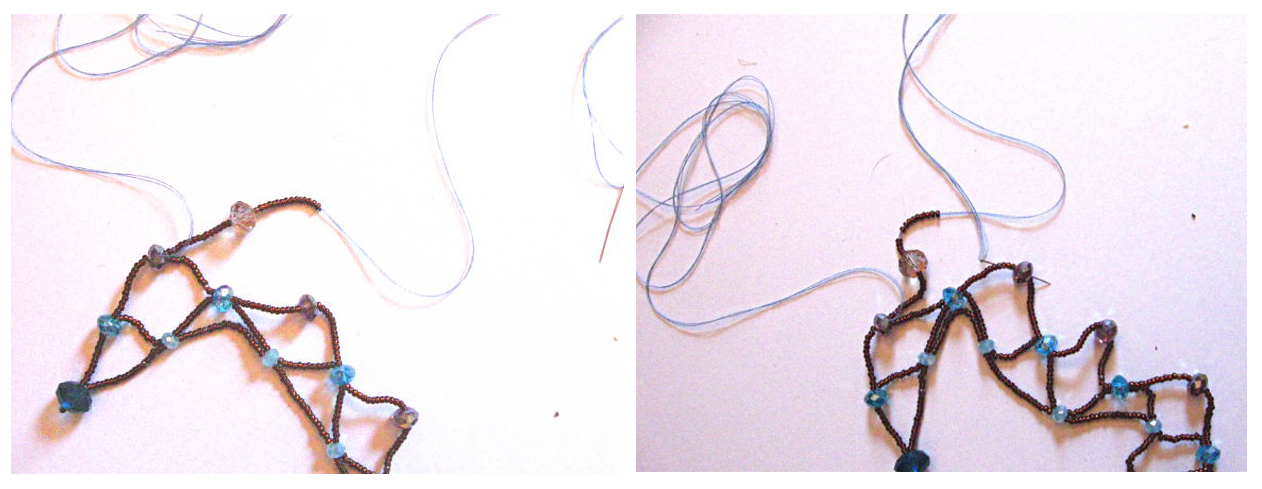
 The picture on the left is what your necklace should look like now.
The next steps are to secure all the strings, tie them off, and start on the last two layers.
As an alternative, after securing the strings you could leave the necklace as it is now, smaller then the final result. This is entirely up to you.
It is time to tie off the strings.
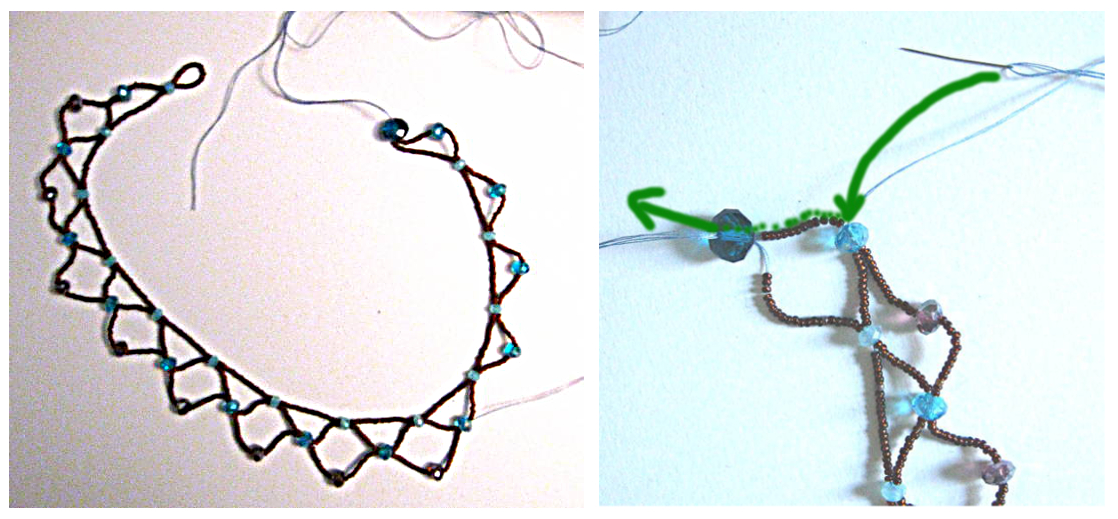
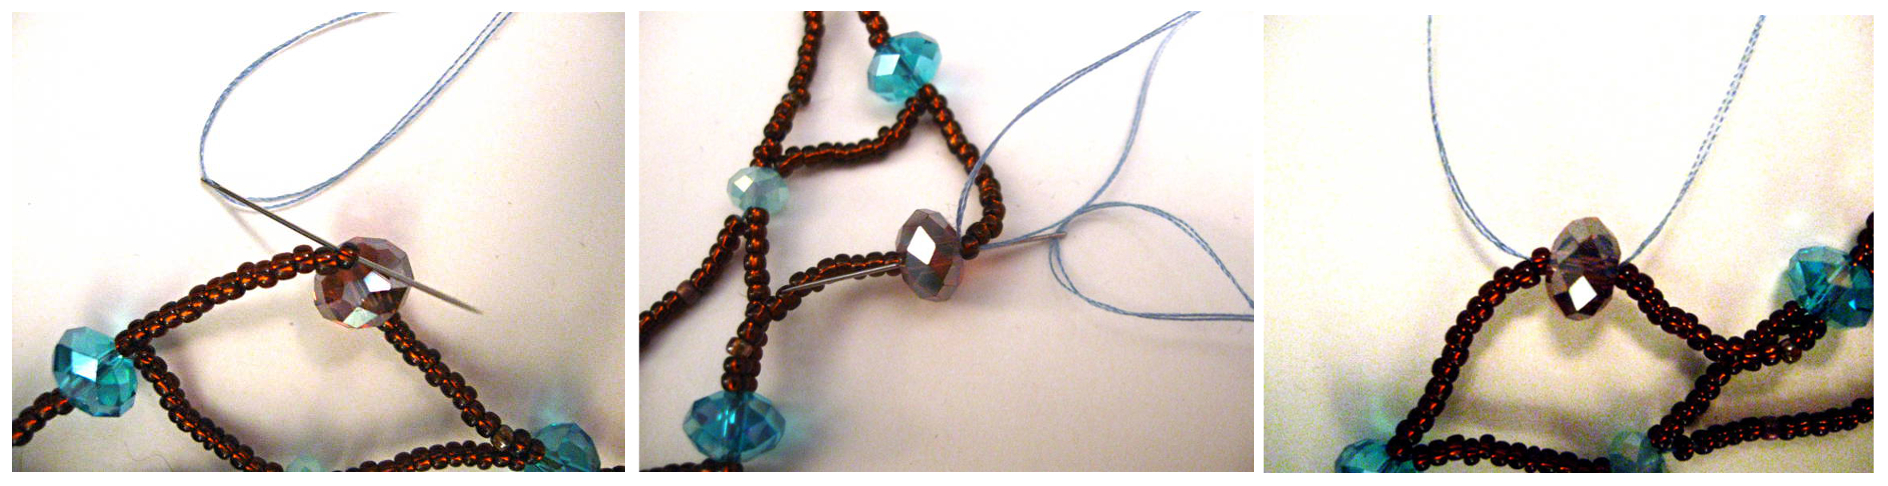
Your needle should be in the last two string ends that you just used for your third layer. First put a seed bead through the needle, push the bead all the way down to the clasp bead. Now tie the string with the needle with another two loose strands. Make a few knots, so that it’s nice and secure.
Now push the needle through the little seed bead again, and tie the strings it’s on it with the next two loose strings.
Look at the photos above.
When you are done, all your strings should be tied to each other with the seed bead preventing the necklace from falling apart.
Before cutting the strings off, put them on the needle two at a time and push them back through the clasp bead. Then pick a path for them in the necklace, pushing the needle through the seed beads, and along the necklace for about 4 or 5 inches. When you have pushed the needle sufficiently far enough, pull it out and cut the string off.
Do the same for all the other strings.
Because some beads are smaller, try to choose a different path for each of the times you do this. Otherwise, if you have too many threads in a bead, your needle might not go through. You can try pulling it gently with a pair of small pliers, but be careful not to pop the little glass beads!
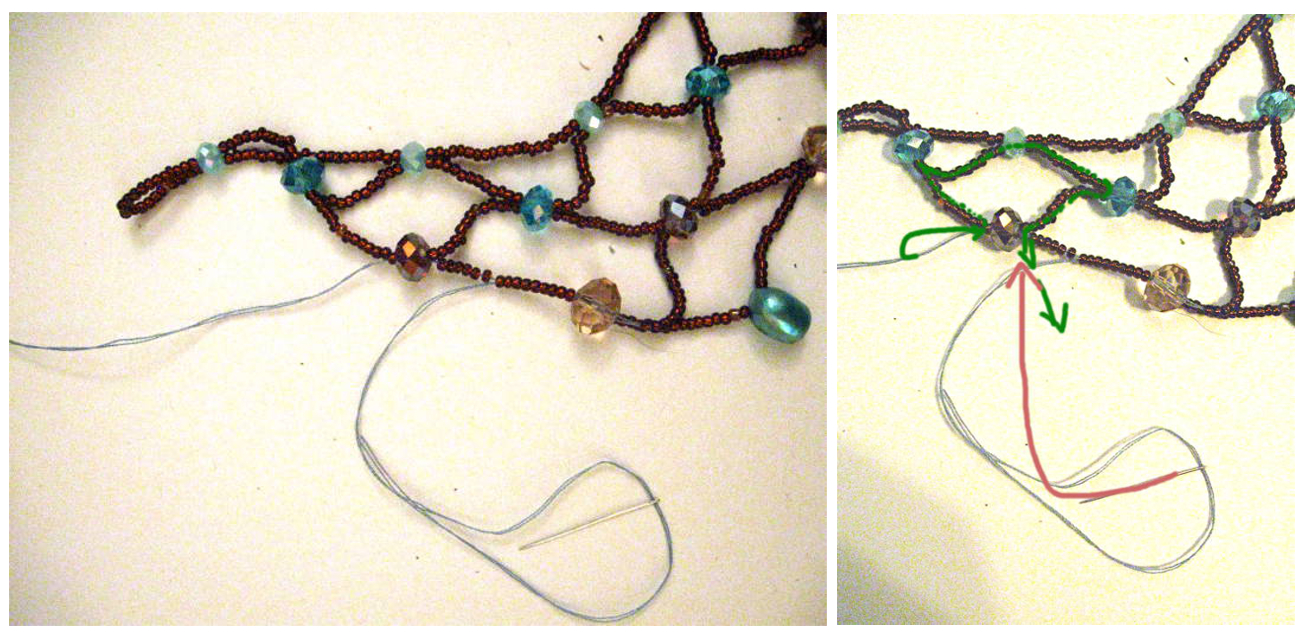
Now it is time to begin the fourth and fifth layers of the necklace. First take two lengths of thread, about 5-6 feet each, and fold them in the center. This way you will have two threads for the 4th layer, and two for the 5th.
Look at the photo above to see what your necklace should look like now, and the string you will need. As a matter of fact, the length I took on that photo turned out to be a bit shorter then I would have liked. In this case it is easier to take a longer length and have extra left over, then not have enough to finish your project!
Take two ends of the thread and put them through the needle.
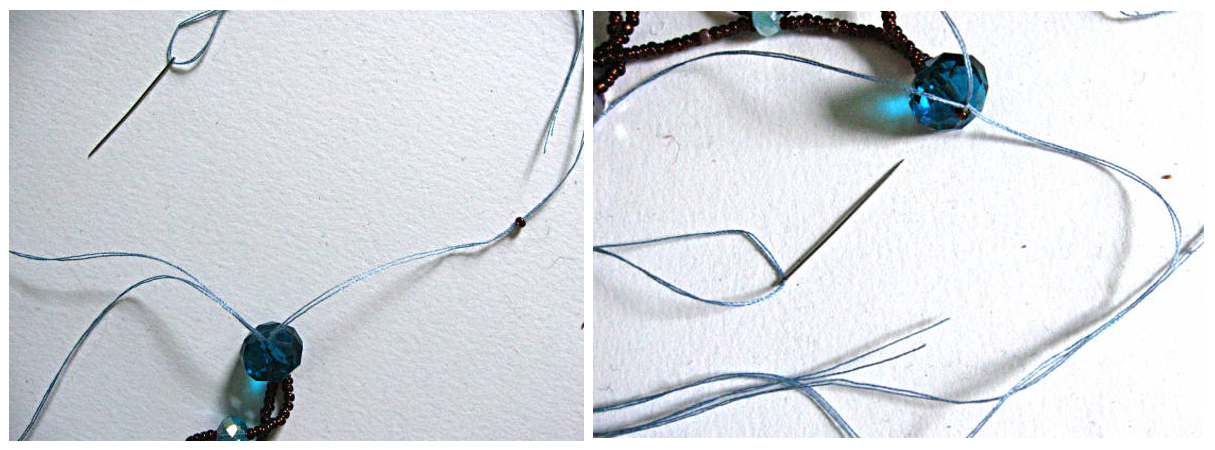
Starting at the large clasp bead, find the first coffee colored bead. Put the needle through the seed bead right above it and then through the coffee colored bead itself. Pull the needle through, make sure the string is divided in half by the seed and coffee colored bead. One half on top of the seed bead, and one half on the bottom of the coffee colored bead.
See the photos above.
Take the thread that is coming out of the seed bead on top, put it in the needle. Now bypassing the seed bead, push the needle directly through the coffee bead and take it out on the other side.
This should be your final result. The seed bead has a string going in through it and also over it. Both strings have to go through the coffee bead and out of it.
Do your best to make sure that the strings are approximately of an equal length.
Now you are ready to go ahead and start the next two layers!
Start the next layer the same way that you did the other three.
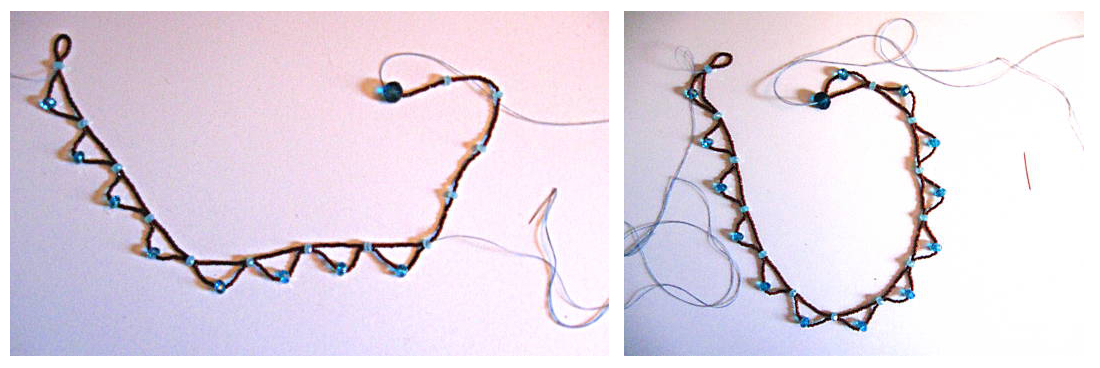
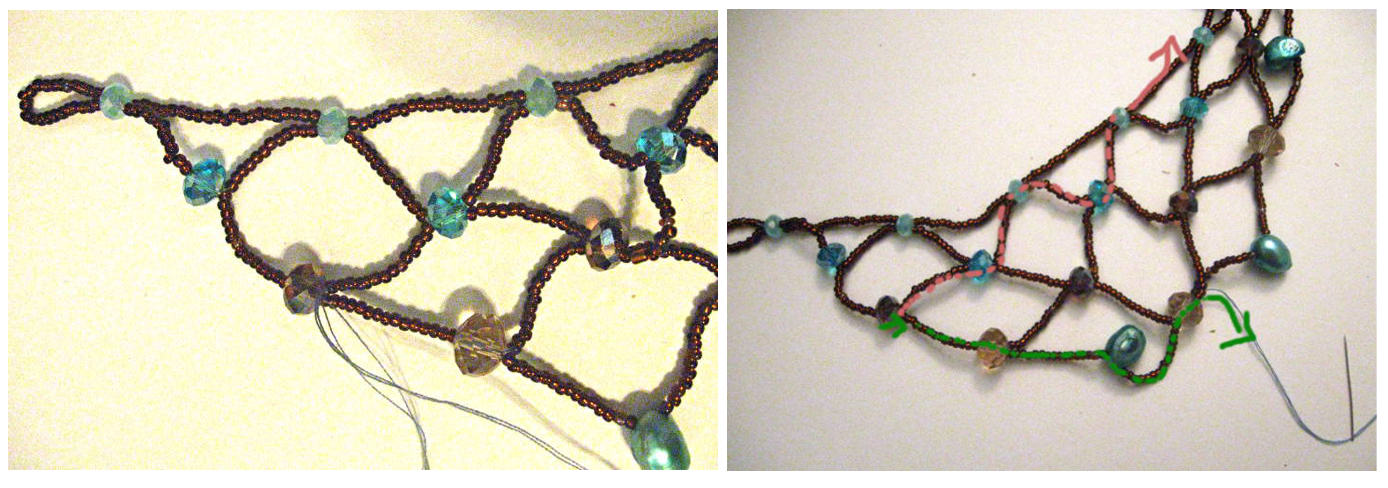
Put two of the strings through the needle for the fourth layer. Then begin putting beads on. I used 15 seed beads, one large beige crystal bead, and another 15 seed beads. After you do the first section put the needle through the next medium coffee colored crystal bead. Then repeat the process again: 15 seed beads, beige crystal bead and another 15 seed beads, put through the coffee bead, and do it again, and again, and again.
In my necklace it worked out to 11 sections. When you reach the last coffee bead stop, pull out the needle, and tie a small bead to the end of the string to prevent the beads from spilling.
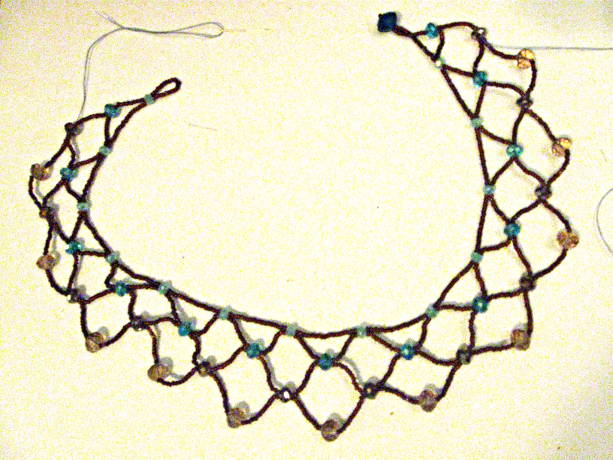
Look at the photo above to see what the necklace should look like now!
To start the fifth and final layer of the necklace, thread the remaining two strings into the needle. Push the needle into the first 15 seed beads and the beige bead of the fourth layer, taking the needle out of the beige bead. This is where the fifth layer will begin.
Now do the fifth layer the same way you did all the others. I used 16 seed beads, one tear drop blue pearl, and another 16 seed beads for every section, then put the needle through the beige bead and do another section. In my case, it was 10 sections, therefore 10 blue pearls. Keep going until you come to the last beige bead, pull your needle through it, and you have made the last layer of your necklace.
Next step is to tie off both strings and your necklaces is done!
Now you have two strings going in the same direction like in the photo. You need to take one string around and move it in a direction opposite of the other string. You can do that easily by putting a needle on that string and pushing it through the seed beads of the necklace in a circle until it meets the other string.
As an alternative, if you have a string that’s long enough, you could push both strings through the necklace to the loop, and bring one of them around the loop, while leaving the other at the base.
Once you do that you can tie the strings into several knots to one another.
Then, just like before you need to take the strings through the necklace about 5 inches or so before cutting them off. So put a needle on the first two strings and push your way through the beads, then do the same with the second two strings.
After you push the needle far enough for both strings, feel free to cut them off.
Now it is done!