It was cold around here last few weeks. REALLY COLD!!! So cold, in fact, that we had to stay inside for quite a few days. Since we were home I took out some crafts for me to play with. Crafts that were too girly for my boys to even look at. Lots of sparkles, sequins and other shiny things. I decided that I NEED to make a felt crown. You know, so that I could wear it around the house whilst doing dishes and such. Wait, but I didn’t only make one crown, I went ahead and made FIVE! See what happens when I stay home for too long: I start playing with scissors and glue, and sequins.
Here are my magnificent crowns. Don’t forget to see how I made them below.
World’s Most Magnificent Sparkly Felt Crown Tutorial
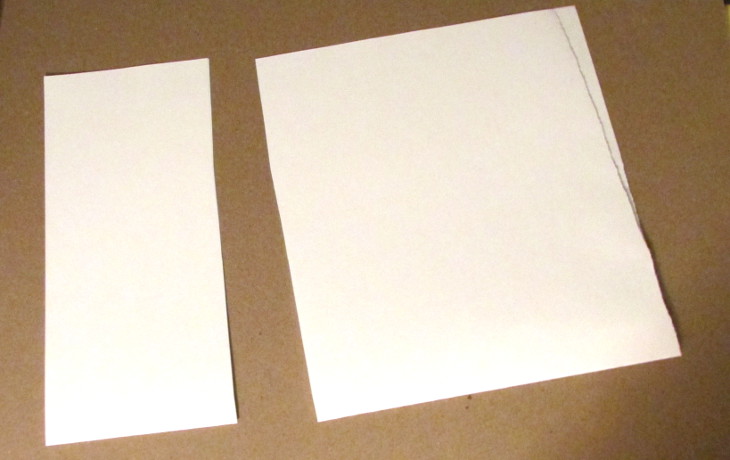
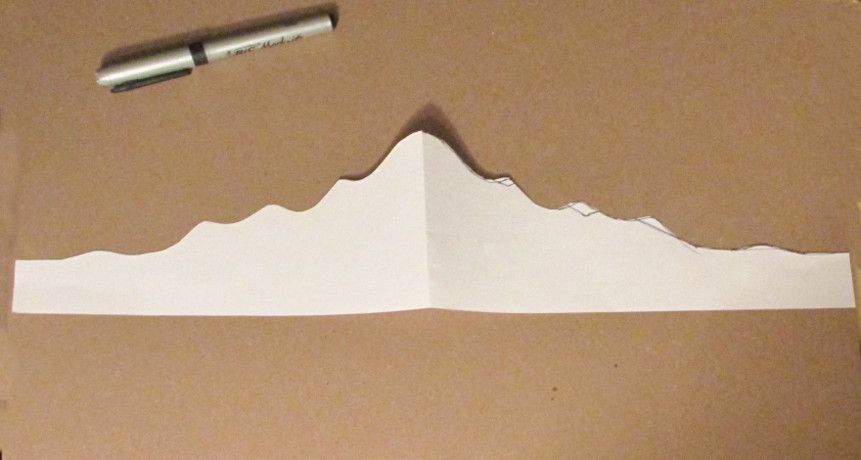
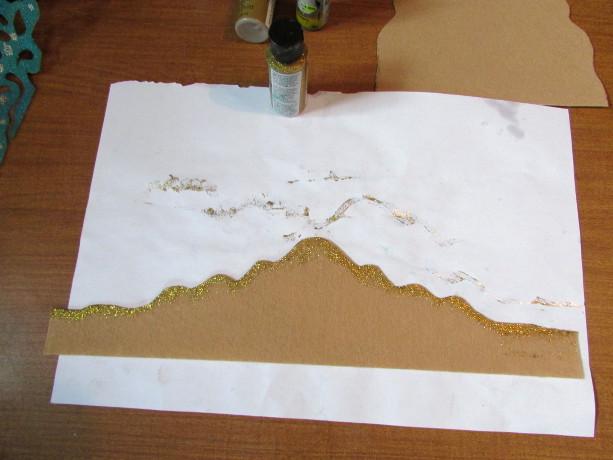
I started with an 18×12 inch paper. That is the size of felt that I had. Also, it wasn’t a very soft and bendy felt, but more of a fuzzy cardboard sort of feel to it.
Folded it in half, like in the photo on the left.
Then I cut off a length of the paper, with the approximate height I wanted for my awesome crown to be.
I drew the general shape of the crown on one side of the paper. It is taller toward the center and slopes down in little hills towards the back.
Cut it out while the paper is folded, so that it is symmetrical.
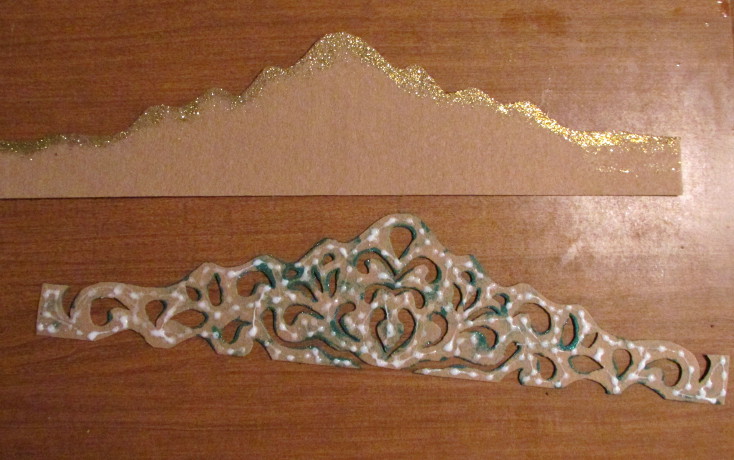
I drew some teardrop shapes and squiggles and cut them out using small, pointy scissors.
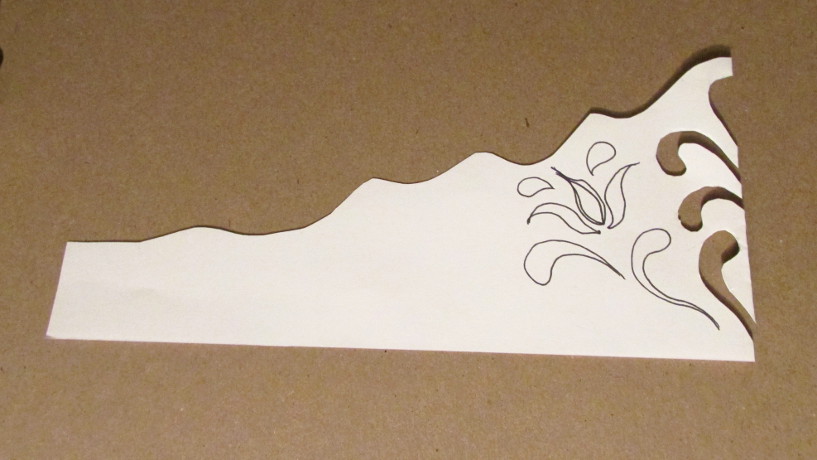
I kept at it until there were squiggles throughout the crown.
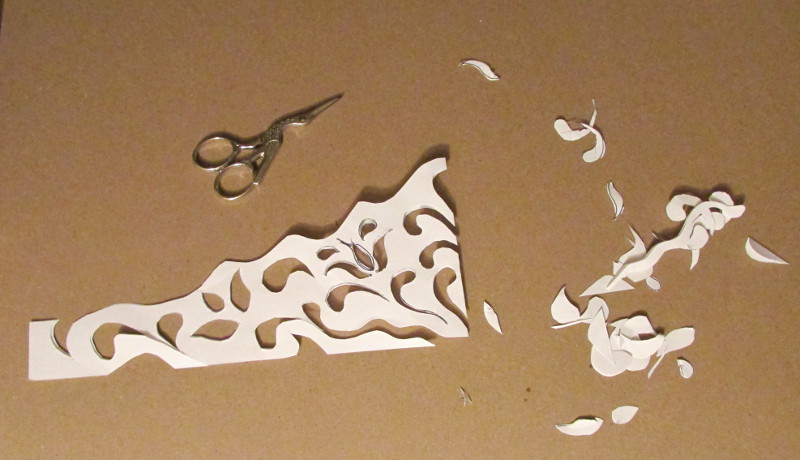
Once the template was done, I traced it over on the felt using a fine black permanent marker.
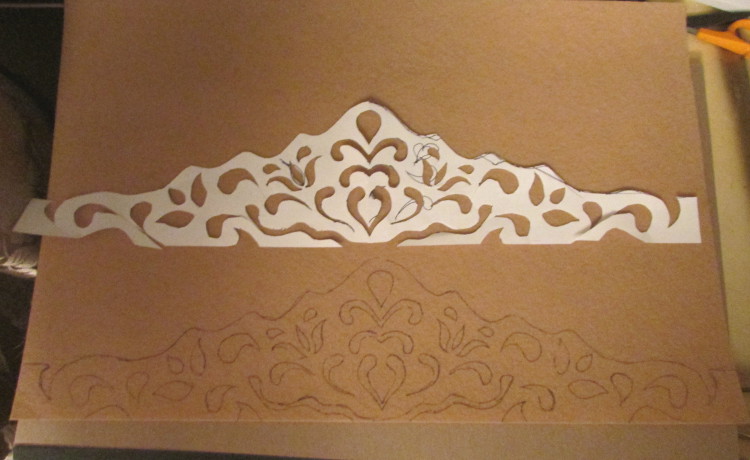
I carefully cut it out from the felt using the same small scissors….
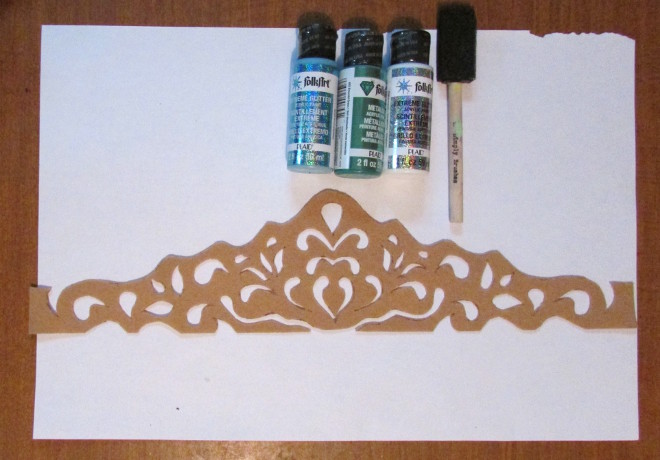
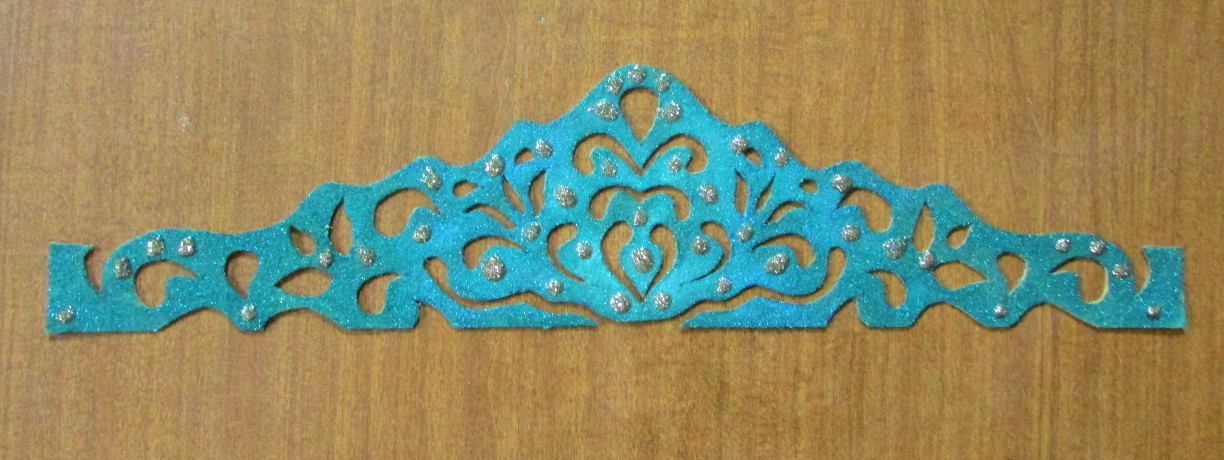
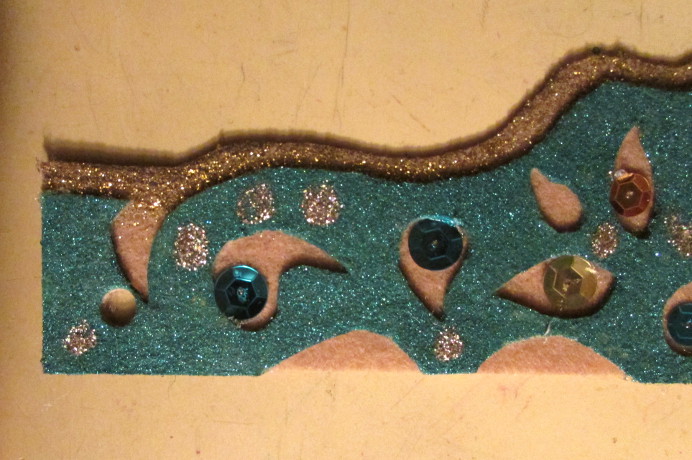
….and decided to paint it with some EXTREMELY SPARKLY paint mixed with some turquoise metallic paint. Just a note, I made sure to turn the crown over, so that the black marker marks are on the opposite side. After I finished painting it, I decided that it needs a few more sparkles and added some gold sparkly paint drops, placing them symmetrically on the crown.
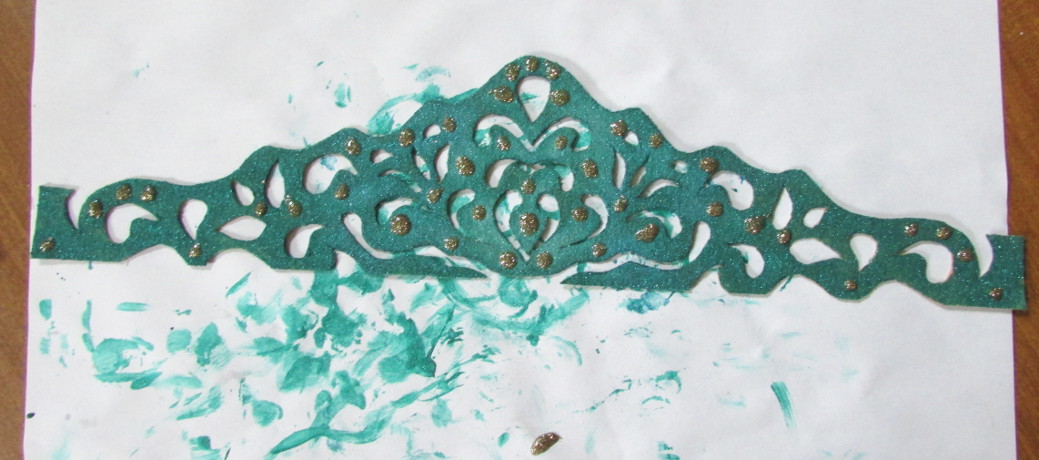
Look how awesome and sparkly it is!!
After it dried, I put it on the leftover felt and traced it’s outline only. This time I made it about 1/4 of an inch bigger on top.
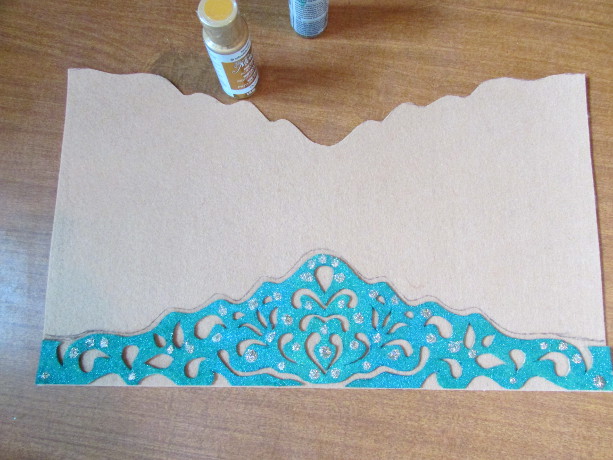
I used gold sparkly paint on the edges of the background, because, you know, you can never have enough sparkles.
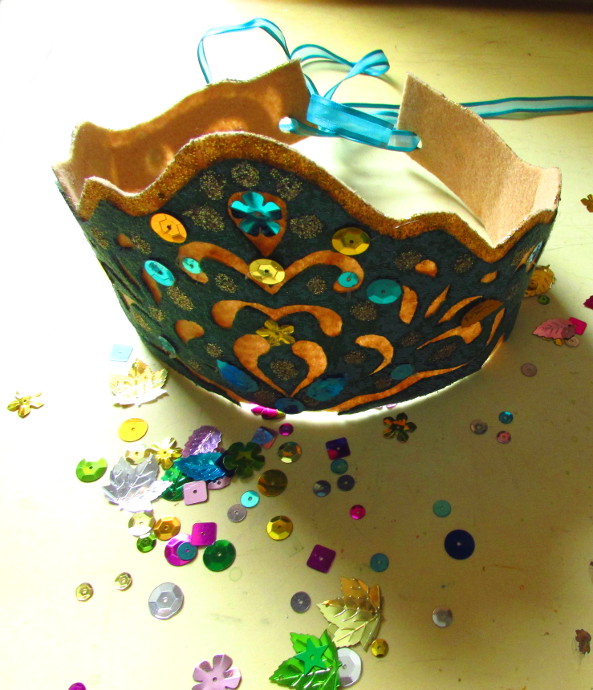
If you look at the photo on the bottom you will see that I started out by using a regular white glue to glue the two parts together. DON’T. White glue doesn’t work, it just gets absorbed into the felt. Go with the hot glue gun. First place it the right way on the background and start gluing on one corner, then move to the next part, and the next, and so on.
After it’s all dry, I used the hot glue gun to glue a bunch of sequins on, again making them symmetrical.

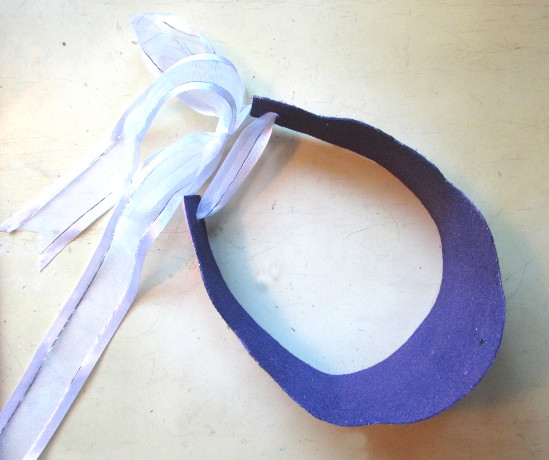
Using a regular hole puncher I poked a hole on each end.
To tie it, just put the ribbon through the two holes….
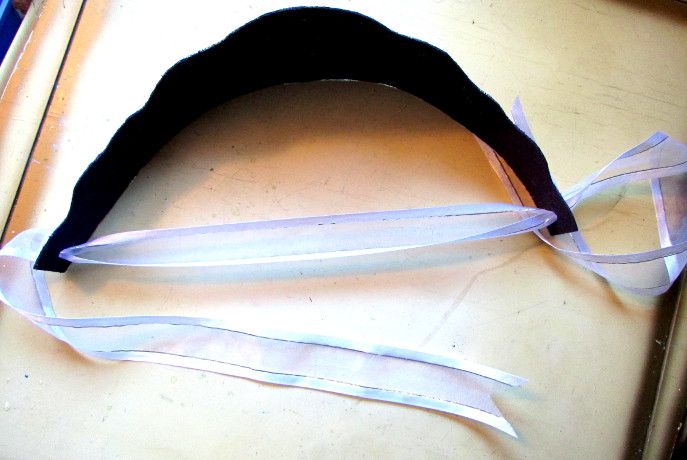
…and then gently tighten them, and tie in a bow.
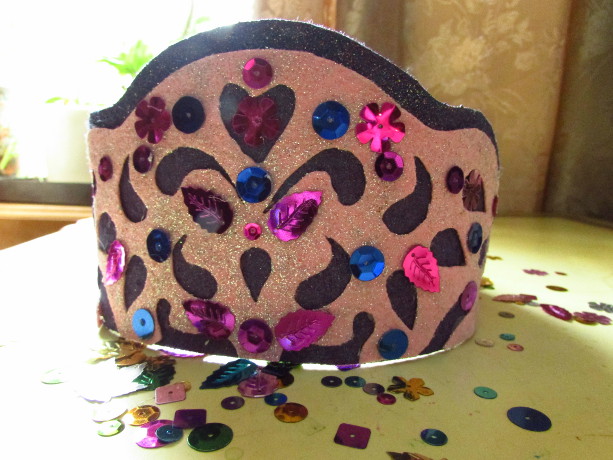
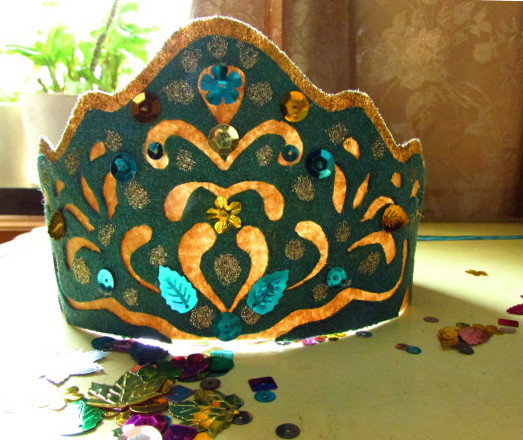
Here are a few more photos of my beautiful crowns: