I tried felting for the first time at a friend’s house, and loved it right away. Felting was easy enough to do, and I liked that if something didn’t come out just right, all I have to do is take it apart and re-do it or re-purpose the wool for something else. Plus it feels amazing and wonderful to play with the soft and fluffy colorful wool.
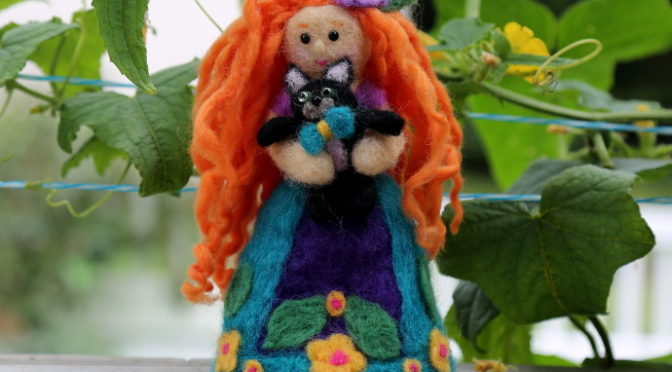
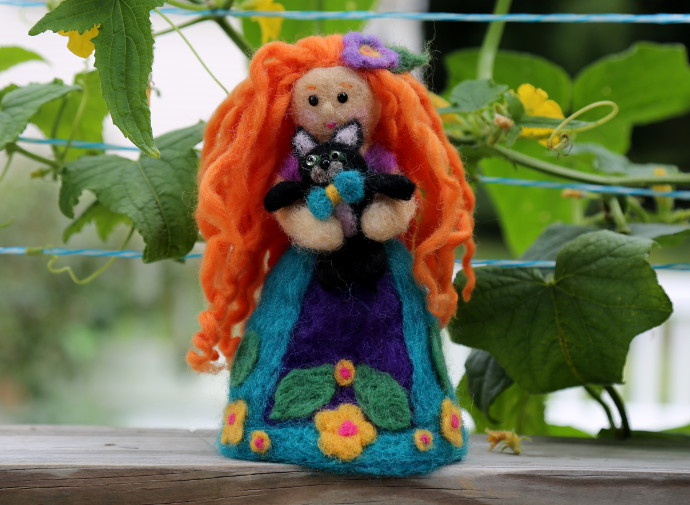 I came home, and bought some of my own supplies for wool felting, so that I can learn to do it. I wanted to make something very specific: a pretty princess with bright red curly hair, holding a black kitten. Yep. I can be specific. I did it!
***This page contains affiliate links.***
Introduction To Felting: How To Make A Felted Doll
These are the felting supplies that I have purchased and used to make this doll:
- Felting wool: I got this one, and this one, and finally this one. Also, some of this kind too.
- Felting needles: These sort of needles is what I got at first. This tool and this tool set are two things that I found I needed as well. Also, replacement needles. I broke a few needles along the way, so I wound up getting some replacement needles. NEEDLES ARE SHARP, believe me, I speak from experience!
- I also bought a large 8 by 10 by 2 needle felting foam.
- For the body structure I used armature wire, which I had bought for a sculpture art class. This is the one I used, and it was pliable, yet strong enough to hold shape.
- I got a baggie of eyes too.
- A bit of yarn close to the skin color.
I highly recommend that you shop around for these supplies to find the best price. Local family owned stores often offer very good sale prices! Check them first. I called around our local yarn shops only to leave empty handed, so to speak, so I wound up ordering everything online.
Felting tip #1: needles are sharp. DON’T POKE YOUR FINGERS.
Felting tip #2: keep the needle straight, and not at an angle, or it breaks.
Felting tip #3: tear the wool apart, avoid cutting it. You want the wool strands whole. I did cut it when absolutely necessary, like when making the skirt, or flowers.
How To Make A Felted Princess Doll Step by Step:
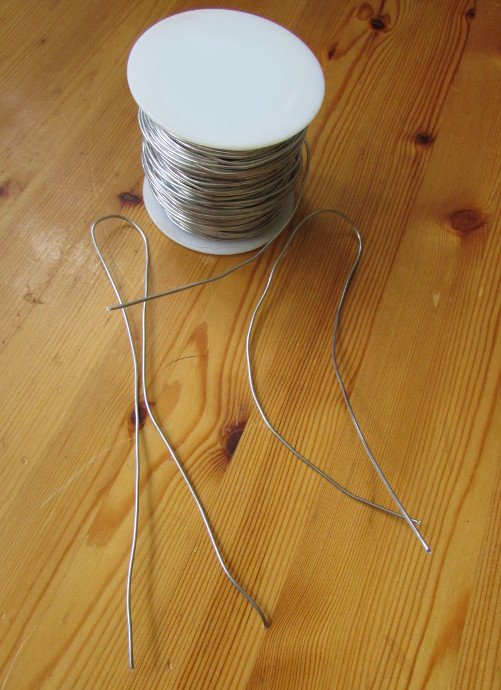 I started by cutting two lengths of the armature wire, about a foot each.
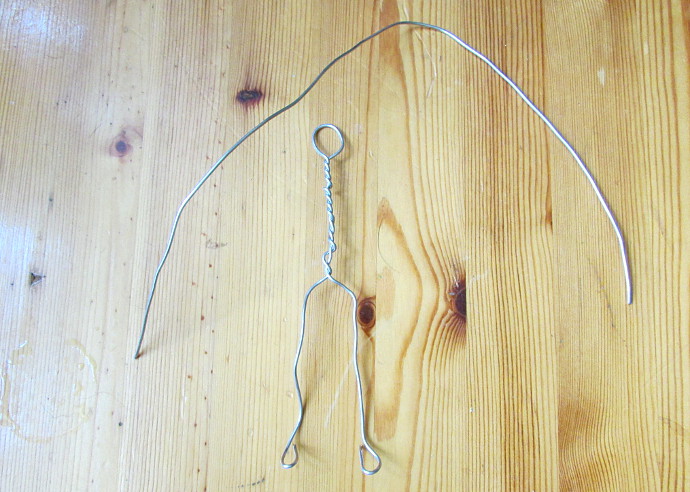
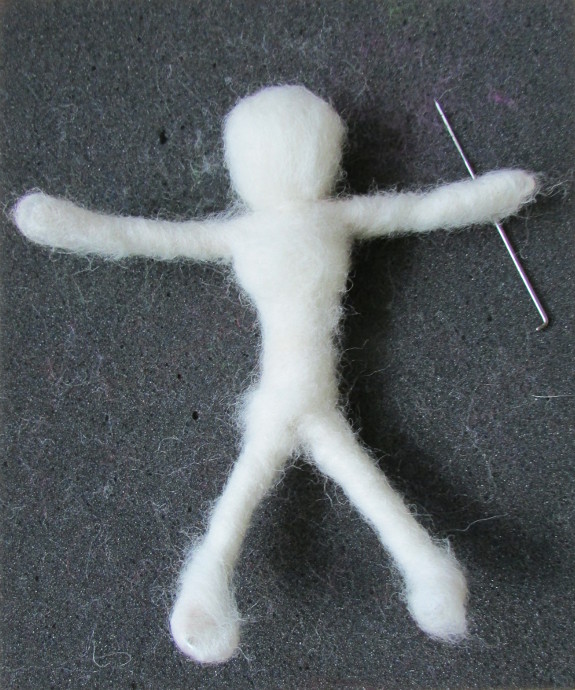
I twisted one in the center, making a skeleton with legs.
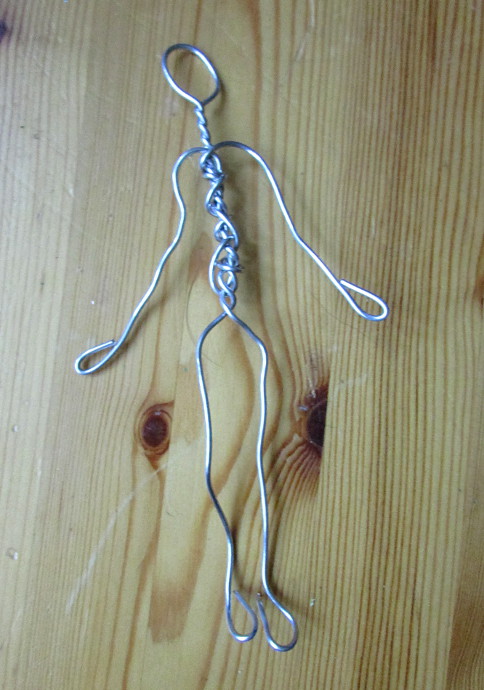
Then I added the second piece of wire at what would be a waist, and twisted up to the shoulders. This way I made arms and shoulders. I bent each end of the wire tips to create hands and feet.
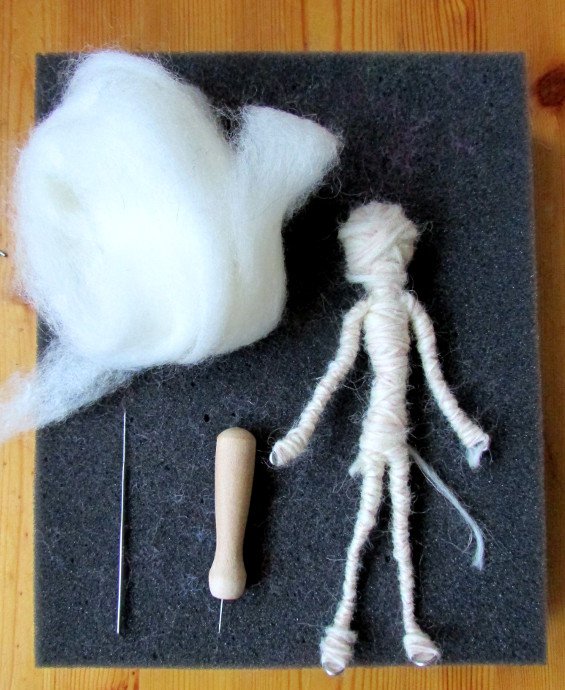
I had some plain white wool yarn. I wrapped it around the wire to create a bit of base. It looked like a mummy at that point.
I took some slightly off white wool, and started wrapping it and felting it all over the body.
I kept adding more and more wool to the body…
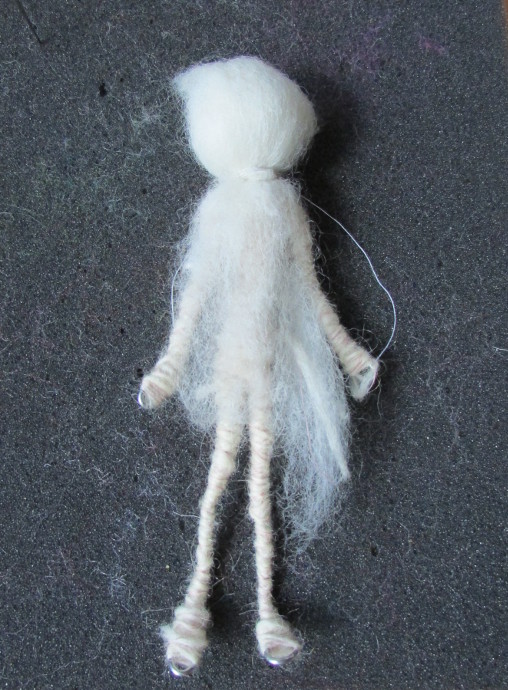
…until everything was well covered.
At that point it still looked kind of goofy. It was time for another layer, to make it look less goofy.
Keep adding more wool around the body, and working it until it looks like something you need:
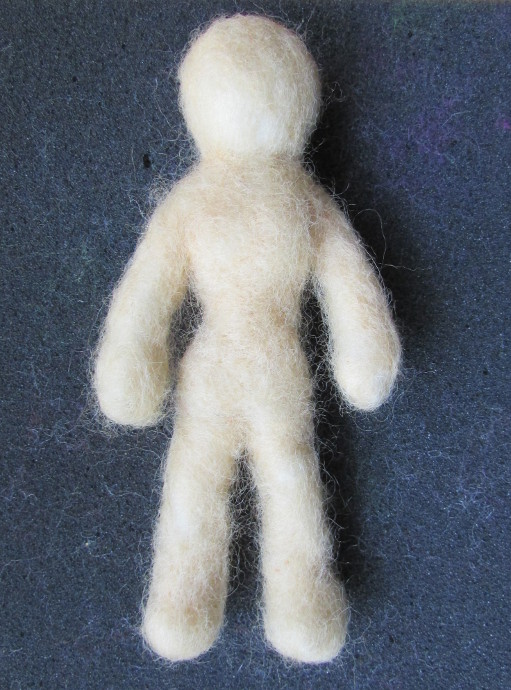
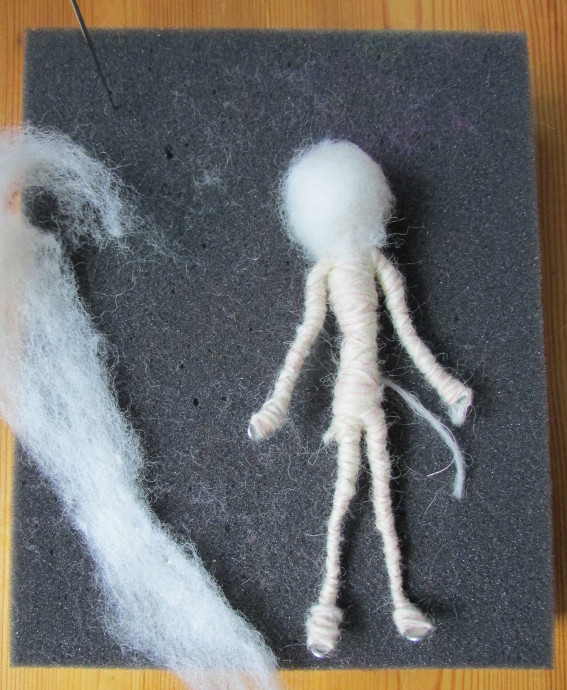
Don’t forget the neck!!!
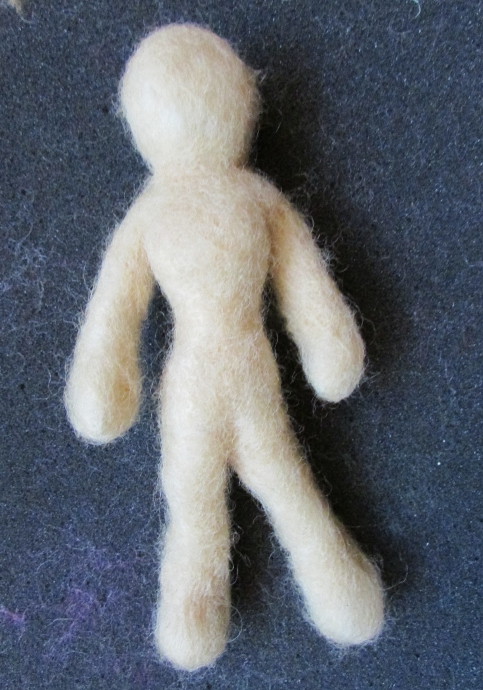
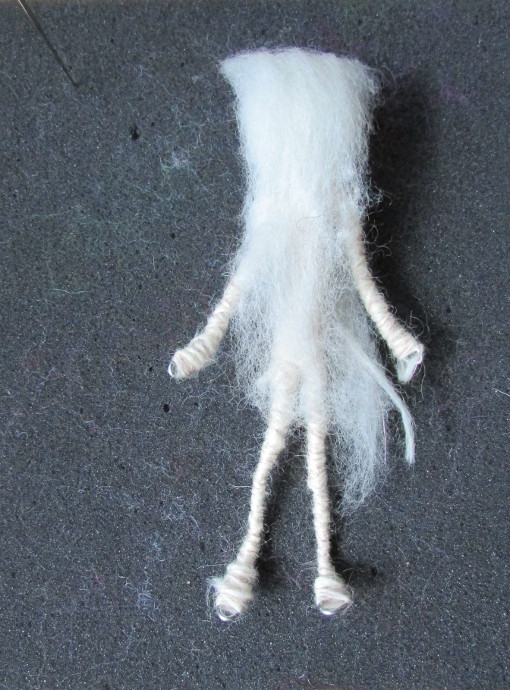
At this point, it took quite a bit of work to get the body to be less ‘furry’ and to have the shape I wanted it to have. At some point I decided that I will be done.
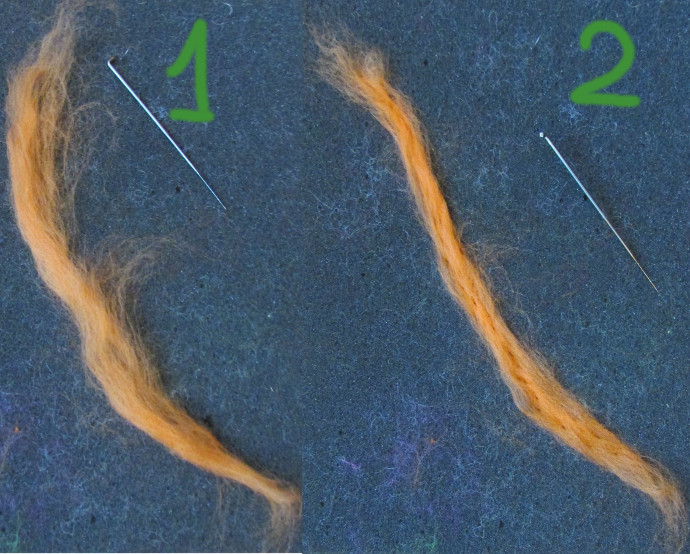
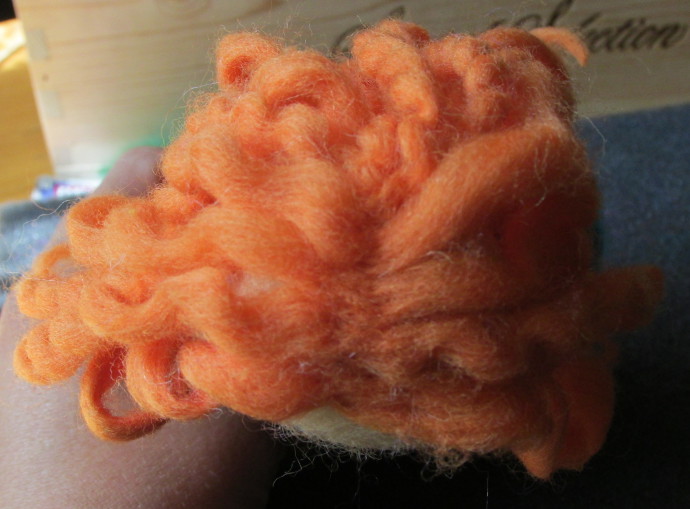
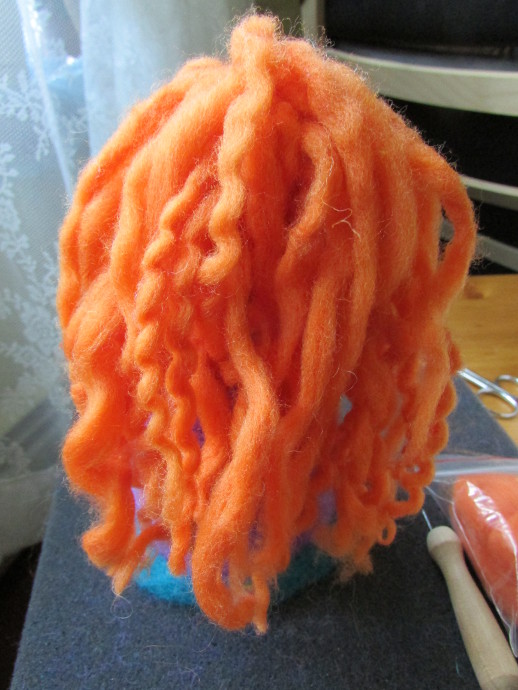
Since I wanted the hair to be curly, before I went on to do the rest of the princess, I need to curl up some hair. Sure, you can purchase the pre-made curly hair, but I preferred to make my own out of the felting wool.
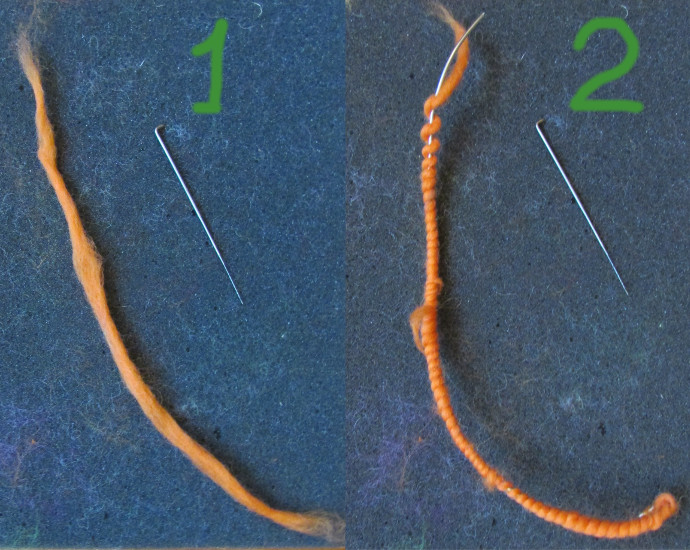
First, I took long strands of orange wool and felted them just enough to keep it together.
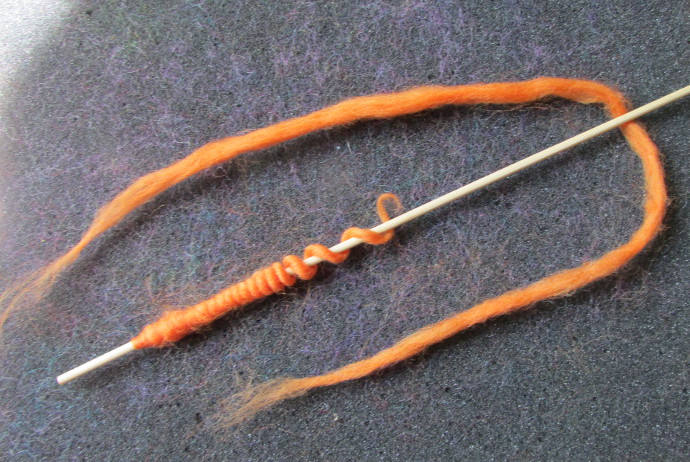
I rolled the wool in between my palms, and then wrapped it around a wire. I let it sit for the few days while I was finishing the princess (it doesn’t really take days, I only worked on it about 20 minutes every day).
At the end, to get it to curl faster, I steamed it using water with my iron. Note: steamed, never actually touched the iron to the wool.
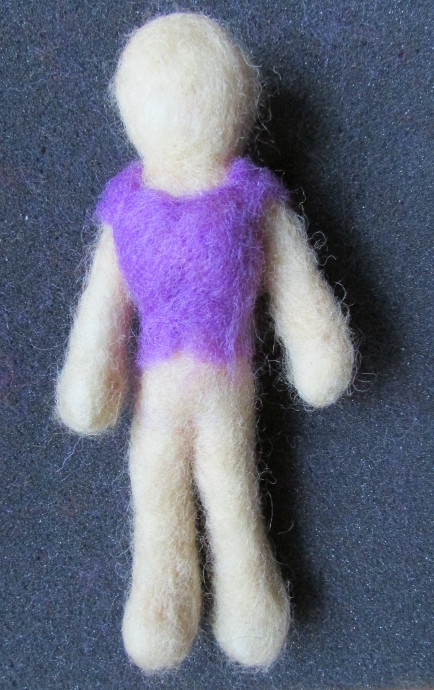
It is time for the top of the dress. I took a long purple strip of wool, and wrapped it in an X around her upper body and shoulders. Like the two photos below.
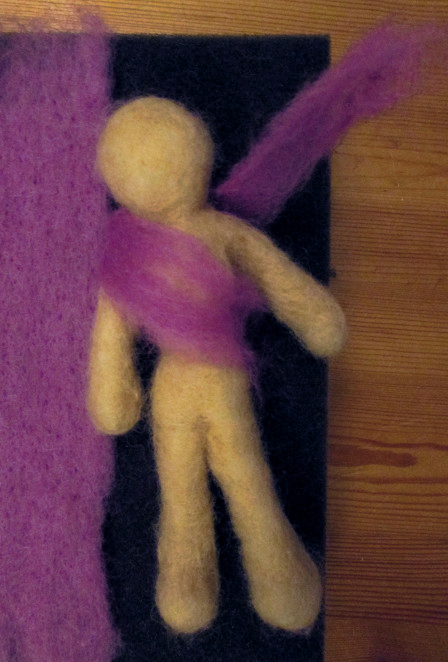
Then I ripped off the two unnecessary ends.
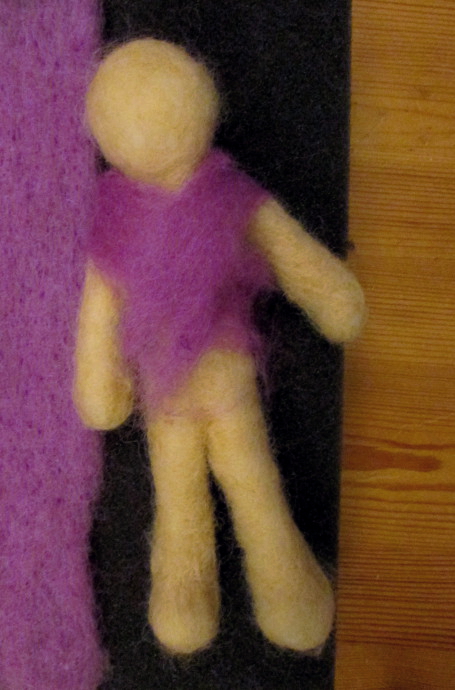
I used the felting needle to shape the upper part of the dress. I needed to add little wisps of wool here and there as I saw fit.
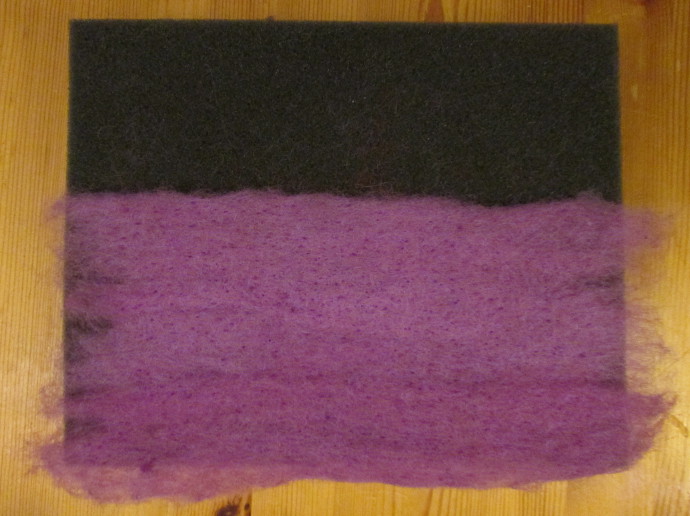
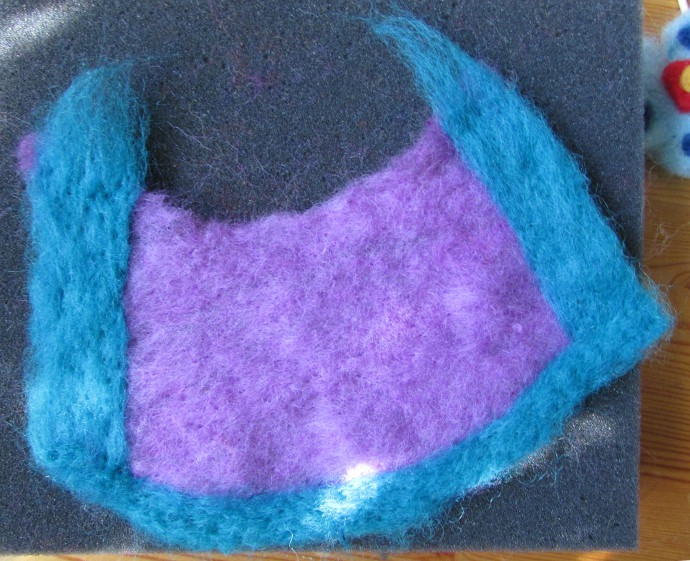
The bottom part of the dress started with a few strips of purple wool, lined together and felted into a long flat piece of felt.
This is where I cut it a bit. Ultimately, you will need an approximate shape like in the photo below.

Using blue wool, I added edges to the purple skirt.
I added another, darker, purple triangle, and more blue trim to it.
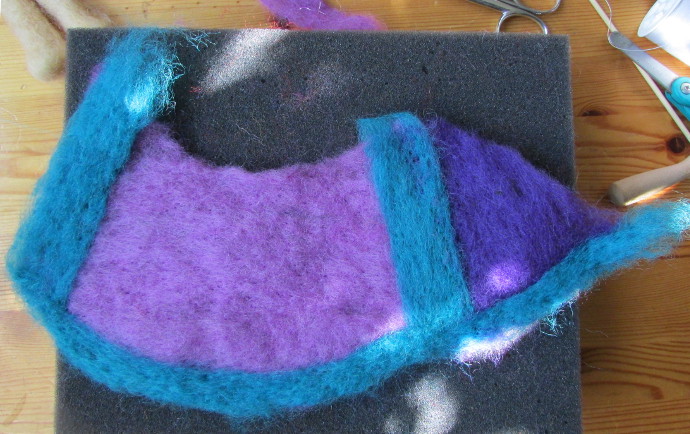
Then I connected the skirt, felting the dark purple edge of the triangle to the blue trimming on the opposite side.
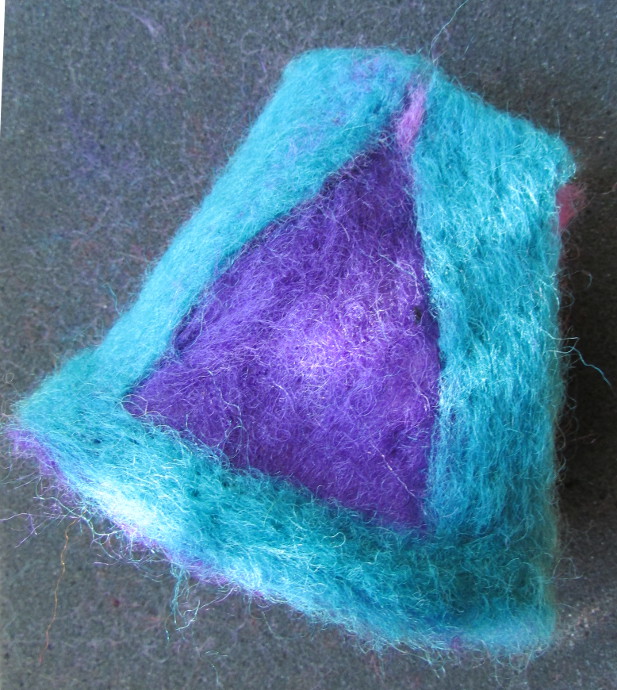
Starting with the back, I felted the skirt in four spots first directly onto the doll’s waist. First, the center back, then the center front, the two sides. Then I felted all the remaining edges of the skirt to the four quarters of the doll’s waist.
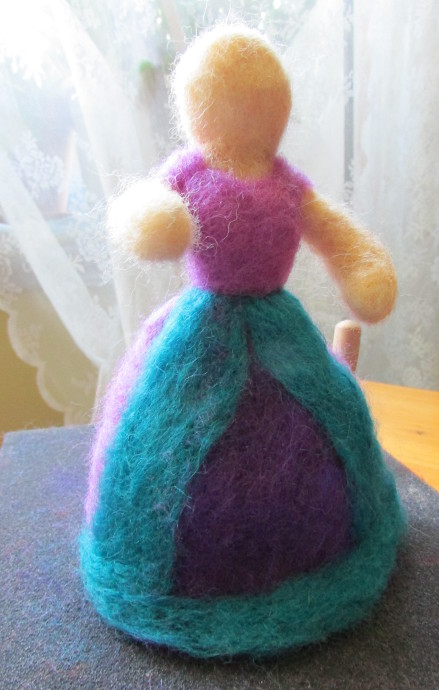
I wrapped a strip of green felt around to make a belt/bodice. Then felted it on better. Here is the view from the back.
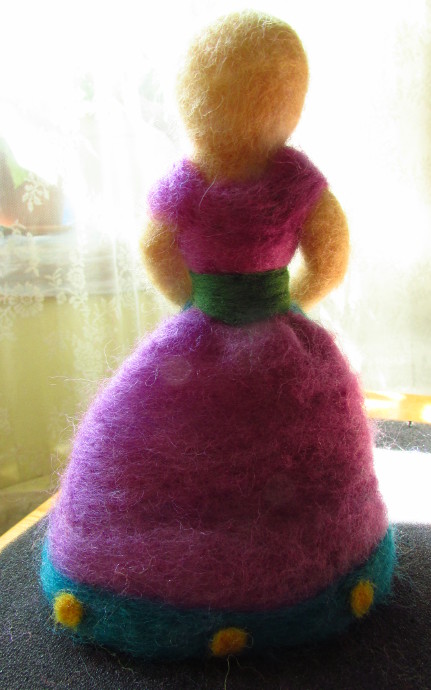
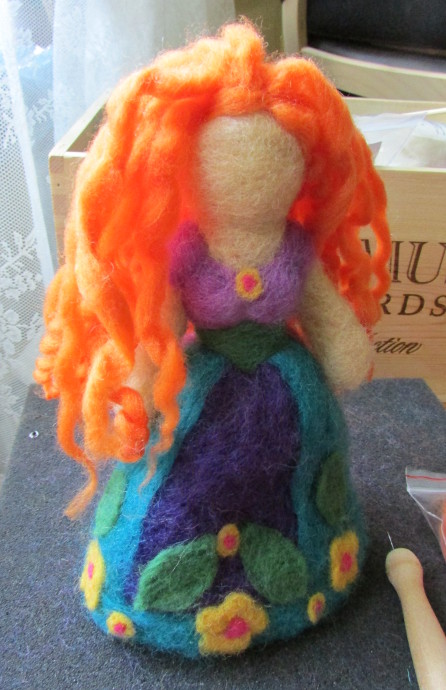
Here is the view from the front. I added little flowers, leaves and decorations to the skirt.

At this point something unthinkable happened. The phone rang. I went to answer it, and my dogs stole the doll. They ripped it’s head off, and tore the dress in shreds. SHREDS. I got upset. However, it wasn’t too hard to fix. I put the head back on to the wire. Peeled off the skin felt from the neck and head and attached new one on. The dress though. I had to take the felt piece by piece, clean it, shred it and re-felt the entire skirt. That’s why on the following photos the skirt and decorations look a little different.
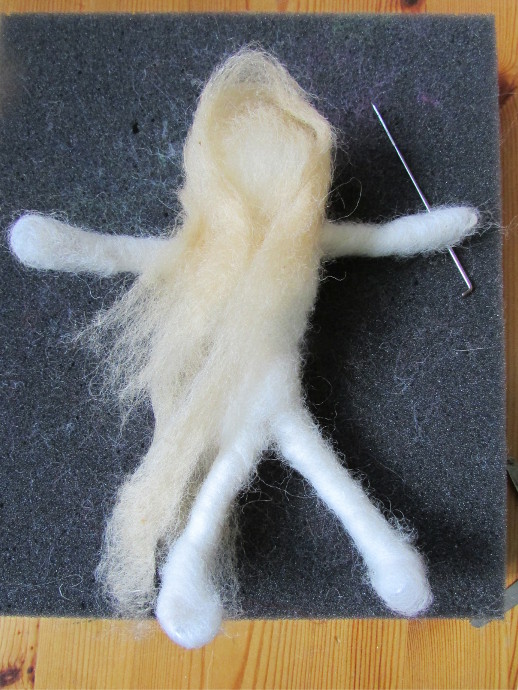
Time for the hair. I unrolled it, and it looked great. After a bit of time, it did straighten out a little. First, I felted on some strands down the center of her head.
Here is the front view.
I added a few more strands where it would be above the ears.
At this point, I kept adding hair strands to the empty spaces on her scalp.
I kept working on it. You see that strand across her forehead? I didn’t like it, so I peeled it right off.
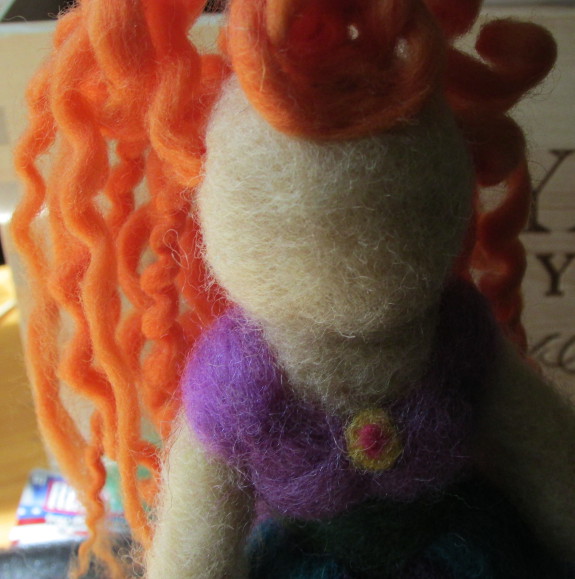
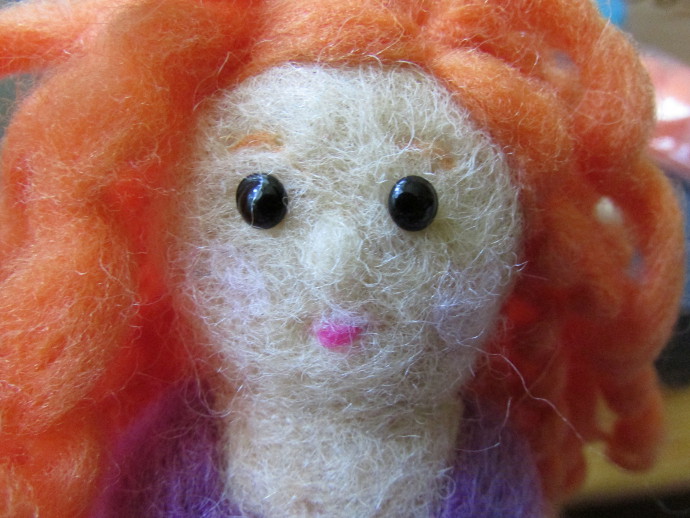
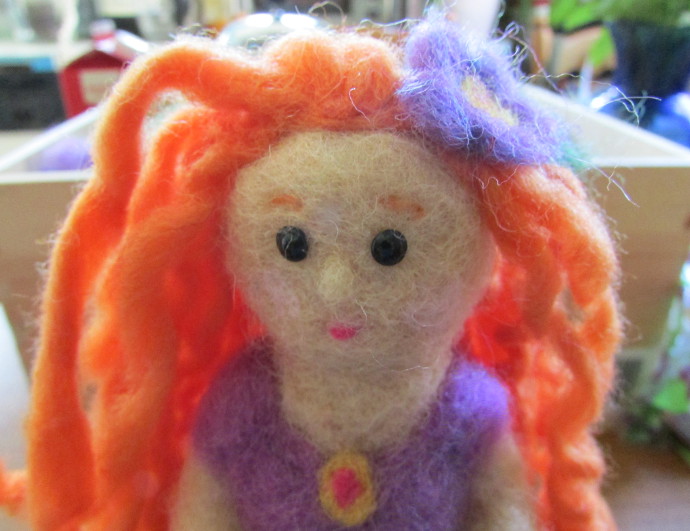
Face!!! At first I thought I would make it Waldorf style and not give her facial features, but I wasn’t thrilled with a blank face. I got the eyes that were ready. The eyebrows is quite literally a single strand of orange wool. Seriously tiny amount. Same for the lips. Really small tiny amount. The nose is just a little knob made with skin colored wool.
Changed the hair a bit more:
Flower parts for the hair.
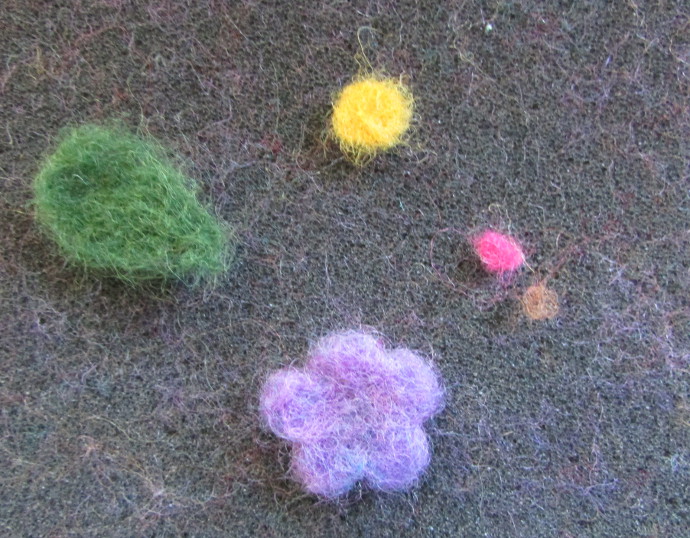
Photo below is where you can see that I moved the hair away from her forehead and felted the leaf to the hair.
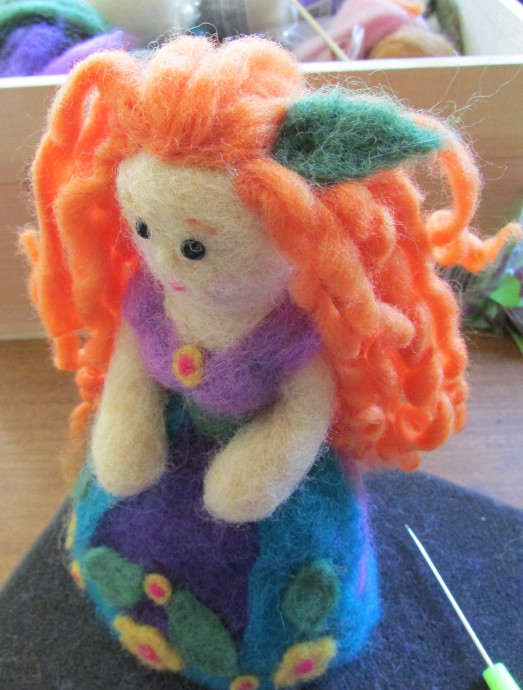
Attach the flower.
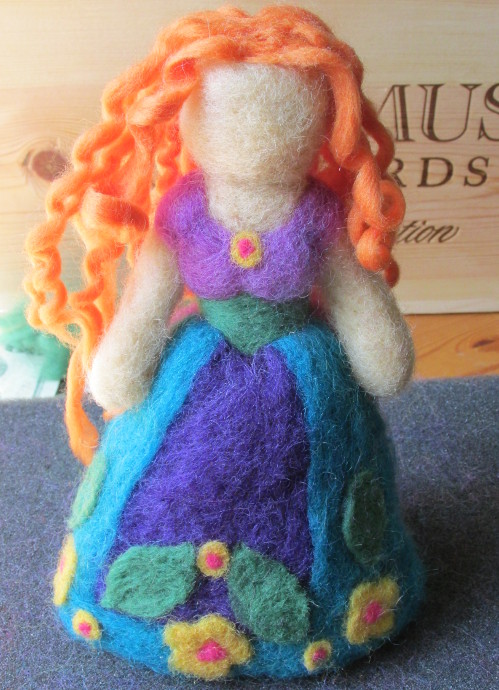
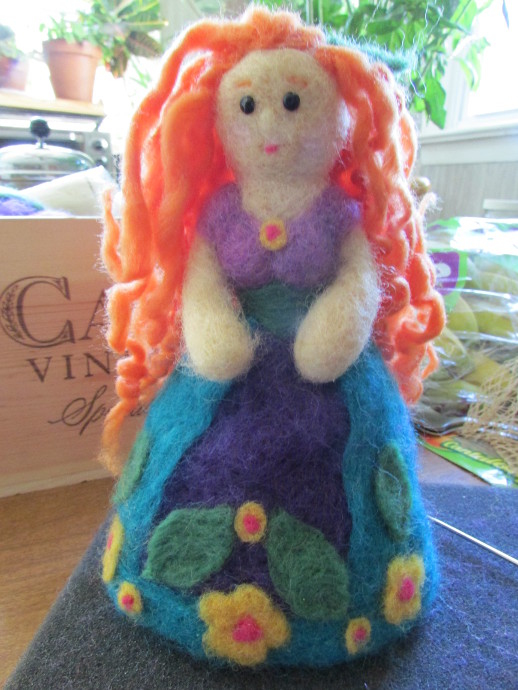
There she is, all done and adorable!
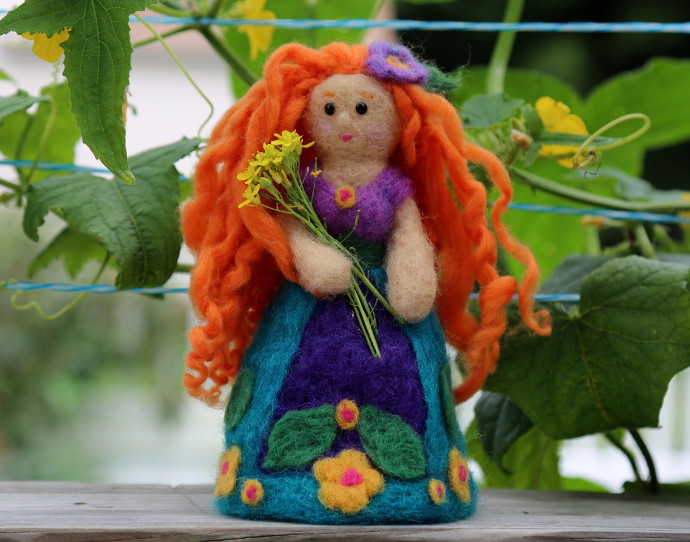
You know what is really awesome? Because of the wire underneath she is completely pose-able, so the kids could do a shot by shot animation!