Color pencils have got to be one of my most favorite mediums. I love how much control you have with a colored pencil.
***This page contains affiliate links.***
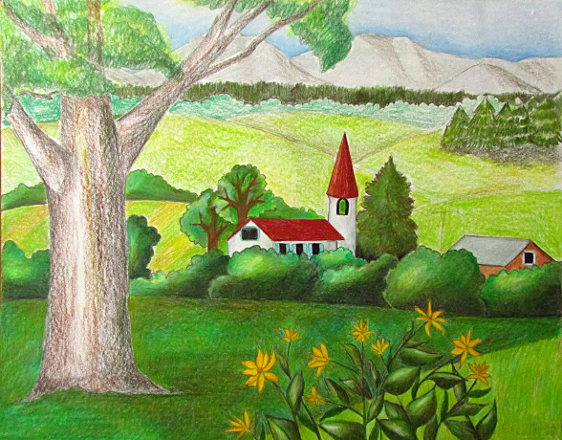
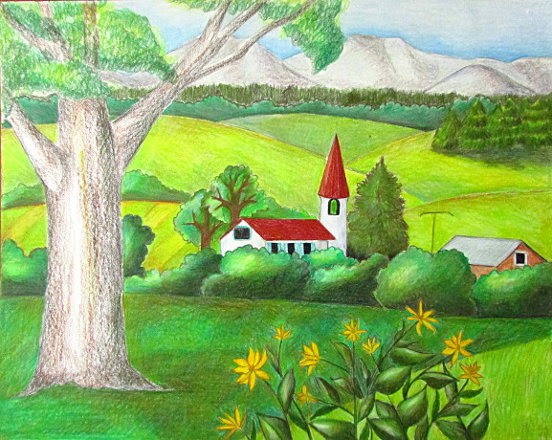
Here is how to do a simple color pencil landscape drawing.
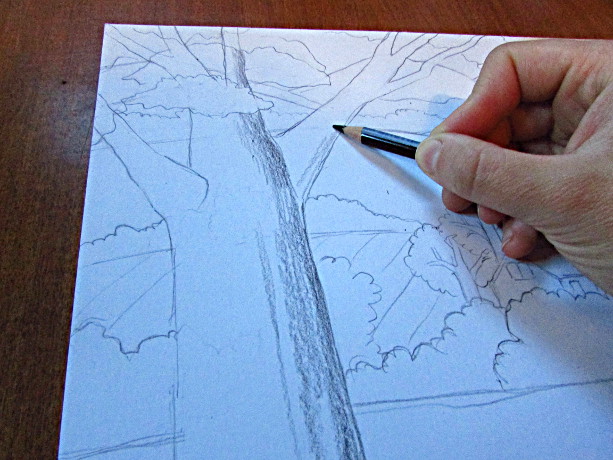
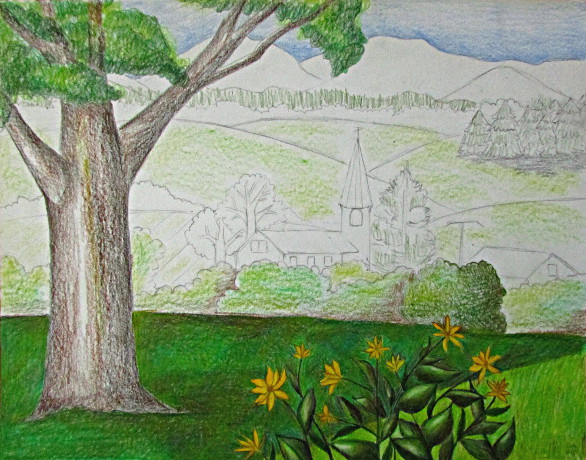
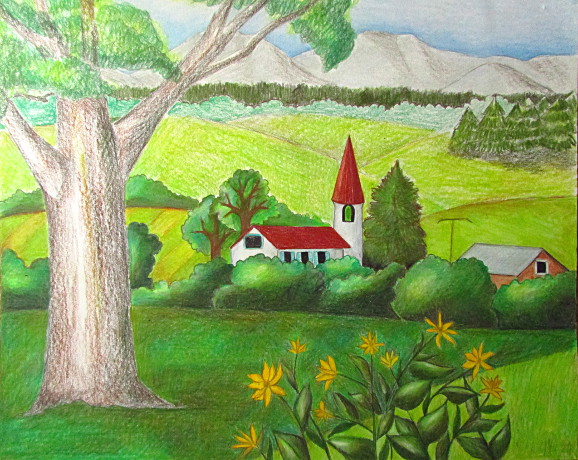
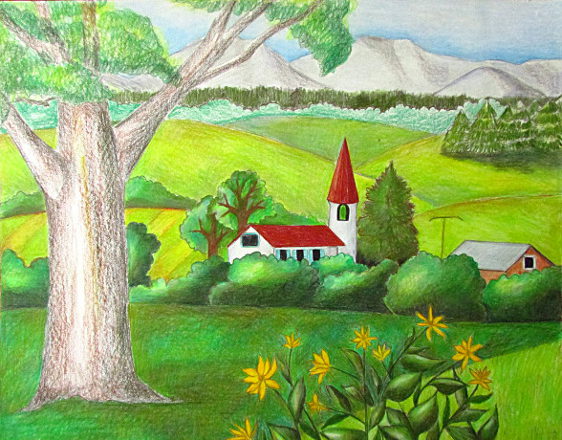
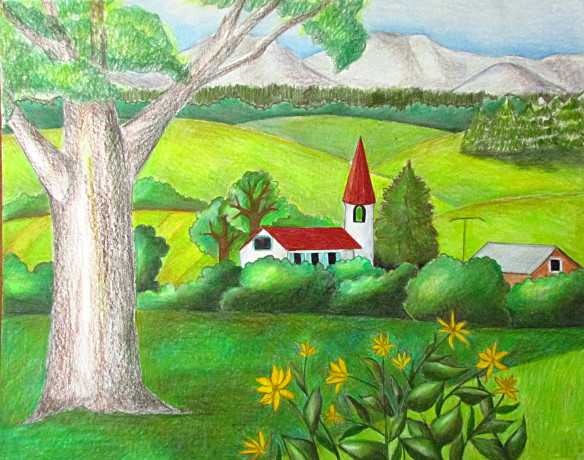
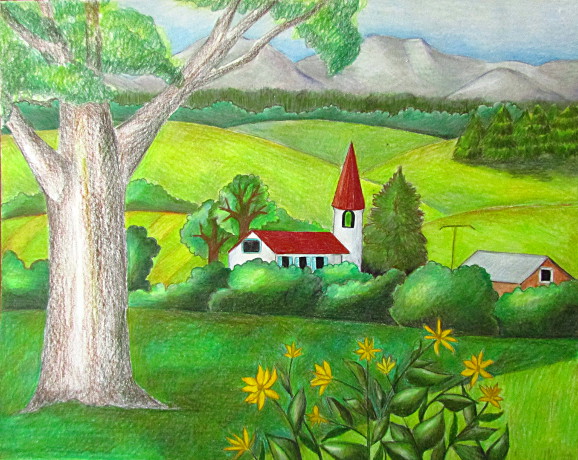
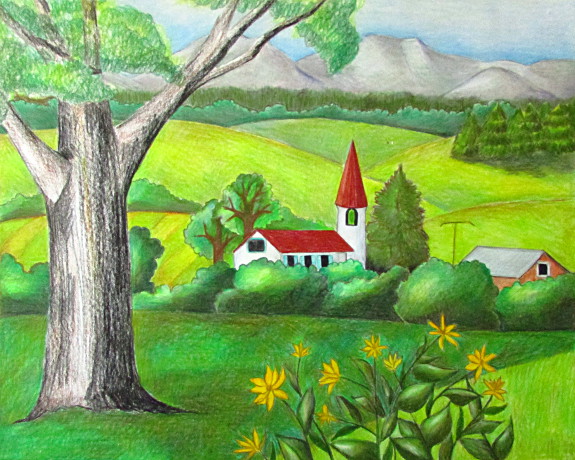
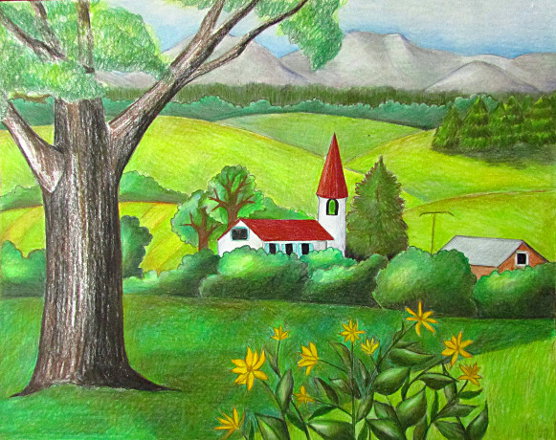
I would like to note that I had to enhance the photos of the pencil sketches so you could see them better, that’s why the lighting seems different on all of them. If you click on the smaller images they will pop up larger for you. Also, please note that you absolutely should change things around. This just gives you a general idea about how to draw a landscape, where you put trees, houses, hills, bushes and flowers in your picture is completely up to you! The most important thing is to have fun with it, and not give up.
These are the pencils I used for this project: PRISMACOLOR PENCILS (I love the extra large pack, but there are smaller size packs available) and this is the paper: Strathmore Vellum Bristol Paper Pad .
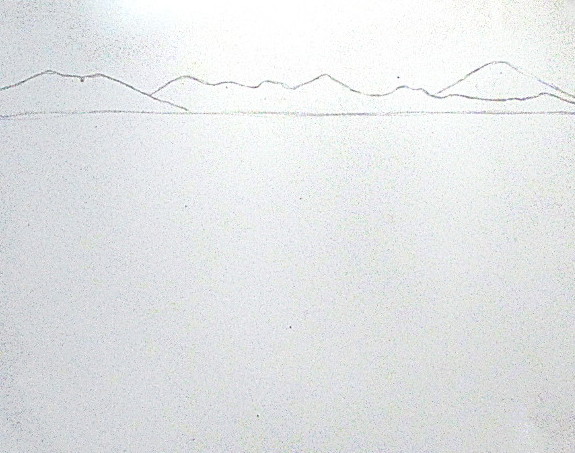
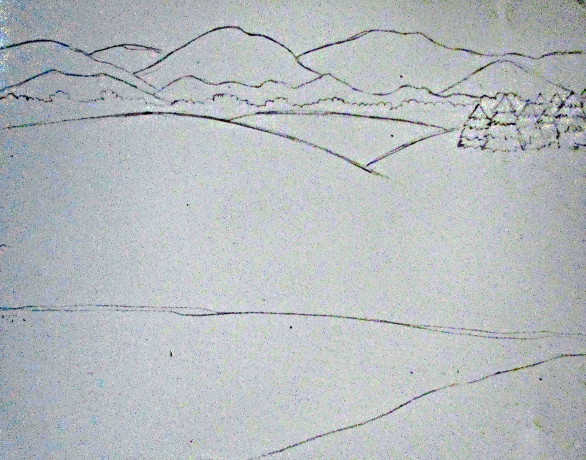
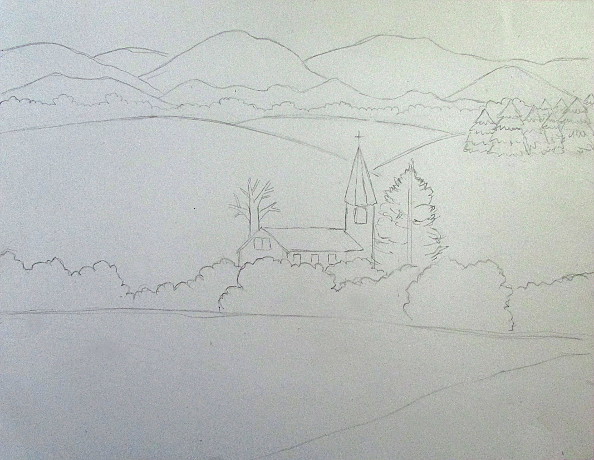
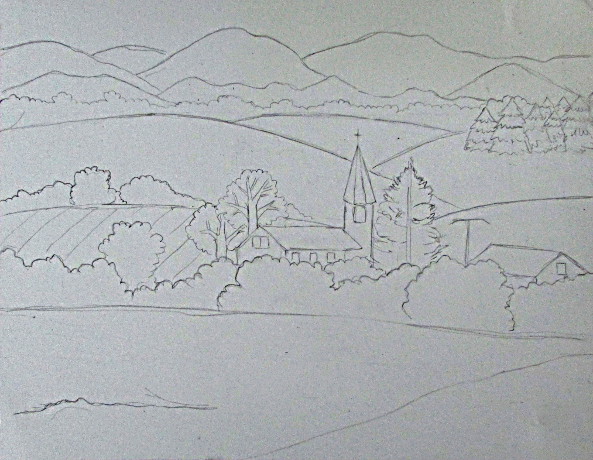
Start by approximating where your horizon will be. It will be erased and covered by hills later, so just a nice light line. Draw a few mountains in the background.
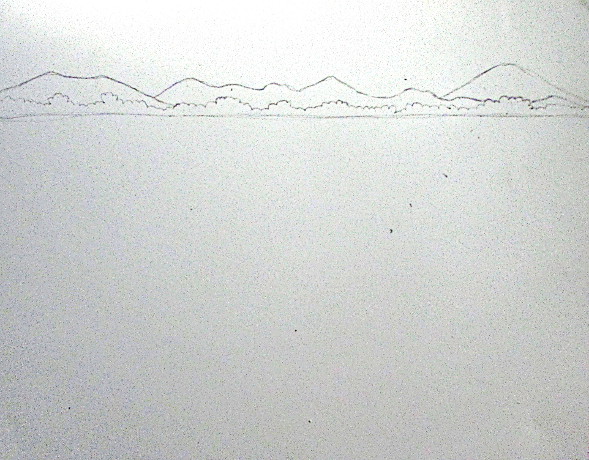
Draw little bunches of trees below the mountains. The trees are far away and all they look like is wavy little hills.
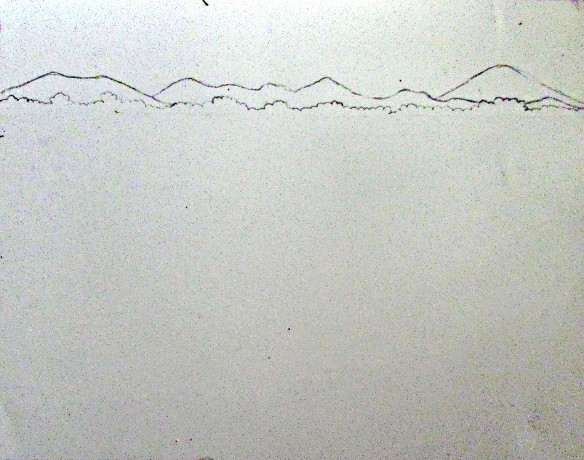
It is time to erase the horizon line and replace it with some background hills, like in the photo above.
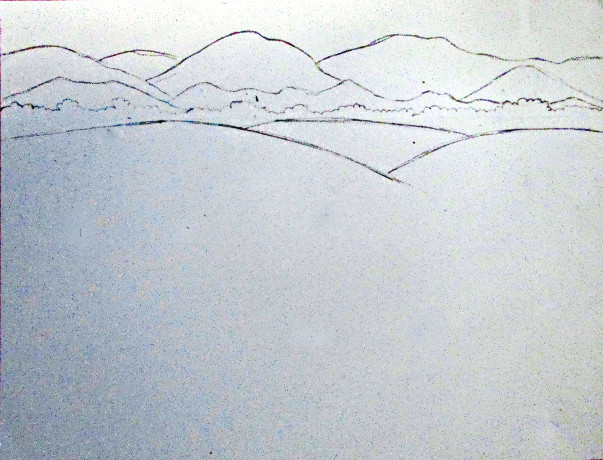
Also, I thought my mountains were too small, so I drew bigger ones in the back, and will make the smaller mountains into a layer of large pine trees.
Now draw two hills in the front. The hills you would be standing on if you were there looking out. And a little group of pine trees on the hill beyond.

Add some bushes in the foreground. Like behind the second hill in the picture above. Again, the bushes are just curly little shapes.
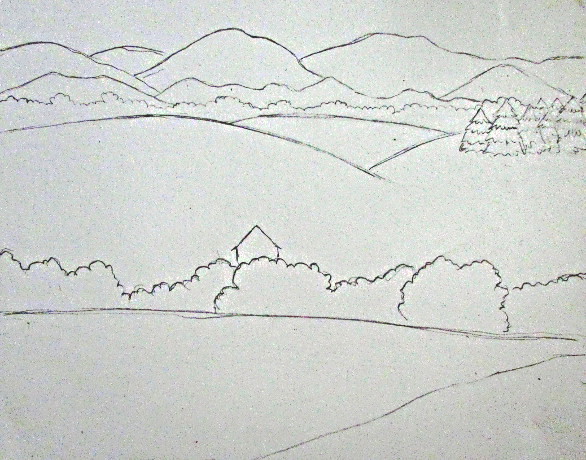
Behind those bushes there is a house. I start with a simple geometrical shape, a triangle, and two lines going down.
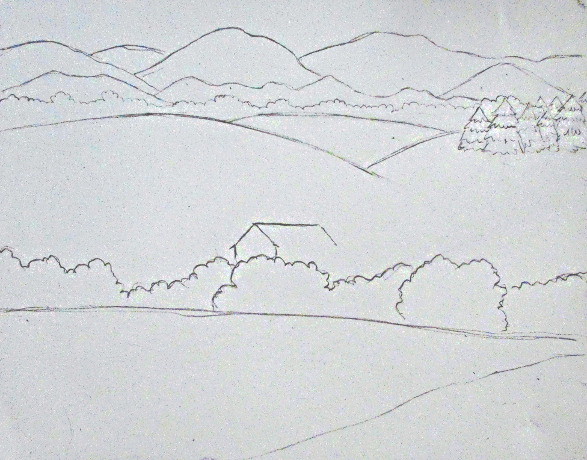
Then add the roof line extending over and running parallel to the ground. Technically it’s more of a roof top then a house.
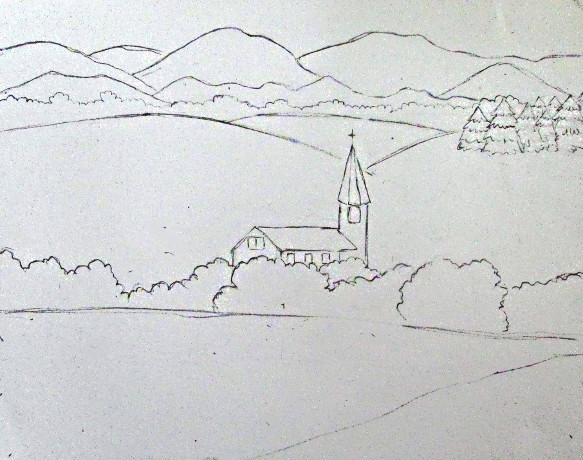
Add the little church tower in the back, with a triangular roof on top. Add a few windows as well. When working with colored pencils I find it easier to think about the small details ahead of time.
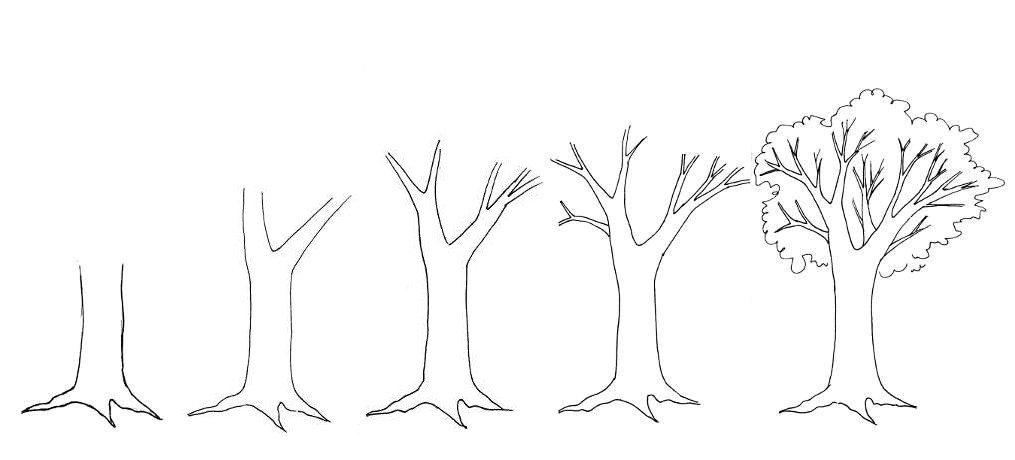
Start the trees around the first house, as well as behind it. To see how to draw a simple tree take a look at the picture below.
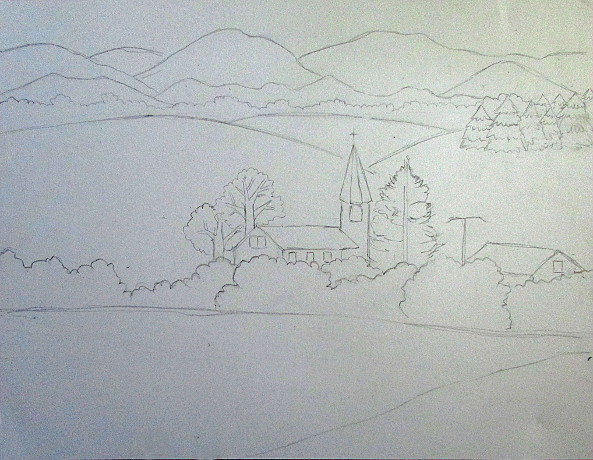
Add another little roof of another house, and a few more trees to complete the town.
Add another little roof of another house, and a few more trees to complete the town.
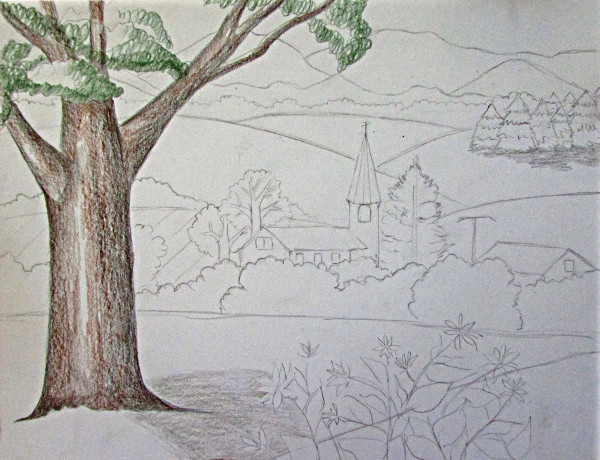
Next comes the big tree in the foreground. I start by indicating the area where the roots meet the ground. Look on the lower left corner of the sketch above.
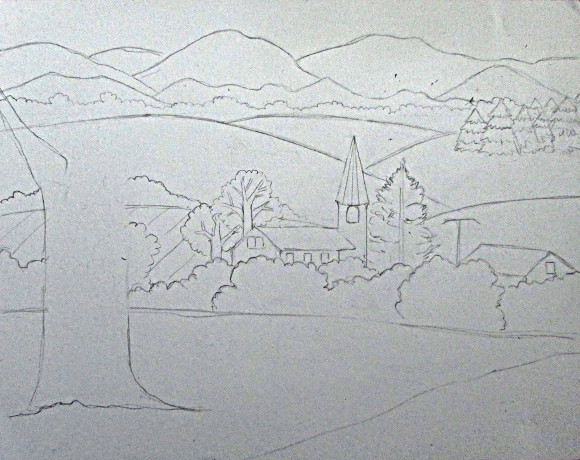
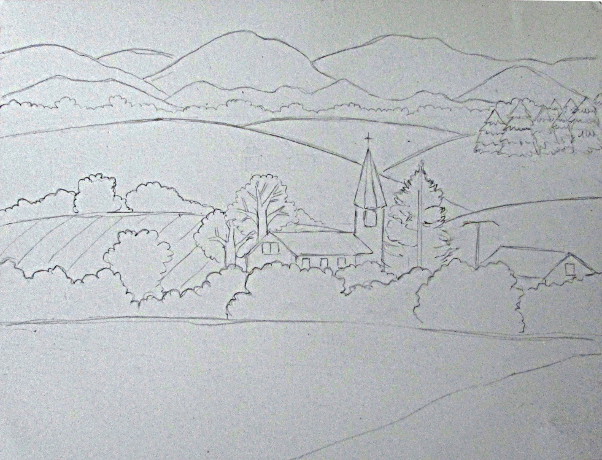
Start extending the trunk up. Begin indicating where the largest branches will be. You can erase the mountains behind the branches a bit later.
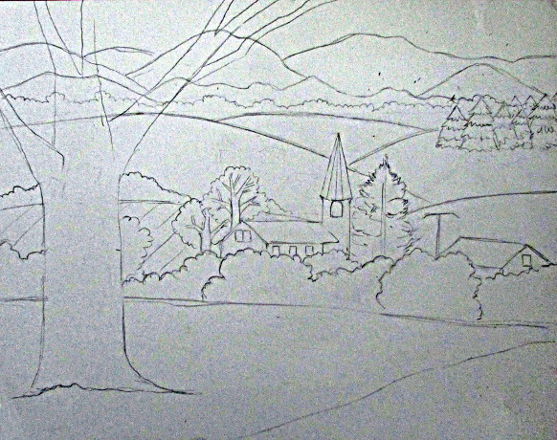
Add several large branches. Just a few. From each larger branch make the smaller ones come out in a V shape.

Finish up the main branches, and erase the hills, mountains and bushes that the branches are blocking.
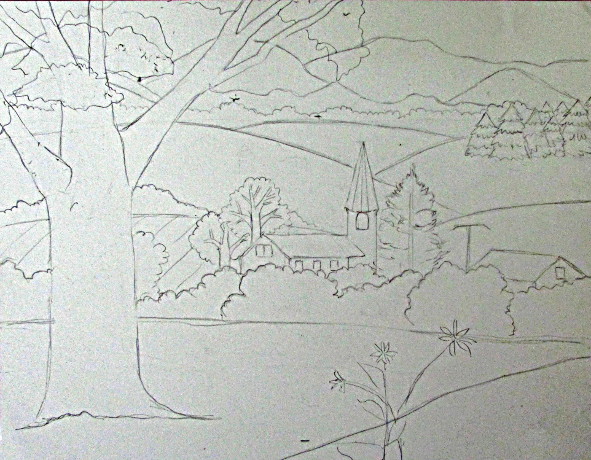
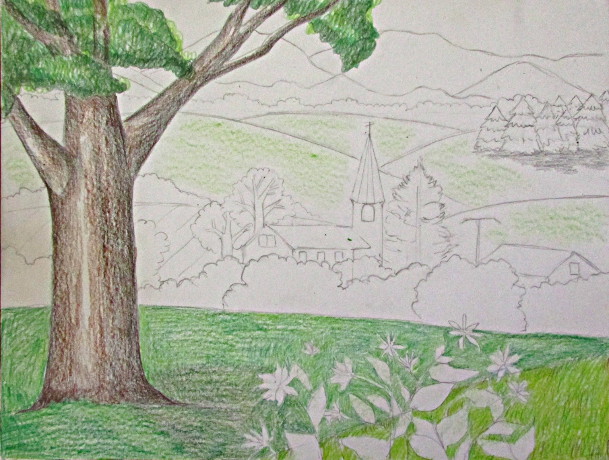
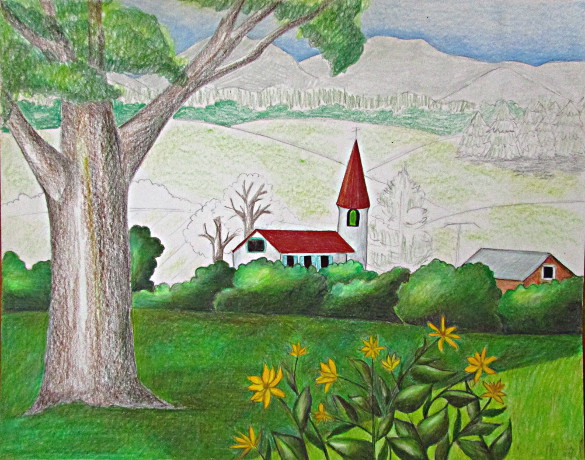
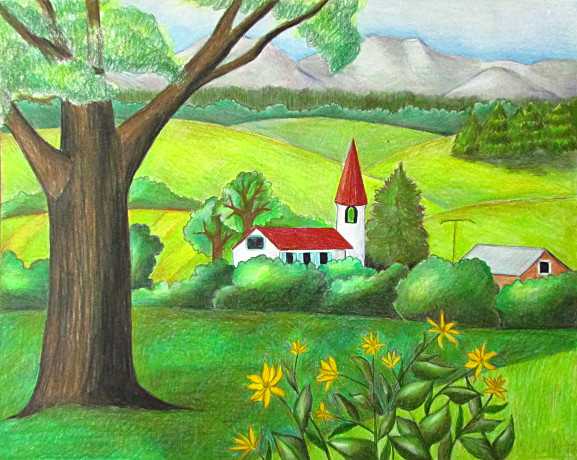
Add bunches of leaves. I wouldn’t bother with individual leaves, just bunches work well. Also in the very front I added some flowers that grow close up.
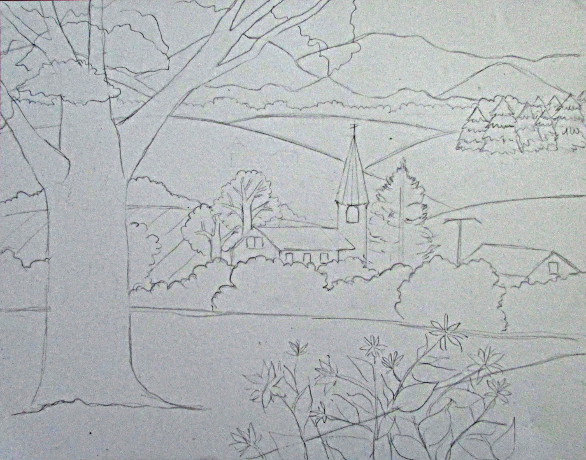
After adding a few more flowers in the front, I felt like my sketch was complete. Now it is time to decide where your light is coming from. I thought that upper left would be the sun position for me.
It is time to start coloring it all in! I started with the tree. Using a black pencil, I shaded the side opposite of the where the sun is coming through. Using light strokes.
Also at this point I have made a decision to color the tree in lightly, just to make it more defined. Then I would proceed with the rest of the drawing, coloring everything until it’s done. After that I would come back to the tree and finish it to the end as well.
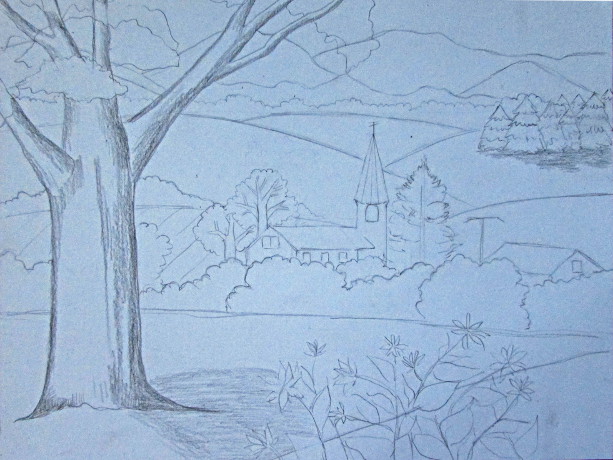
For the next few steps, I was just shading in the tree trunk. I also added some shadows for the pine trees in the back.
After I worked with some black on the tree trunk, I did some dark brown, then light brown. Don’t forget that the shadow falls away from the sun.
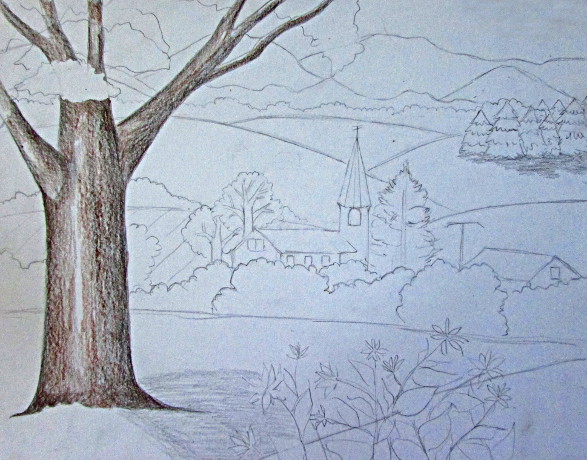
Color in the leaves to indicate where they are going to be placed. Start with a dark green color, color them in little green curly lines.

Color them a little more using a lighter green, drawing over the branches when the leaves are in front of them.
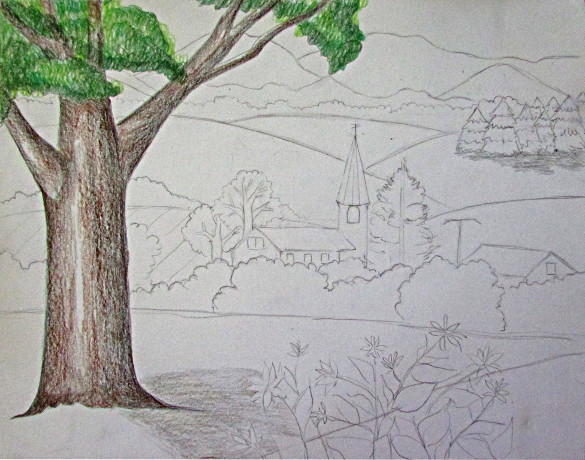
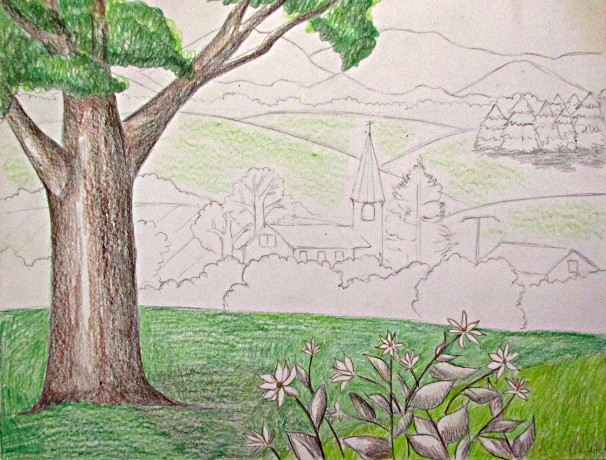
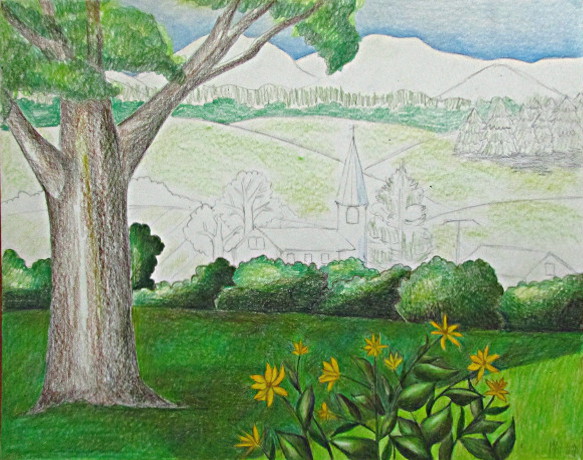
Keep working on the tree until you have a good idea of where everything will fall on the page. Shade the tree, but not too completion, it will be finished later on. Once your tree is semi-finished, it is time to start coloring everything else.
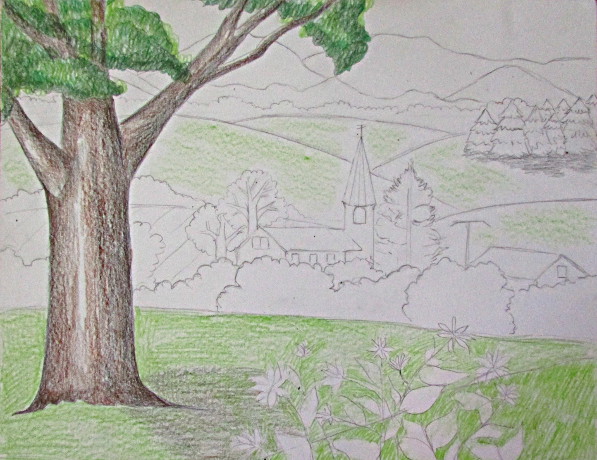
I started with the grass on the hills up close, carefully going around the flowers at first. Using light green vertical strokes on the closest hill to resemble blades of grass. Also, I added some of the light green color to the background hills.
When doing the grass and hills I like to overlay different kinds of green together. I start with a light green, add some dark green, olive green, browns, and even some yellow.
If the hill is up close I like the vertical strokes to indicate blades of grass. If the hill is further away I make the strokes even and blend the colors in more evenly.
Look on the photo above to see an up close detail of the hill that is up on the front.
Keep going with the front hills. After the initial go with the light green, I added some darker green to the further hill, and more bright green and brown colors to the front one.

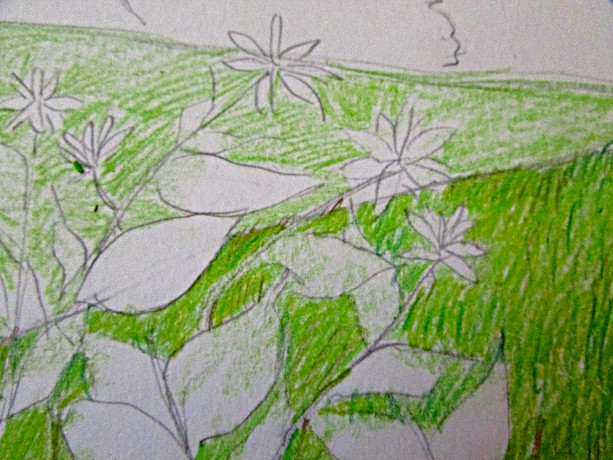
After I semi-finished the two hills, I started doing the flowers. At first, it is just a dark shadows on the leaves and stems, using dark brown or black pencil.
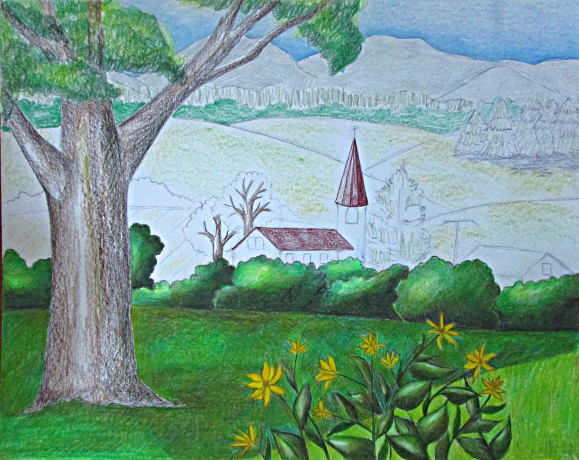
Using a lighter brown, or an olive green, I did a bit more shadows on the leaves and stems. I also add color to the hills as I work on the flowers. At this point I also realized that I have two sets of mountains, so I change the smaller ones into a row of pine trees.
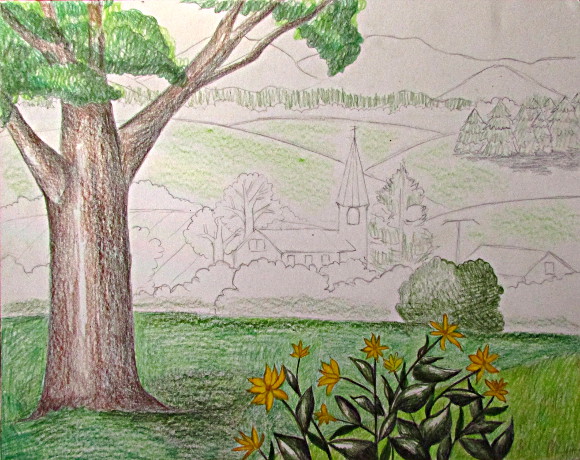
I keep adding some dark green to the leaves, and now making the flowers yellow with brown centers. Add a little green to the bushes, also some darker green to the pine trees in the back, and the line of pines way out by the mountains.

I finished the flowers by using light green to go right over the darker colors, pressing fairly hard. Followed by a white pencil over the light green, also pressing hard, and over the yellow flowers. I decided to do the bush behind that tall flower first, so that I could be done with that whole area.

After the flowers I did the two hills behind them, and the bush. This way the background behind the flowers will be done. Using a darker greens for the further hill, and lighter ones for the hill close up, I layer the colors, carefully going around each flower.
Finish up the hills by choosing one or two greens and coloring with enough pressure so that no white from paper is showing. I also added some shading and green to the bushes.
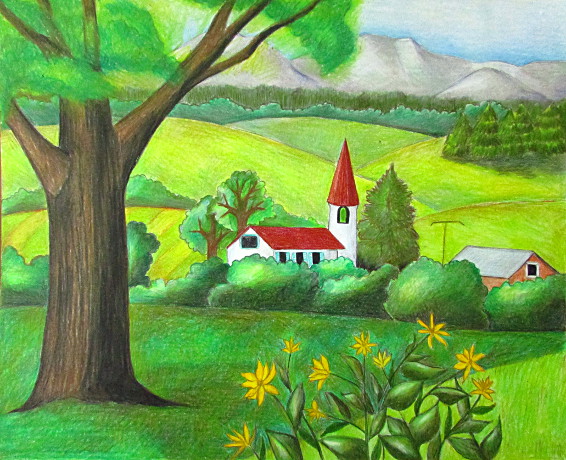
After I was done with the front hills and the flowers, it was time for the sky. Using sky blue, and cloud blue, I colored in the sky. Darker when it’s next to the mountains and lighter going up.

I added more shadows to the bushes. Darker on the bottom right, away from the sun. Also, finish up the sky using a white pencil.
Add some emerald green to the bushes, and the same green for the trees way out by the mountains.
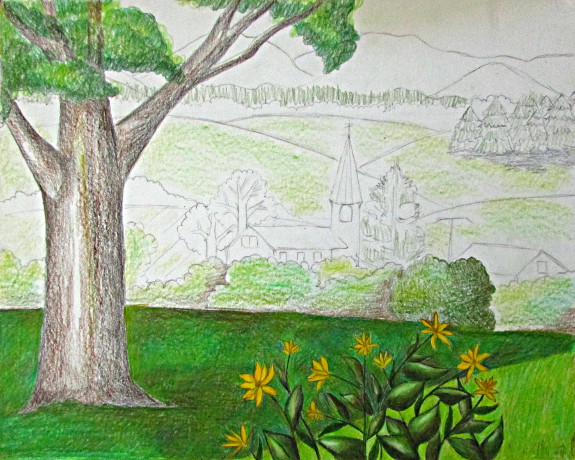
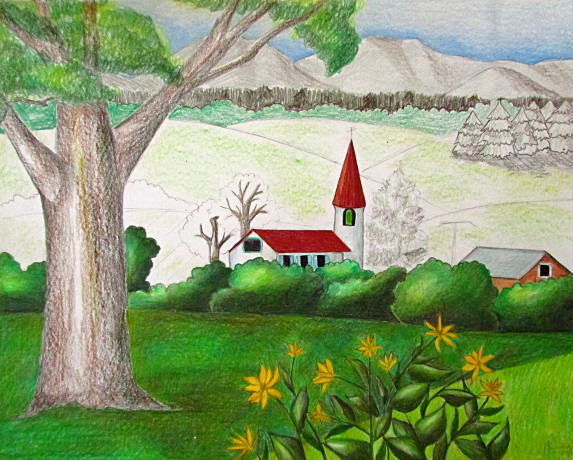
Finish up the bushes by using a really light green, and applying enough pressure to no longer see the white of the paper. Also get started on the rooftops and the trees in the town. I also add color to other things, a little bit, like the mountains now have a light grey tint. Also I did some brown on the trunks of the trees.
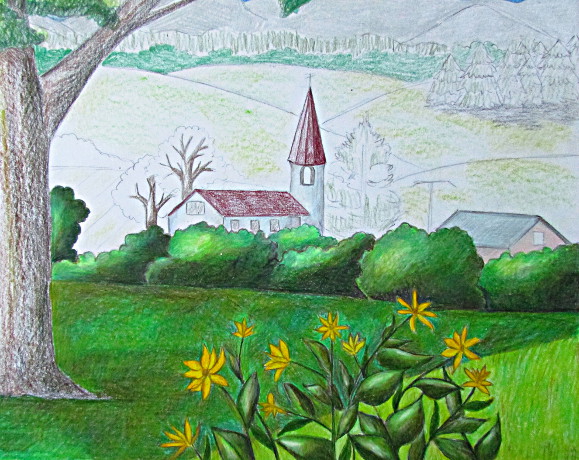
Here is a photo a bit closer up. I decided on the colors of the buildings. The church got a light cloud grey shadow, and mostly white. The other little house is a light pink. The sides facing away from the sun are darker than the ones facing it. Don’t forget to start that tall pine tree by the church by using some olive green.
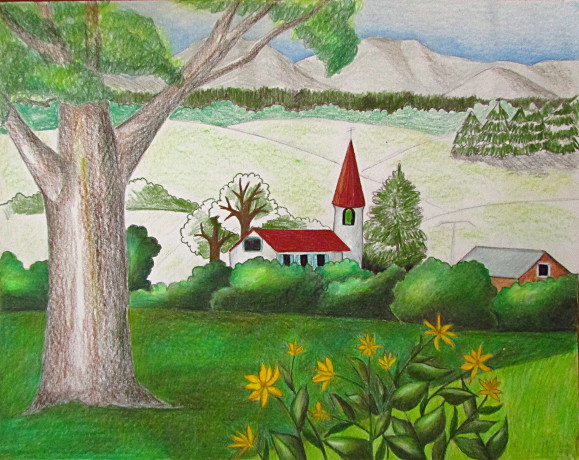
Finish up the roofs and the houses, again, making sure the white of the paper is not showing through. Even though the church is white, it is the result of using a white pencil, not white paper. I also added some shutters and window frames to the windows. I also didn’t particularly like the pink of the house on the right, so I changed it to a reddish brown instead.
Now I decided is a good time for the mountains. A bit back I did a solid grey color on them, applying the pencil with light pressure, nice and even. Now I took a darker grey and added shadows where the mountains are facing away from the sun. I also added some olive green to the background pine trees, and some more shadows to the little group of pines on the hillside.
I add some more green to the pine trees, the bushes, the trees by the church, and the large pine tree next to it and the bush on the edge of the hill. Keep in mind that the further away things are the more blue/grey colors you need to add to them!
Focusing on the next two hills up front, I used a light green to shade the one on the right, and make stripes on the one on the left. Also finish the bushes over the hills. Also, I added a mix of different greens to the trees behind the church, and more color to the large pine tree.
Using different light greens and yellows, layer the color on the remaining hills. Adding some brown to the edges will help to distinguish one hill from another. Finish up the large pine by the church.
Apply more pressure with a green, yellow or white to the hills close up to finish them. As before, make sure the layer of color is thick enough for the paper to not show through.
Do the same with the remaining hills, including the darker area under the pine trees for the shadow that they give off.
Next, if you look at the line of trees all the way back by the mountains, I added some grays, blues, and bluish green, and finished them up.
Using some olive green, and some lighter green I finish up the grove of pine trees in the back.
When things are further away there is also less detail involved, more outlines and blocks of shadow and light.
Back to working on the mountains, I added some blues, purples, grays to the areas away from the sun, and white to the areas facing the sun, making them complete. Also, added some grey colors to the row of pines at the edge there, blending them in with the mountains.
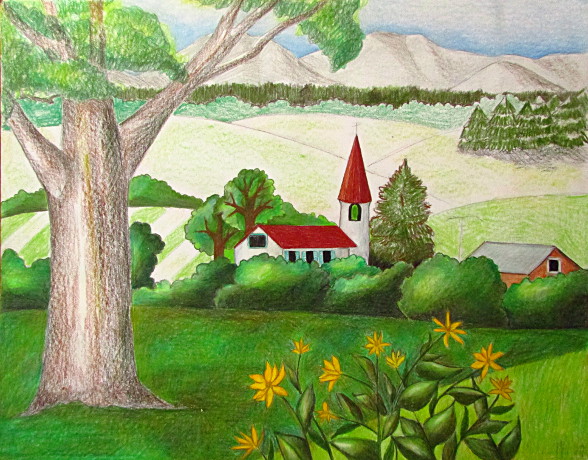
After everything else is done, it is time to go back and work on the tree. I start by adding some black thick lines to show the shadows.
Next, using a dark brown I add more pencil lines going from top to bottom to indicate bark. I leave the areas facing the sun a bit lighter.
Finish up the tree with some light brown.
Now finish the leaves on the tree with a few different green colors.
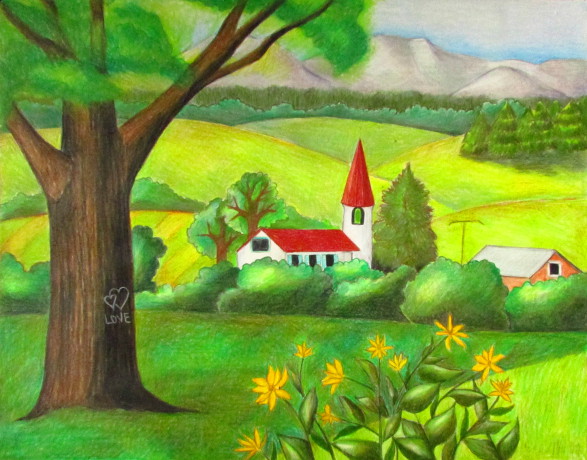
After I was done, I thought it would look nice to carve something on the tree, so with a sharp white pencil I drew two hearts right over the dark tree trunk. Now it’s all done!