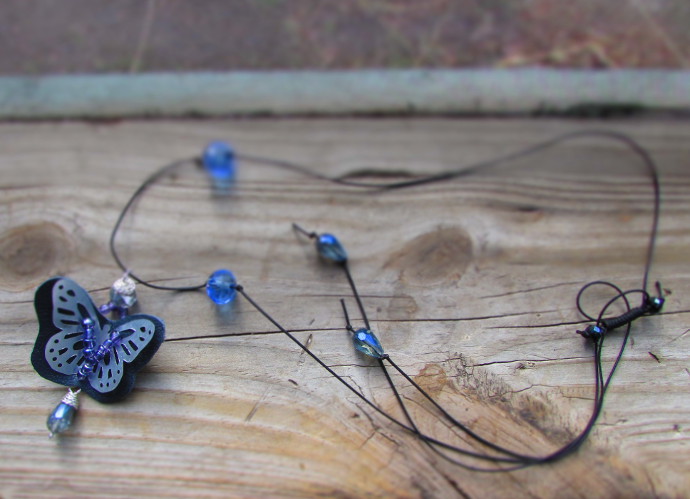
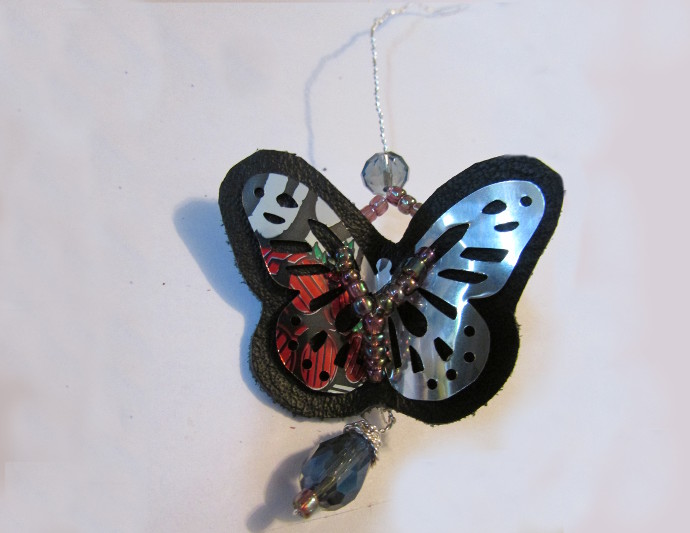
Right on time for Earth Day and Spring, here is a tutorial for recycled aluminum can butterfly jewelry. I have made both earrings and a necklace. I like the necklace better. It came out really neat, and I have already given a bunch away as gifts.
Here is how to make one (or ten) for yourself and friends:
***This post contains affiliate links.***
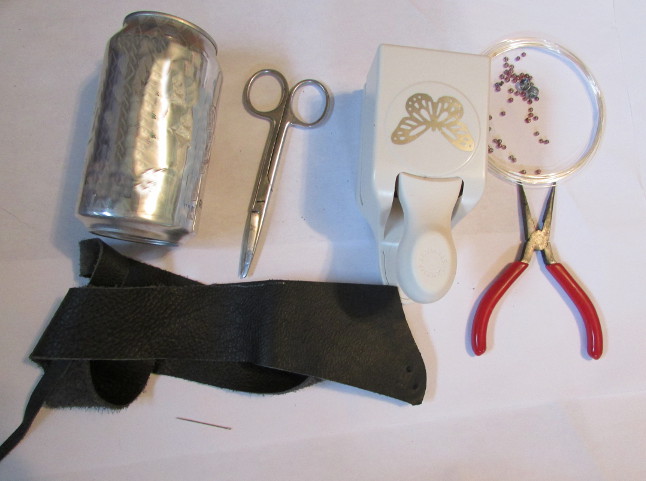
What you will need for Recycled Aluminum Can Butterfly Jewelry:
You will need an aluminum can, a needle, some leather (or imitation leather, or even felt), scissors, a bit of large glass seed beads, and a bit of wire. I like to use 26-28 gauge sterling silver wire, like THIS ONE. You’d also need a pair of pliers to cut and manipulate wire with. I personally like THESE. Most importantly you will need a paper punch of your choice. I used a Martha Steward Monarch Butterfly Punch. At first I was worried that punching through an aluminum can might ruin the punch, but it didn’t, not even one bit. I must have made 20 of these butterflies, if not more, and the punch continued working perfectly well. You will also need some crystal beads, the big shiny ones, especially if you’re making a necklace, and Nylon Knotting Cord, like THIS ONE.
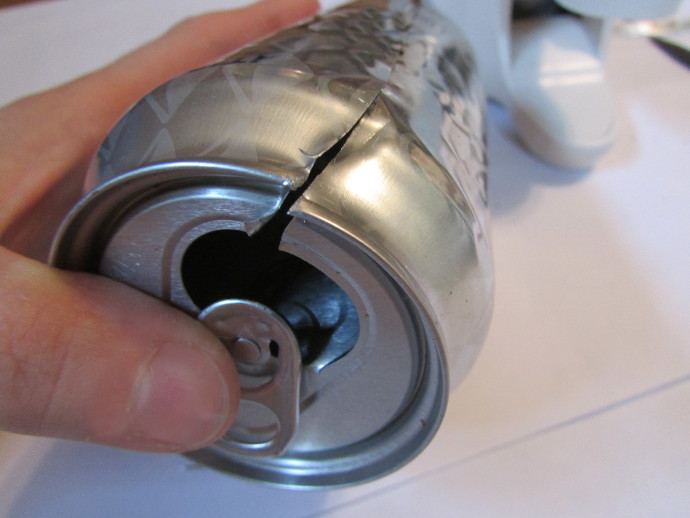
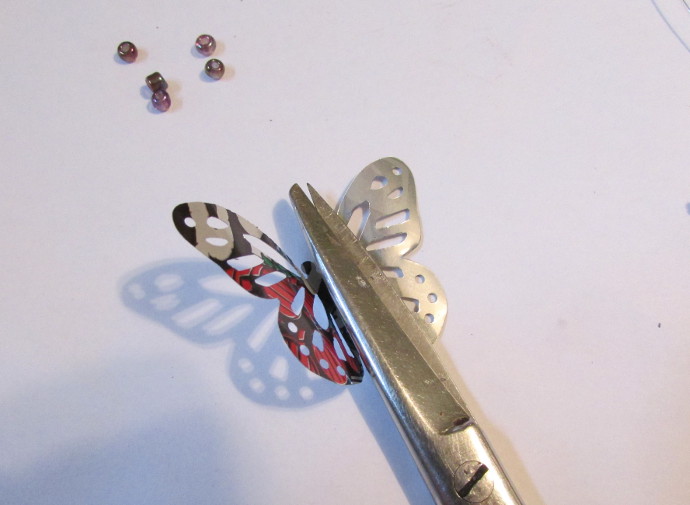
First you will need to cut your aluminum can. I used a regular soda can. I don’t drink soda, so I had to take a friend’s can. I found that the easiest way to cut is from the opening down.
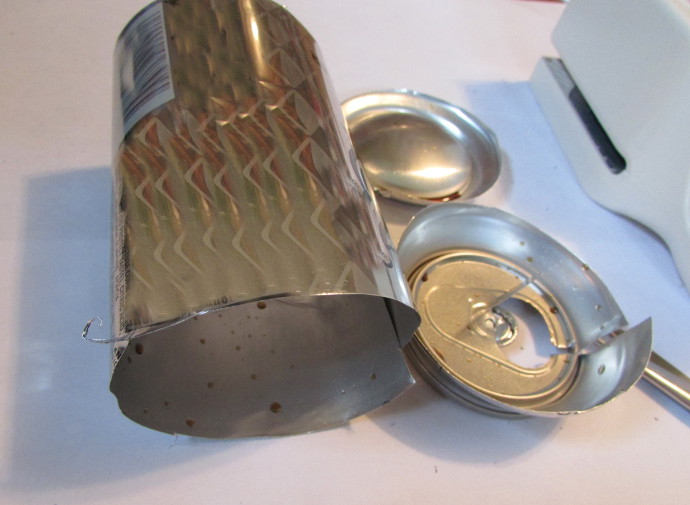
Cut the top and bottom off and cut the can all the way down so it opens up flat. Wash the soda off, and wipe it dry. Be careful not to cut yourself of the jagged edges.
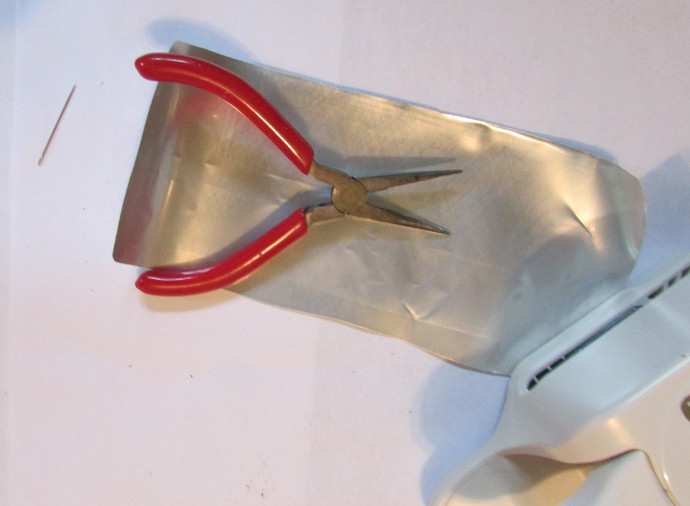
Make sure to trim all the jagged edges, so that the aluminum doesn’t get stuck in the punch.

Gently slide the aluminum into the punch.
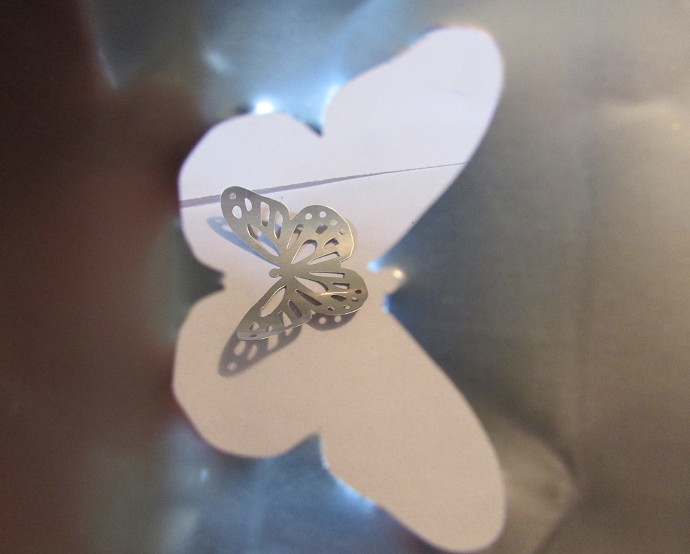
Press gently but firmly, and punch through. Once your butterfly is punched, pull the remaining aluminum out. The butterfly is bent a bit because the of the original can shape. You might need a knife, or a flat object to wiggle it out.
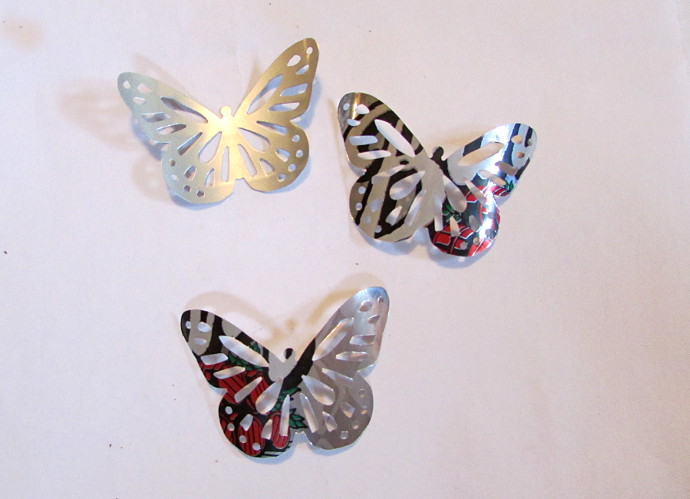
Punch some more butterflies out, because it’s fun. You can use the outside of the can if you like the picture, or the inside for just silver.

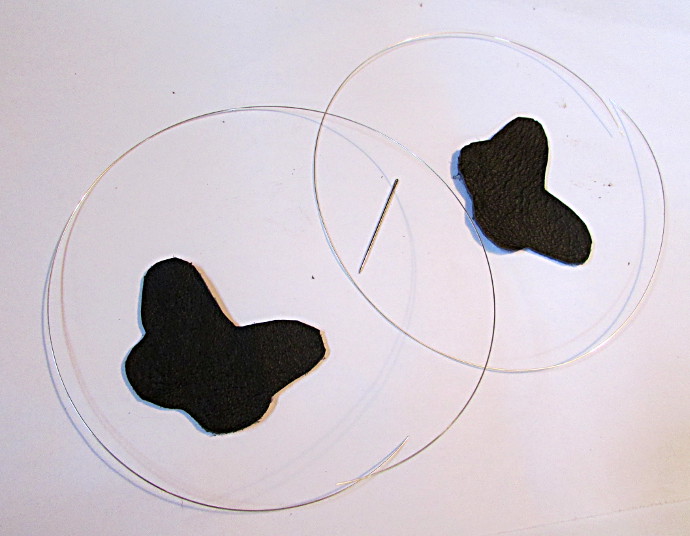
Lay it out against your leather (or felt), and cut the approximate shape of the butterfly around it, giving it a few millimeters extra all around.

Here are my butterflies with the leather backing.
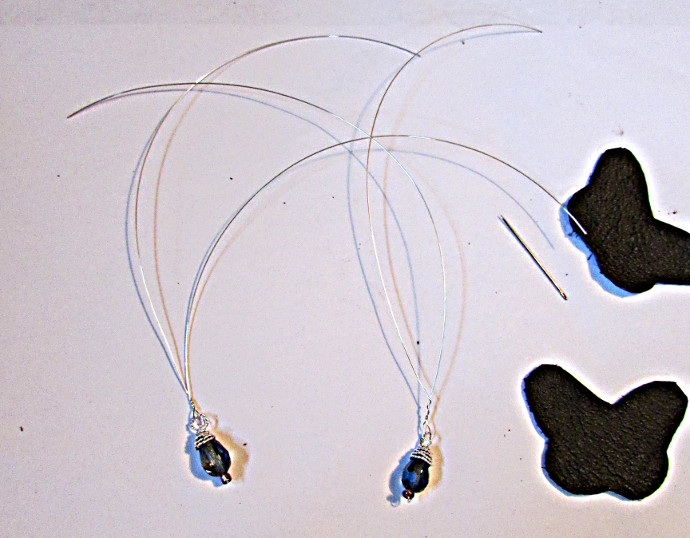
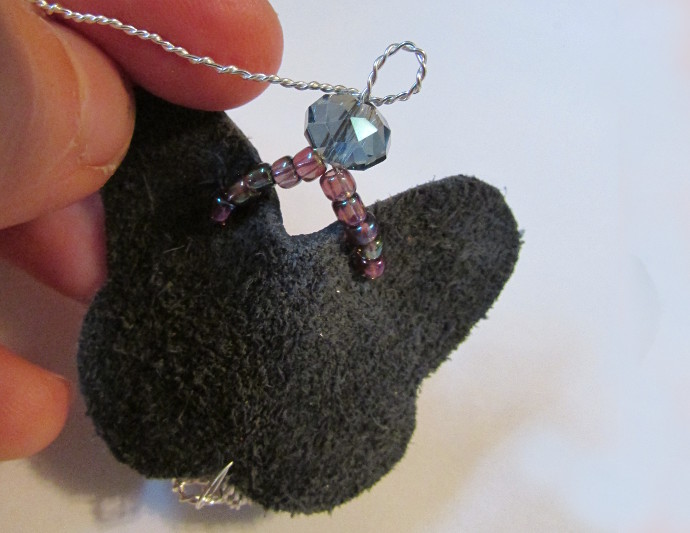
For each butterfly you will need to cut about a foot of wire. It’s time to make the pretty dangly part on the bottom. Use a crystal or glass bead, and one of the seed beads for that.
Put the seed bead in the center, and fold the wire in half.
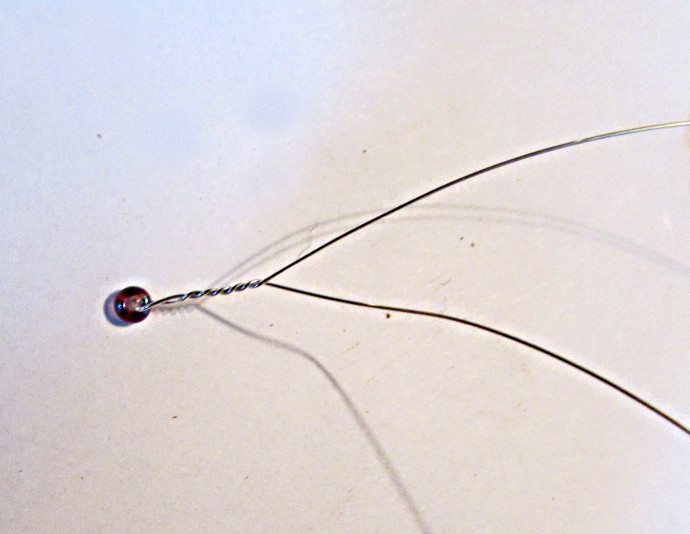
Then twist the wire from the seed bead a bit.
Put the glass or crystal bead on the wire.
Twist the two ends of the wire together until the end.
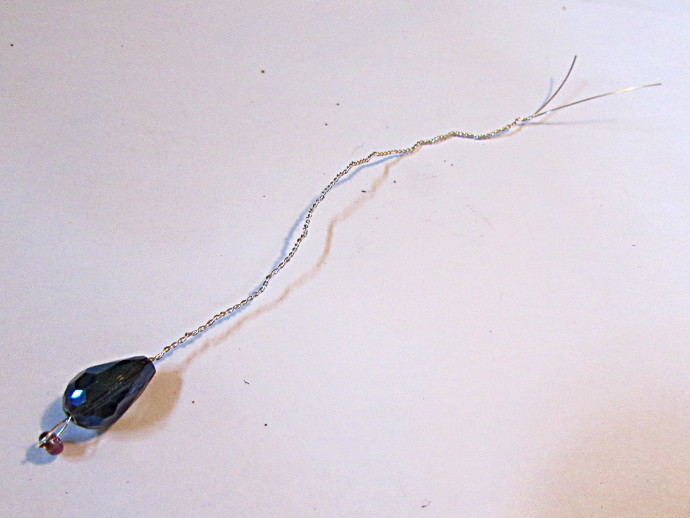
Just like this.
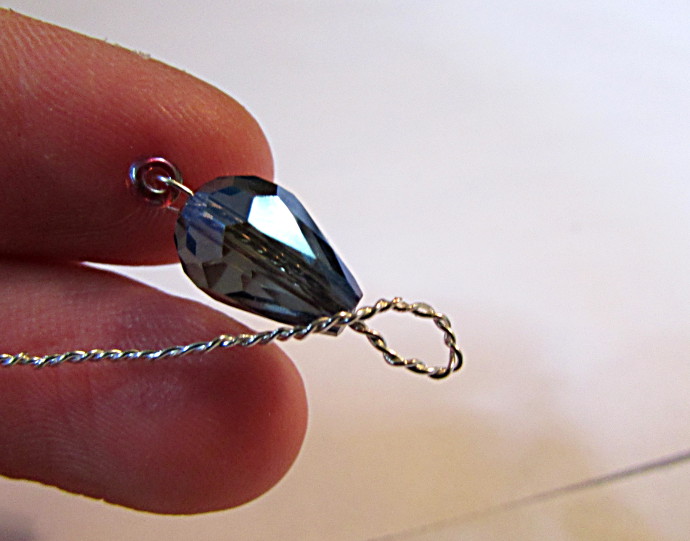
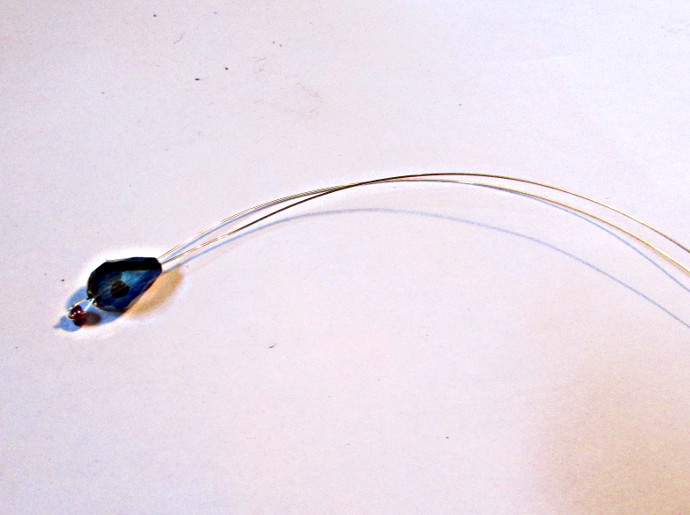
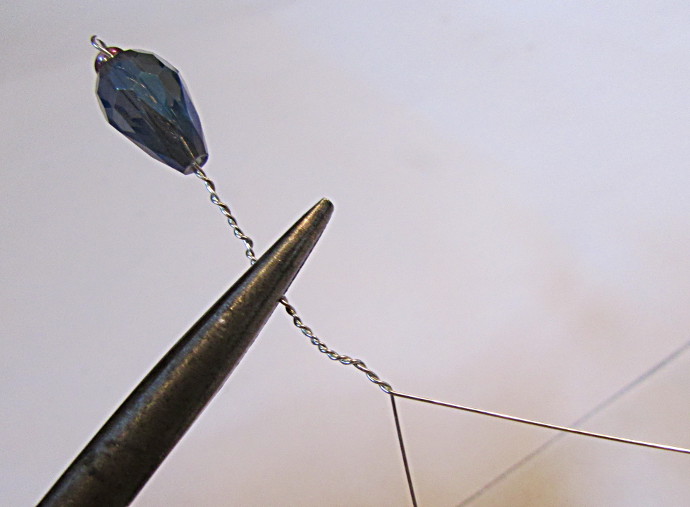
Make a loop at the top of the crystal/glass bead.
Twist the loop to close it, and then wrap the remainder of the wire around the top part of the bead.
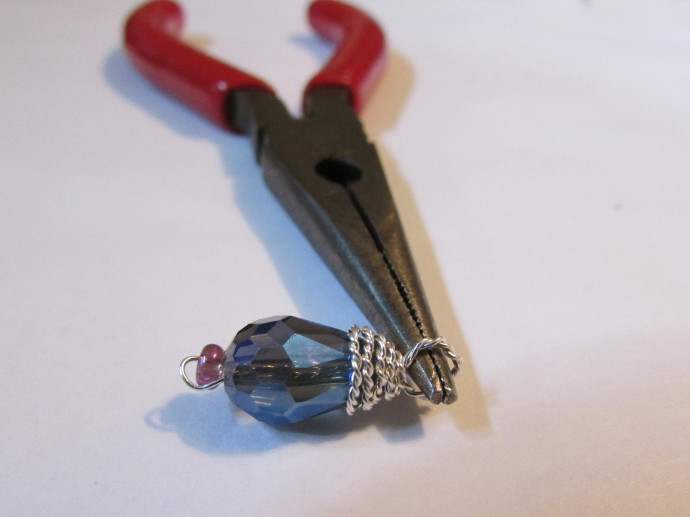
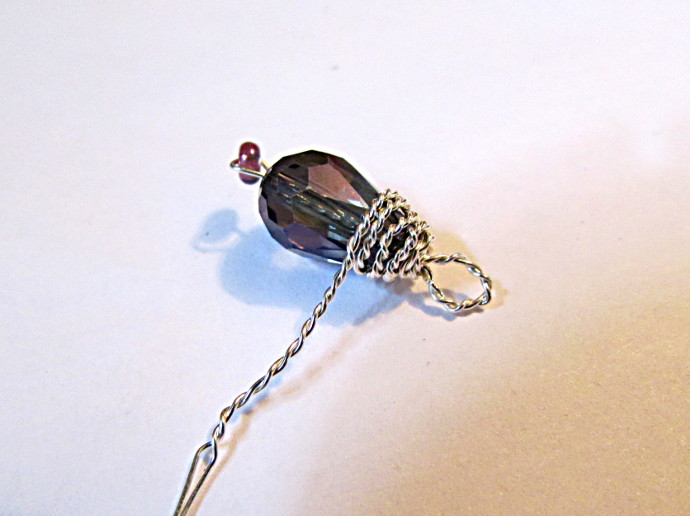
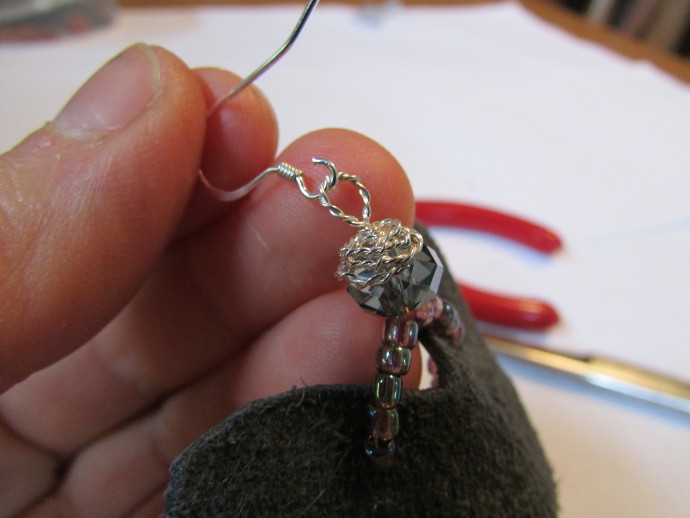
Using the pliers, clip off the left over wire, play with the part where you clipped it. You can push the end down and close to the loops, or under them, if possible. Just make sure it doesn’t stick out and catch stuff when the necklace (or earrings) is worn. Use the pliers to make the loop nice and round.

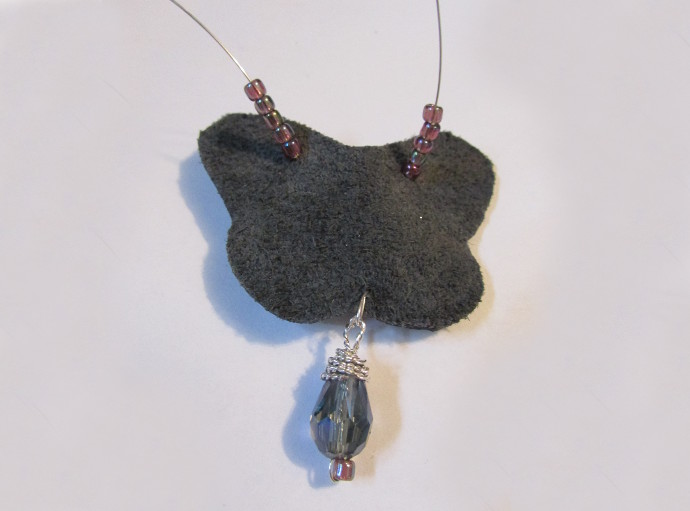
Ta-daa. The bottom pieces are all done. You can see on the right piece, the end of my wire is pushed close to the bead, and doesn’t stick out.
Next you will need your leather (or felt) butterfly shapes, a large needle, and a foot of wire for each butterfly.
Put the wire through the loop in the pretty dangly bead you made before. Fold it down the center and twist a little to keep it in place.
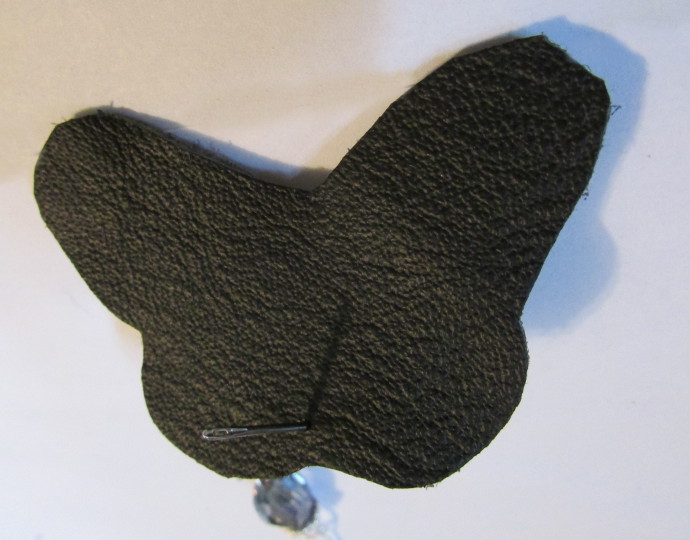
Using a large needle, make a hole in the bottom of your leater (or felt) butterfly shape.
Now push the two ends of the wire through the hole you just made from the back of the butterfly to the front.
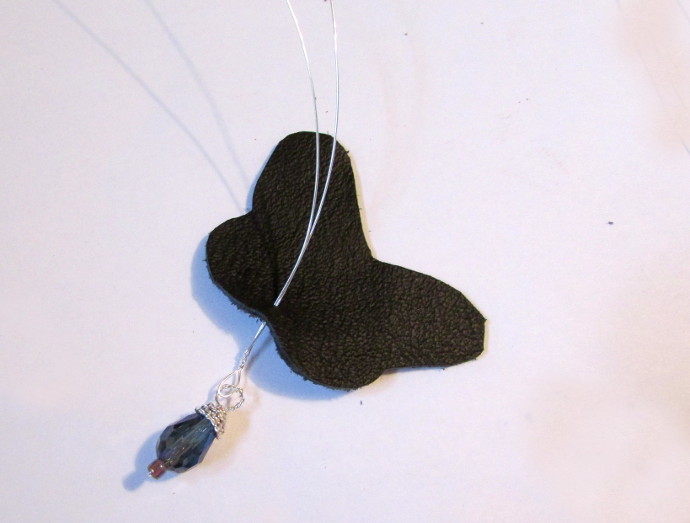
You could use scissors to bend the butterfly out a bit.
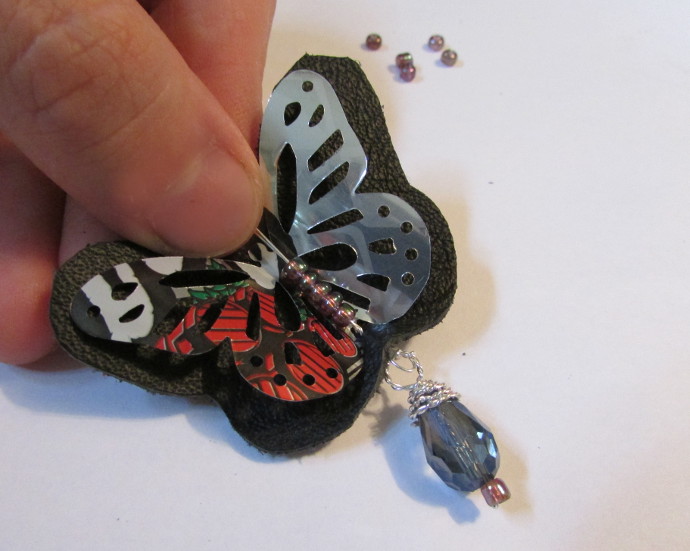
Put the ends of the wire together, make sure the wire is pushed all the way through the hole. Then put on enough seed beads to go to half of the butterfly.
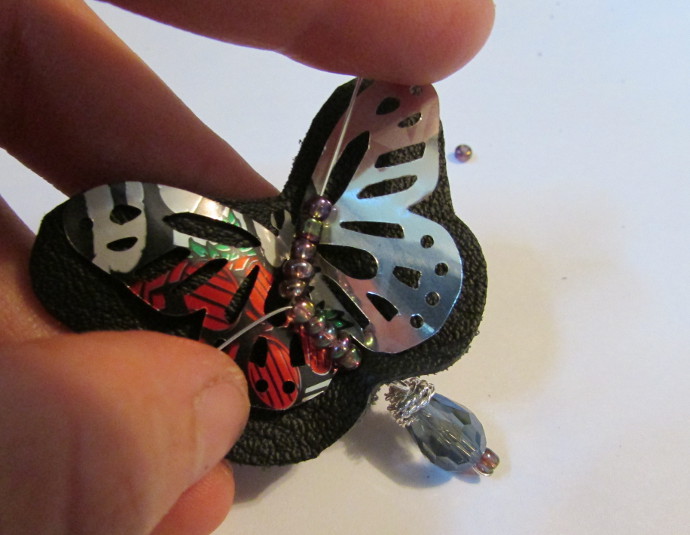
Split the wire ends. Put enough beads on one end to go from the center to that large opening in the wing that you see on top.
Make a hole with the needle where the wire will go through and put the wire in the hole.
Do the same with the other end of the wire, putting it through the other wing.
This is what it will look like now.
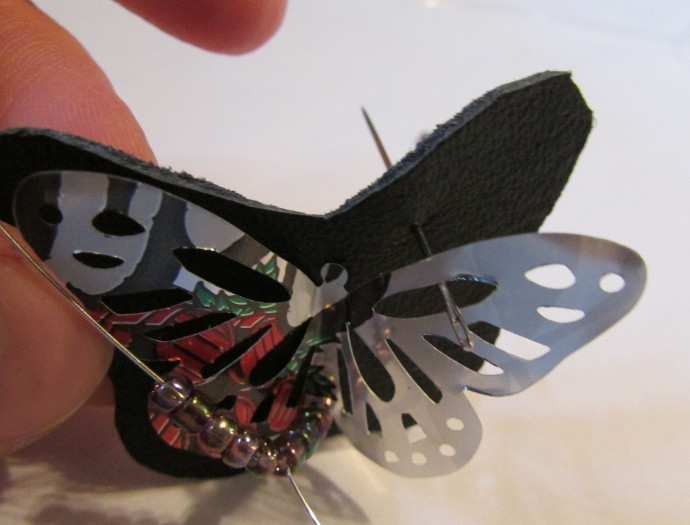
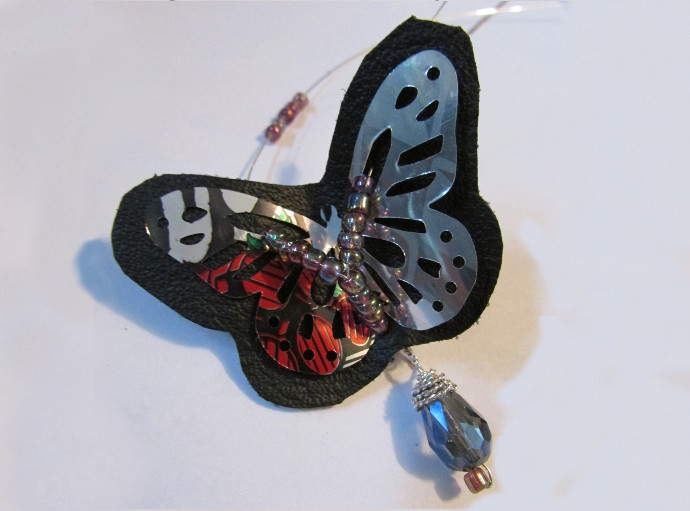
On the back side of the butterfly, put on enough beads on each wire to be able to bring the wires back together without bending the wings out of shape.
Bring the wires back together and twist them together.
Put a medium glass or crystal bead on the wires.
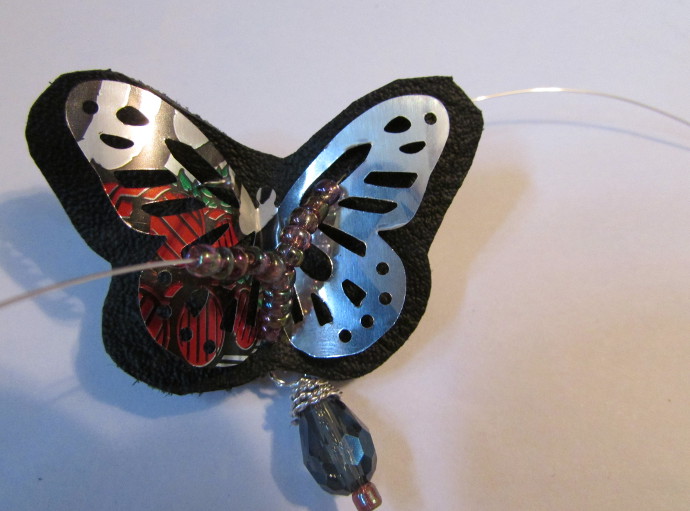
Make a loop with the wire.
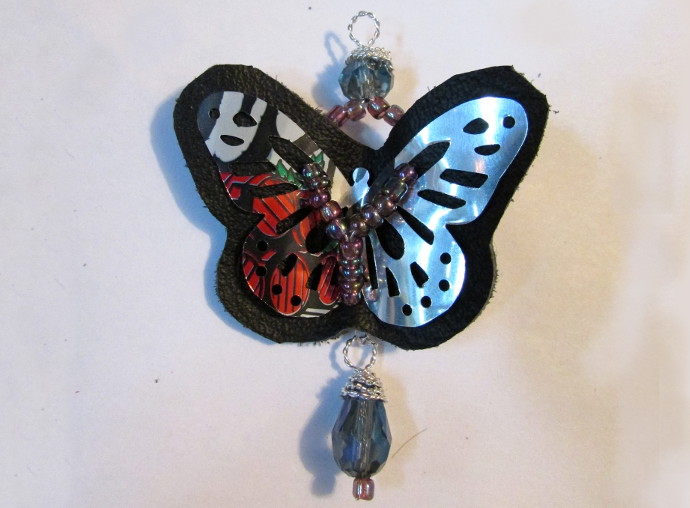
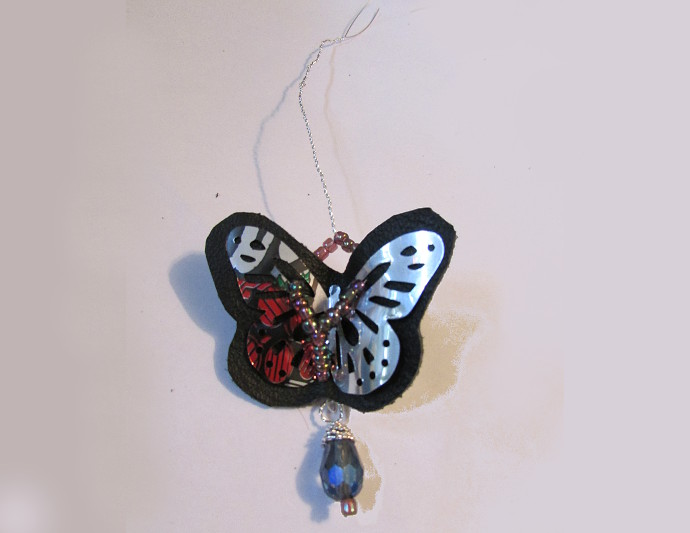
Wrap the wire around the top of the bead, neatly clip off the end, and tuck it in so it doesn’t stick out. Your butterfly is all done.
If you are making earrings, you will need two of them. Just attach them to the earring by the loop on top.
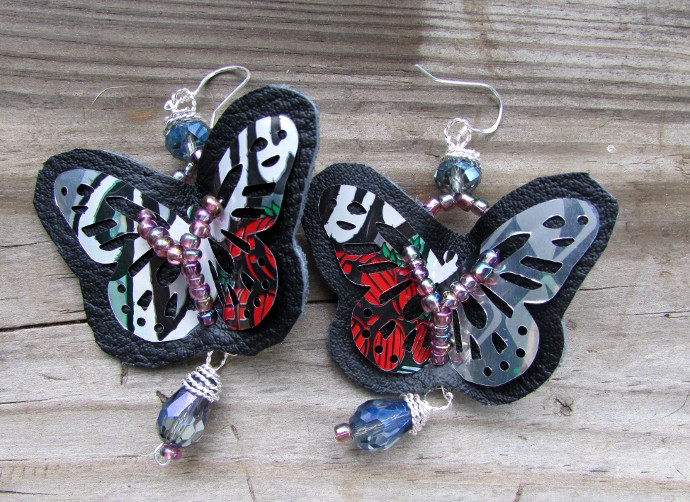
Here are the earrings.
Keep reading if you are making it a necklace.
For the necklace, I decided to make a simple slipknot necklace. I tried my best to take photos of how to make a slipknot below, but if that’s not entirely clear, try a search on Youtube. Videos always help with things like that.
How To Make A Slipknot
You will want some nylon knotting cord. I used a black 0.8 mm knotting cord like THIS ONE.
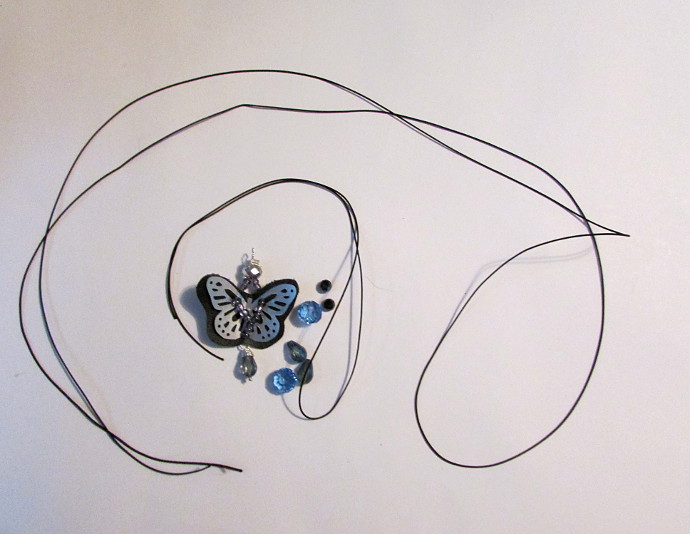
Take two lengths of the cord. The first one, used to make the knot, is only about a foot and a half long. The second one should be the maximum length of your necklace plus 2-3 inches in addition to that. You will also need a few beads: two large crystal beads, two small crystal beads, and two more beads to match the one you used at the bottom of the butterfly.
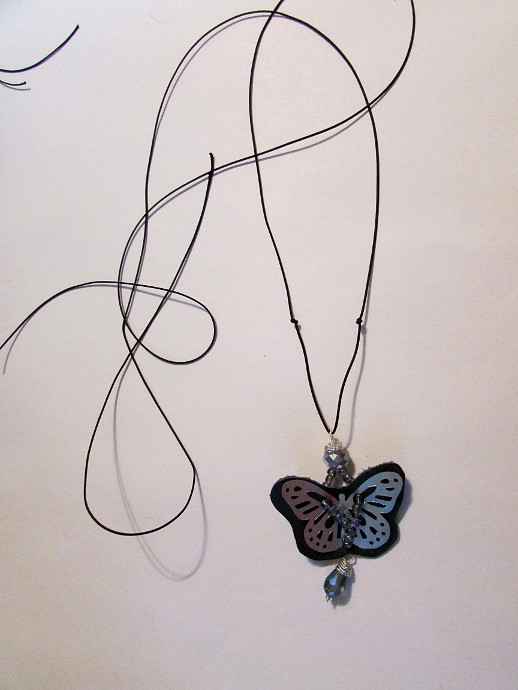
Put the butterfly down the center of the cord, and tie two knots equidistant from the butterfly (which is hanging in the middle of your cord length).
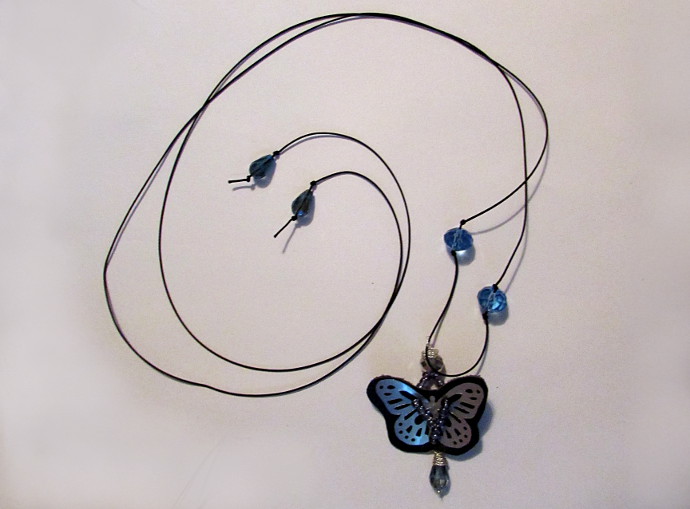
Put two larger crystals on each end of the cord, and tie a knot on the other side of each one. Then add the two teardrop crystals on each end in the same manner you did the large crystals: with a knot on each side to keep the bead in place.
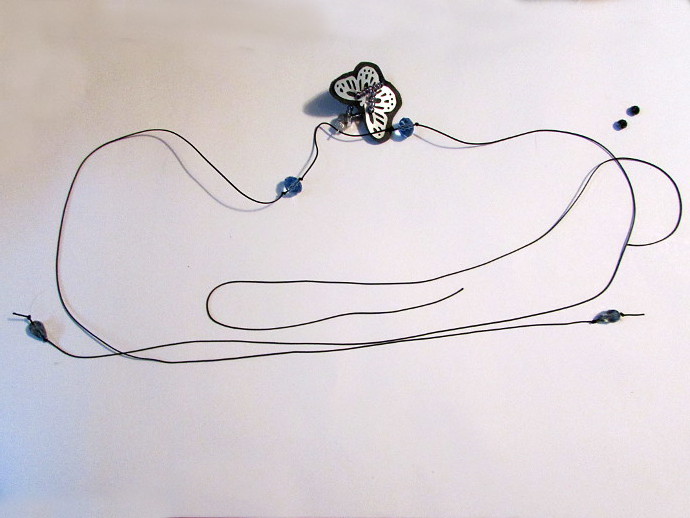
Put the ends of the necklace parallel to each other, but going in different directions. This way you will be able to pull on the ends to make the necklace longer or shorter. Put the short piece of cord in the position like in the photo above.
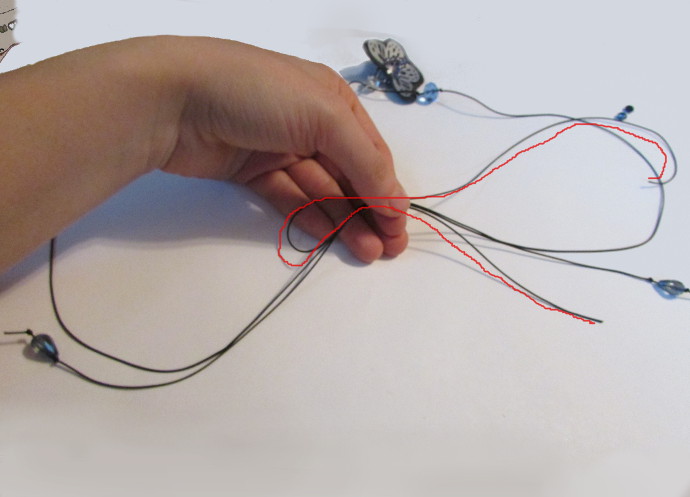
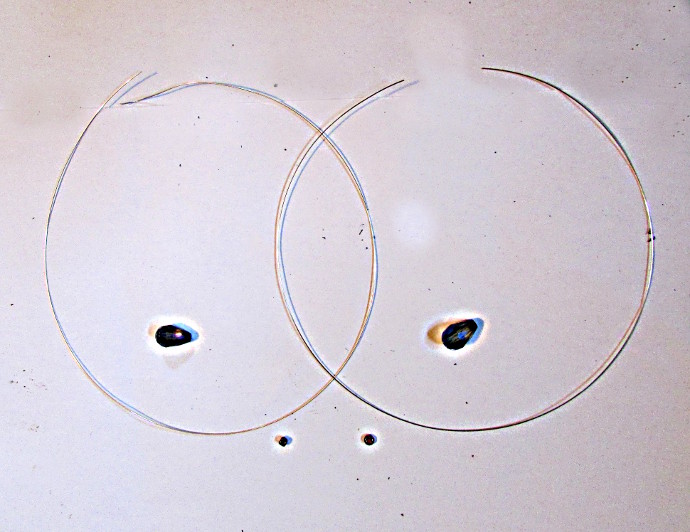
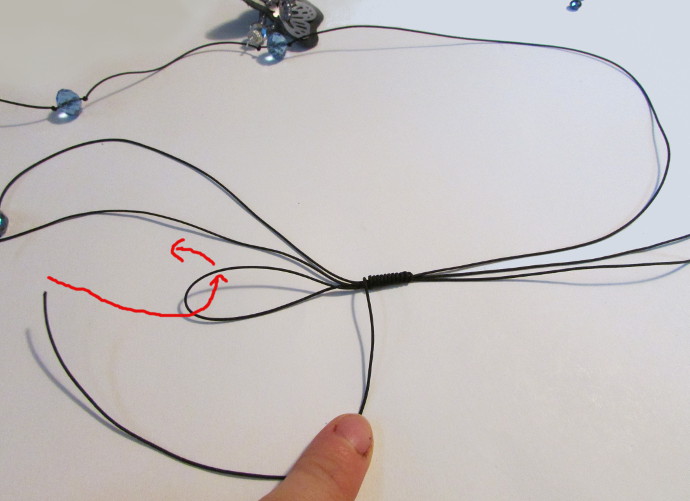
Pick them all up together. At this point you should have four cords in your fingers. Make sure the necklace cords don’t tangle up together, and the slipknot cord has to form a loop with one end longer, and the other shorter.
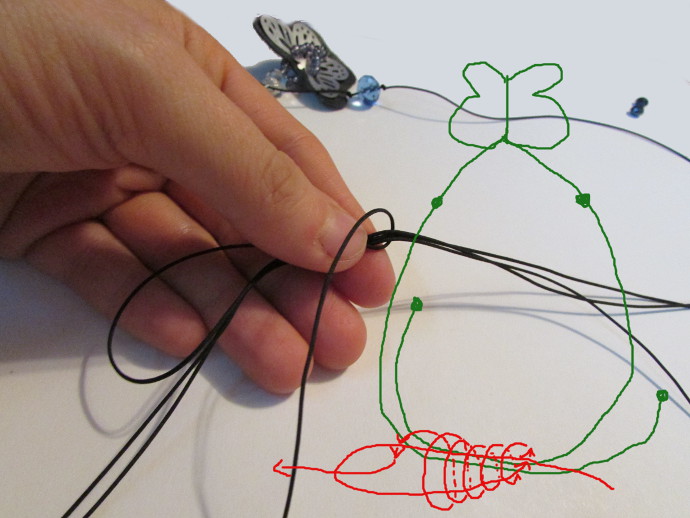
Take the longer piece of the slipknot cord and start looping it around all four cords, going towards the loop. I like to bring it around 7 to 10 times, to make that many loops around all four cords. These loops should be firmly around the cords but not too tight.
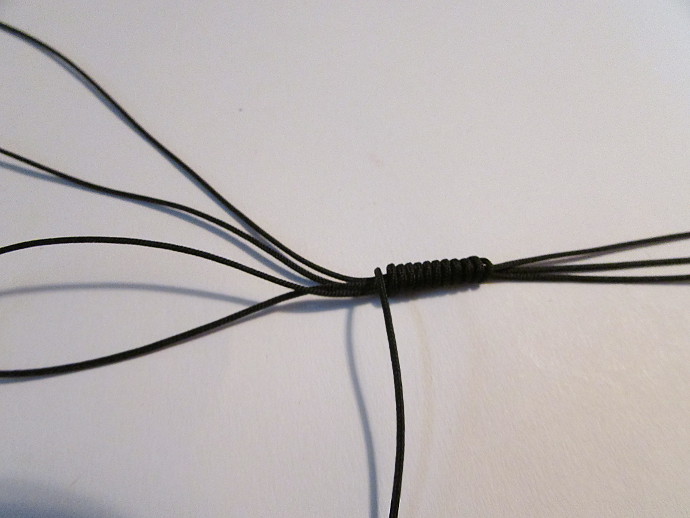
Here are my loops.
Now put the remaining end of the long end of the slipknot cord through the loop you initially made.
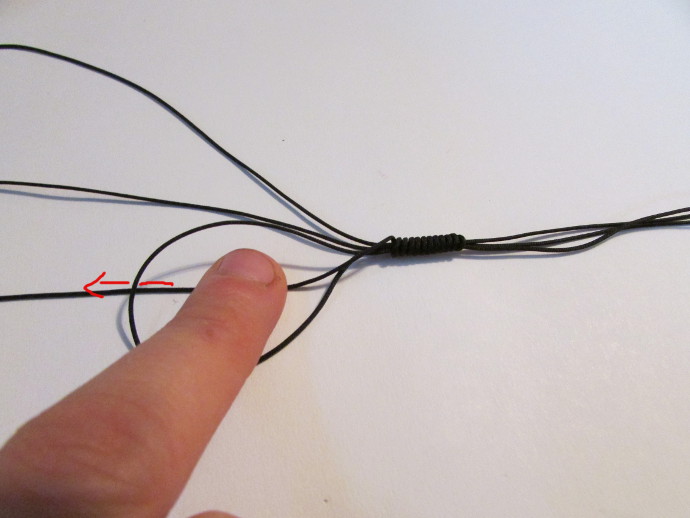
Gently holding what used to be the longer end, pull (gently) on the shorter end until you have tied a knot.
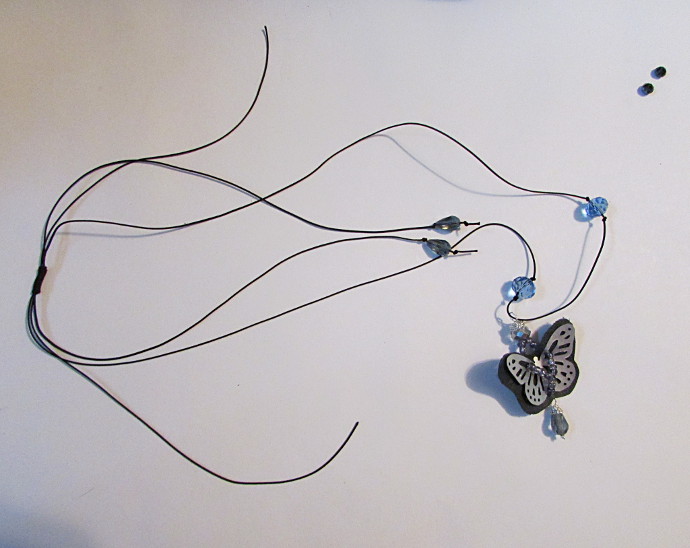
Now your ends of the necklace should be able to slide within the knot, making the necklace longer or shorter. Before cutting off the ends of the slipknot cord, tie to knots on each end, put the two small crystal beads on it, and then two more knots to keep the beads in place. Then cut them off, leaving about 1 cm of cord left. Look at photos below to see what I mean.
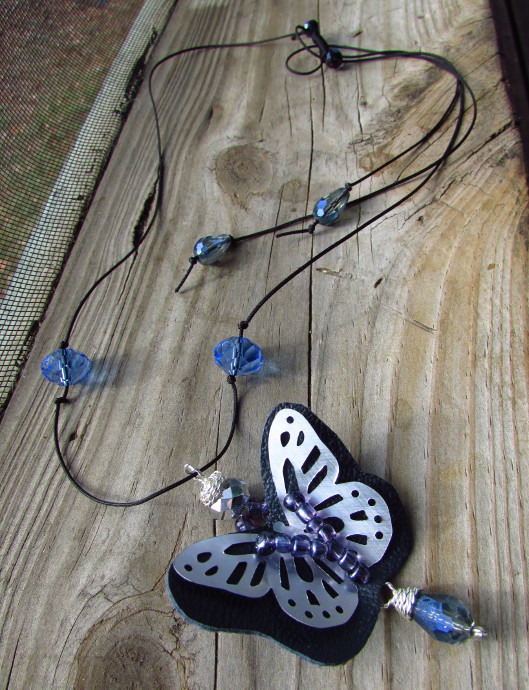
The recycled aluminum can butterfly is all done!