Mosaic is such a fun technique for making art. I have been looking for a long time for a way to do it with a class of young kids. A way that doesn’t involve heavy tools and cutting ceramic tile (or little fingers). Also, I needed something that wouldn’t cost me an arm and a leg, as in today’s day and age, mosaic supplies are expensive (I would know because I buy them for Valentin Kovalyov on a regular basis). There are several places where you can purchase supplies if you are interested in perusing mosaic as an art form. I will make a list of places at the end of this art lesson.
***This page contains affiliate links.***
Some facts about Mosaics
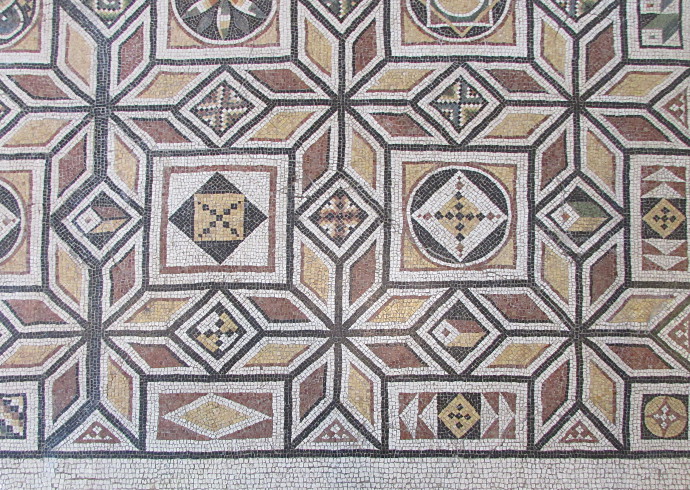
- Mosaic is an ancient art form that uses small pieces to create beautiful images. It dates back to Mesopotamia, close to 4000 years ago.
- Some of the most popular mosaic scenes depicted myths, religious figures, and beautiful geometric patterns.
- Some of the materials that were used for early mosaics are ivory, shells, and pebbles. In today’s day and age there is a much wider variety of materials to choose from: we use ceramic, glass, clay, stone and more.
- There are three different methods to doing mosaic: Direct Method is the one in this art lesson, where you apply the tile directly to the surface. There is also an Indirect Method and Double Indirect method. You can read more about them here.
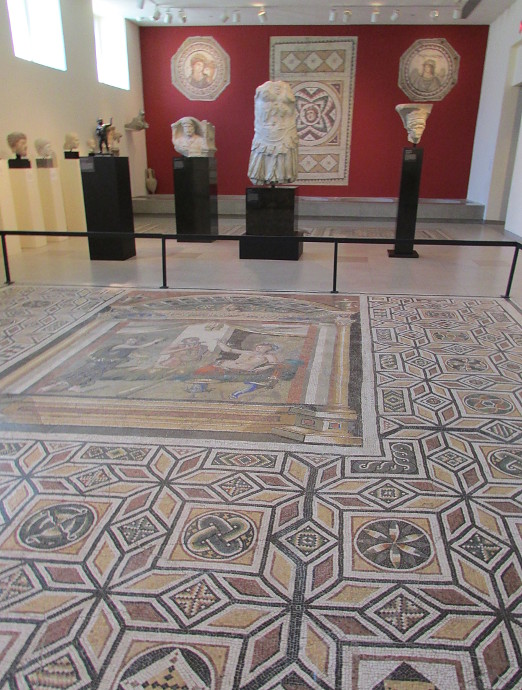
In New Jersey, Princeton Art Museum has some great samples of mosaics for kids to see:
Read more about history of mosaic art here and here.
Recycled Mosaic Tiles Art Lesson
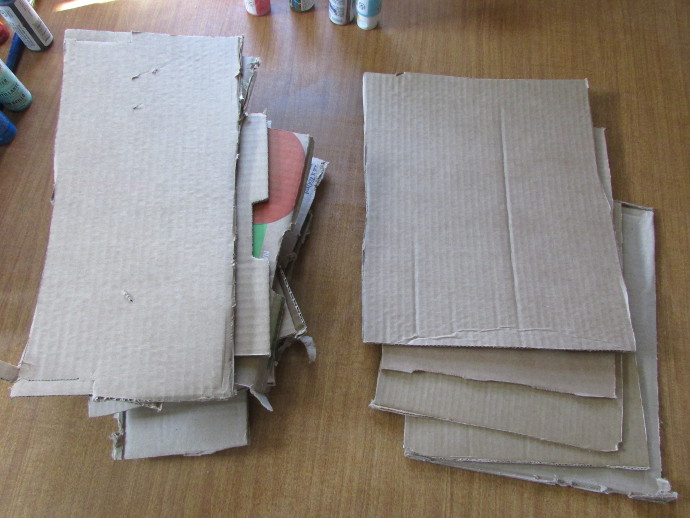
I was brainstorming about how to do the mosaic art lesson for a while, but then it hit me: RECYCLED CARDBOARD! The art class was exactly on Earth Day, so it was just a perfect fit. For this project I highly recommend you invest into a box cutter, the link leads to the one I used for this, and an aluminum meter stick. Also, you should know that this lesson takes a bit of prep time. It took me exactly a week, working on it a little bit every day, to get everything ready.
I collected a bunch of boxes from the local wine store, Costco, and BJs, and cut them. The larger whole flat pieces, such as bottoms and sides, I cut into about 9×12 inch or 11×14 inch sheets to be used as a base for the mosaics, one for each kid and a few extras just in case. After roughly cutting them out I trimmed them using a box cutter and the meter stick. The sides I cut off as well, and made them into small panels to be used for tiles.
The paint that I used to paint the boxes for the tiles was just leftovers from other art classes. I honestly tried to use up the paint that had hardly anything left in the bottle. For art classes I usually use simple craft paint such as Plaid or Americana. To be honest, I don’t buy it online (the links above lead to amazon), but instead I go to a craft store and by whichever non-toxic paint is on sale that day.
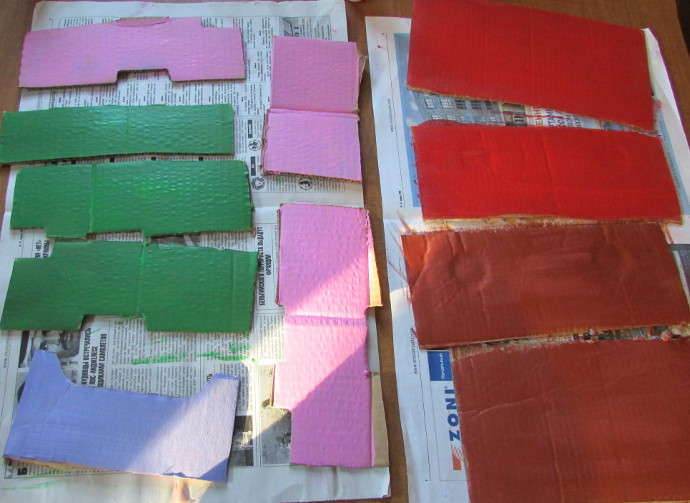
I laid all the flaps and uneven pieces out on a newspaper and painted them in a variety of colors. At that point my oldest son had a brilliant idea: why not paint them on both sides, so that this way you have more colors. That’s exactly what I did.
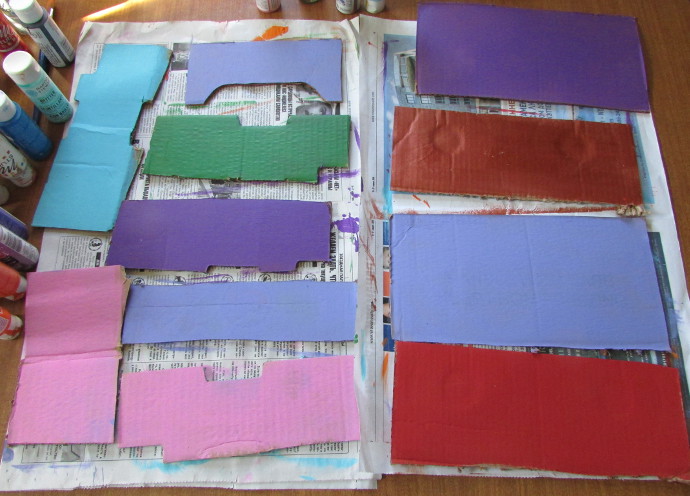
Once one side was dry, I flipped them over and painted the other side. What you see in the two photos above is just about 1/4 of all the panels that I painted. I did them in batches over the course of the week.
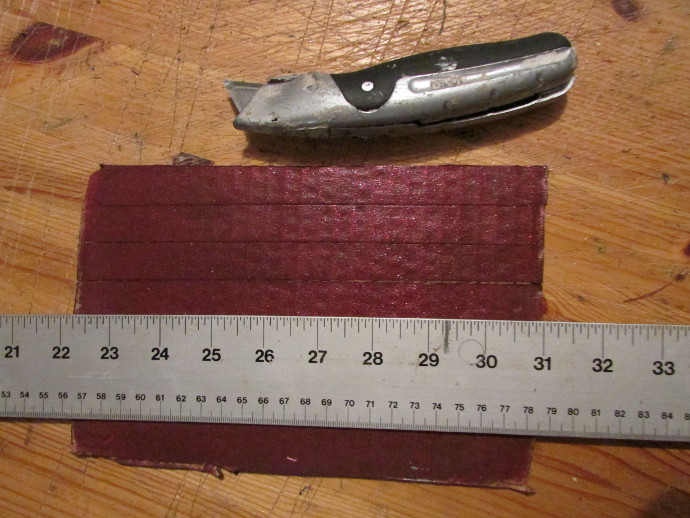
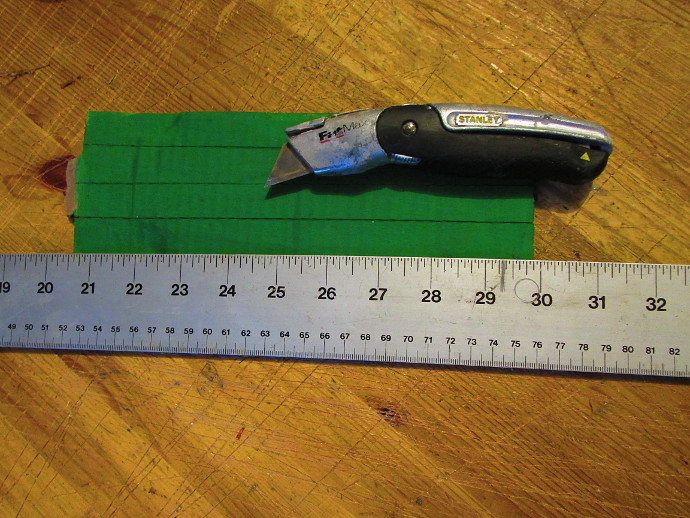
Once they were all dry, I used a meter stick and the box cutter to cut them into long strips about 3/4 of an inch wide. Please, please, please be safe doing this. Box cutters are sharp.
Once you are done making the strips, you are ready to make the tiles.
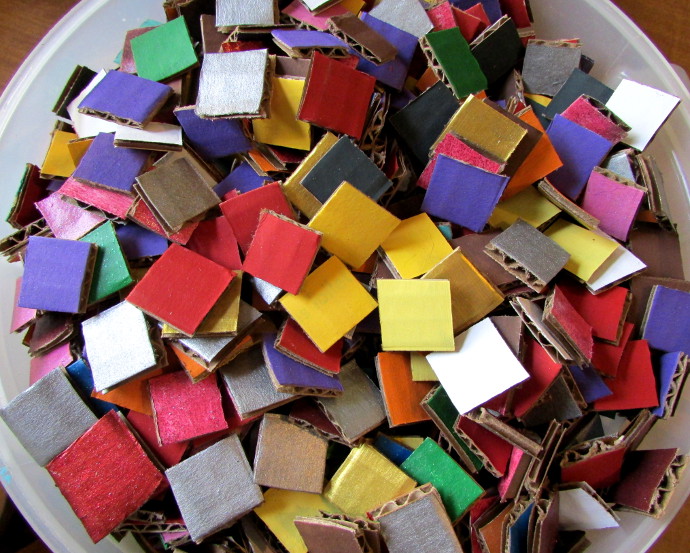
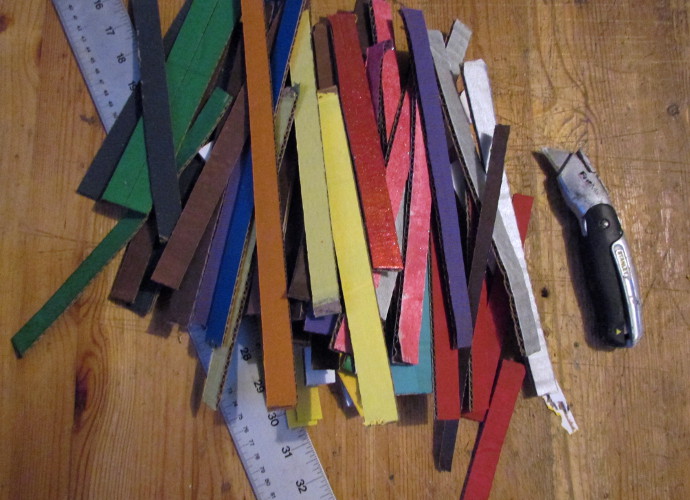
Using scissors, I cut a whole bunch of 3/4 of an inch tiles. When I say a bunch, I mean a giant 8 Qt container full.
That’s all the prep work that needs to be done.
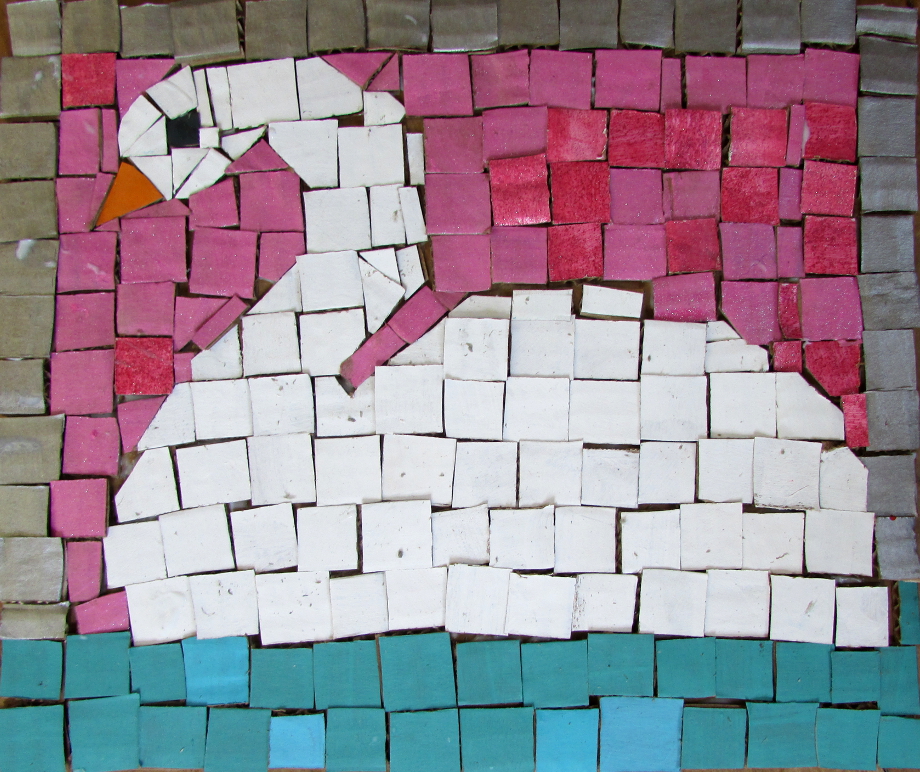
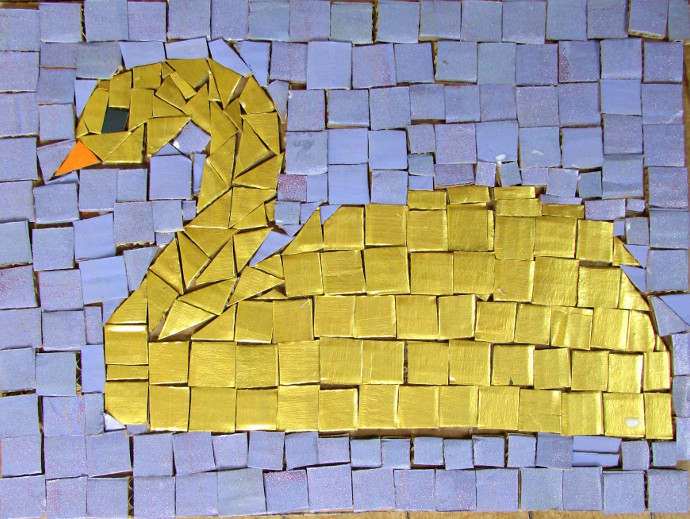
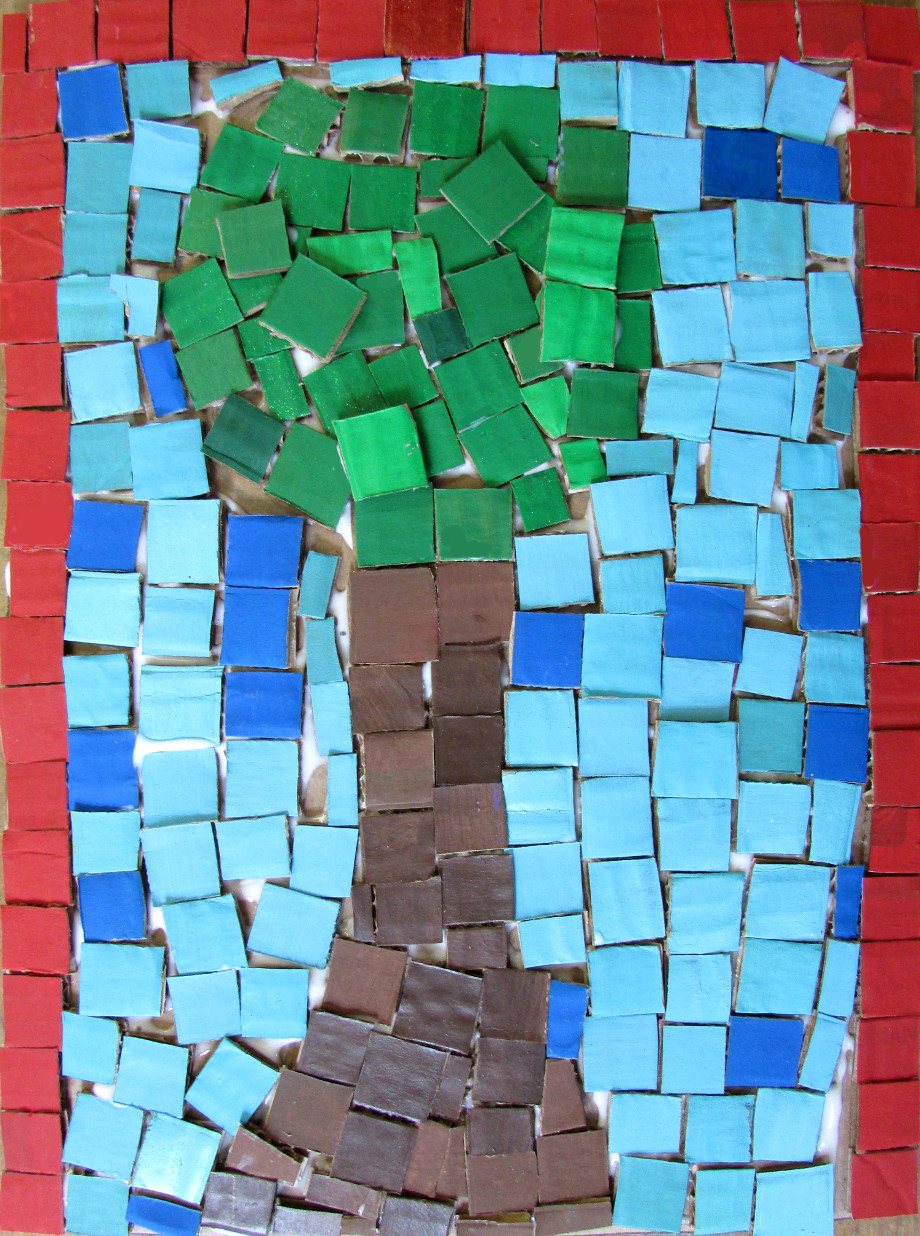
For the art class, I brought scissors, glue, all the cardboard bases and tiles. I also grabbed a few mosaics done by my father-in-law. You can see them here.
Here are some of the mosaics that the kids made. I think they came out fantastic!
What you need to get started with mosaic art:
Now let’s talk for a second about where to get mosaic supplies if you are interested in this art form. You can find some tiles and tools on amazon, though not a whole lot. Here are two stores on amazon that I have used in the past: Jennifer’s Mosaics and Mosaic Mercantile. You will also want to get a wheeled nipper to cut the tile with, though that’s not the only tool out there. My father-in-law often uses a wet tile saw as well. You will also need to use a base, and grout to finish.
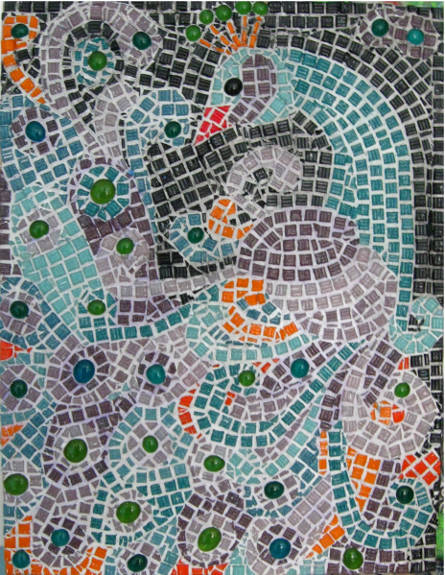 The store that we use most often around here is Mosaic Basics. They truly have everything you need to get started, including grout in various colors, books, glue, tools, and of course different tile. I have made a mosaic in the past (notice the singular). It is hard work, and took me forever (it’s that peacock). I have to say that I had an easier time working with these tiny glass tiles, then ceramic tiles. The glass tiles were just easier to cut and use.
Here are more stores to check out: Enasco (they have more then just mosaic supplies, lots of interesting stuff there, including some excellent art lessons), Mosaic Art Supply (they have excellent instructions and tips on Mosaic Art Supply, see them here). Total Mosaic requires you to have an account with them first, but for artists it’s not difficult to obtain, at least it wasn’t when we did it. Their prices cannot be beat.